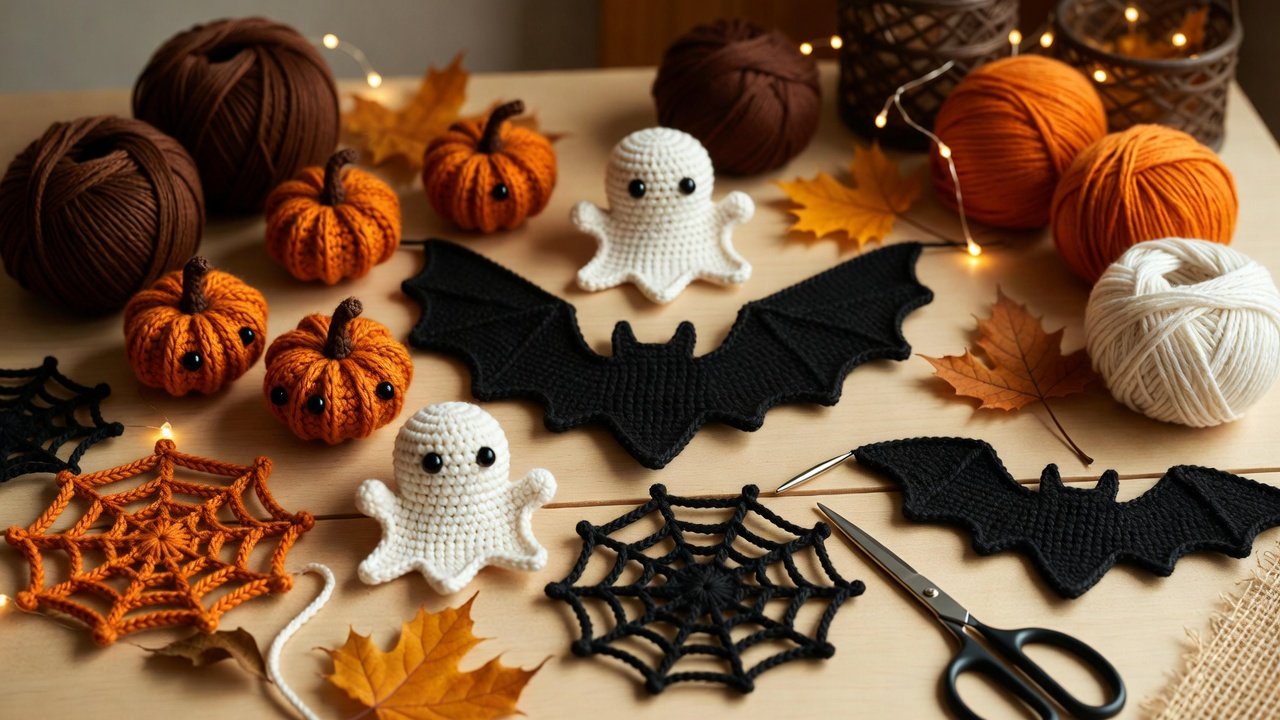
Halloween is the best excuse to pull out bold yarn and play with texture.
Pumpkins. Ghosts. Bats. Cozy fall colors.
Free Halloween crochet patterns make it easy to decorate without buying disposable décor. They’re reusable, customizable, and quick enough to finish before October ends.
This guide shares free Halloween crochet patterns that actually work in real life. Most are beginner-friendly. Many use scrap yarn. All are practical, cute, or just spooky enough.
Why Halloween Crochet Patterns Are So Popular
Crocheters return to Halloween projects every year for good reason.
- Reusable year after year
- Budget-friendly
- Easy to customize
- Ideal for gifts, décor, and craft fairs
You can finish one small item in an evening or create a full Halloween set over a weekend. Most Halloween crochet patterns use basic stitches and simple shaping.
If you already crochet, you already have what you need.
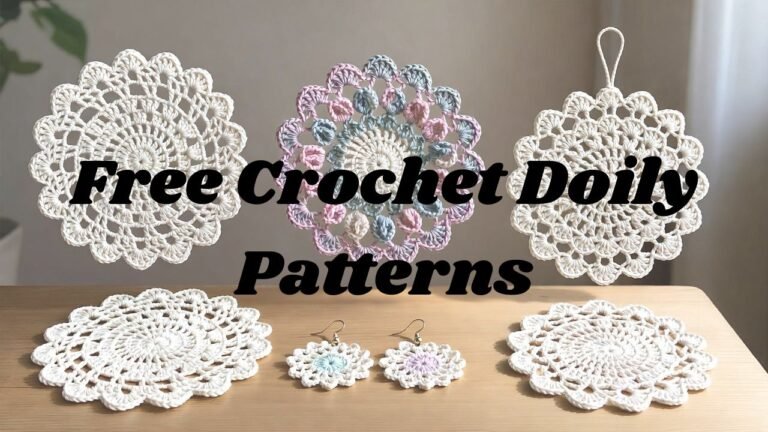
Also visit Crochet Doily Patterns Free
Best Free Halloween Crochet Decorations
Frankenstein Candy Bowl
A classic Halloween crochet piece that works as décor and storage.
- Chunky yarn adds structure
- Simple shape, no tricky shaping
- Works for candy, keys, or entry tables
Great for beginners who want something sturdy and useful.
Crochet Ghost Plushie
Soft. Squishy. Beginner-friendly.
Most ghost designs are:
- No-sew or low-sew
- Made in one piece
- Finished in under two hours
Perfect for kids’ rooms, party favors, or gift baskets.
Pumpkin Amigurumi
One of the most searched Halloween crochet patterns for good reason.
- Fast to make
- Easy to resize
- Works in orange, cream, sage, or muted fall tones
These pumpkins transition easily from fall to Halloween décor.
Crochet Bat Garland
Lightweight and repeatable.
Perfect for:
- Mantels
- Doorways
- Stair rails
One of the most popular indoor Halloween crochet decorations on Pinterest.
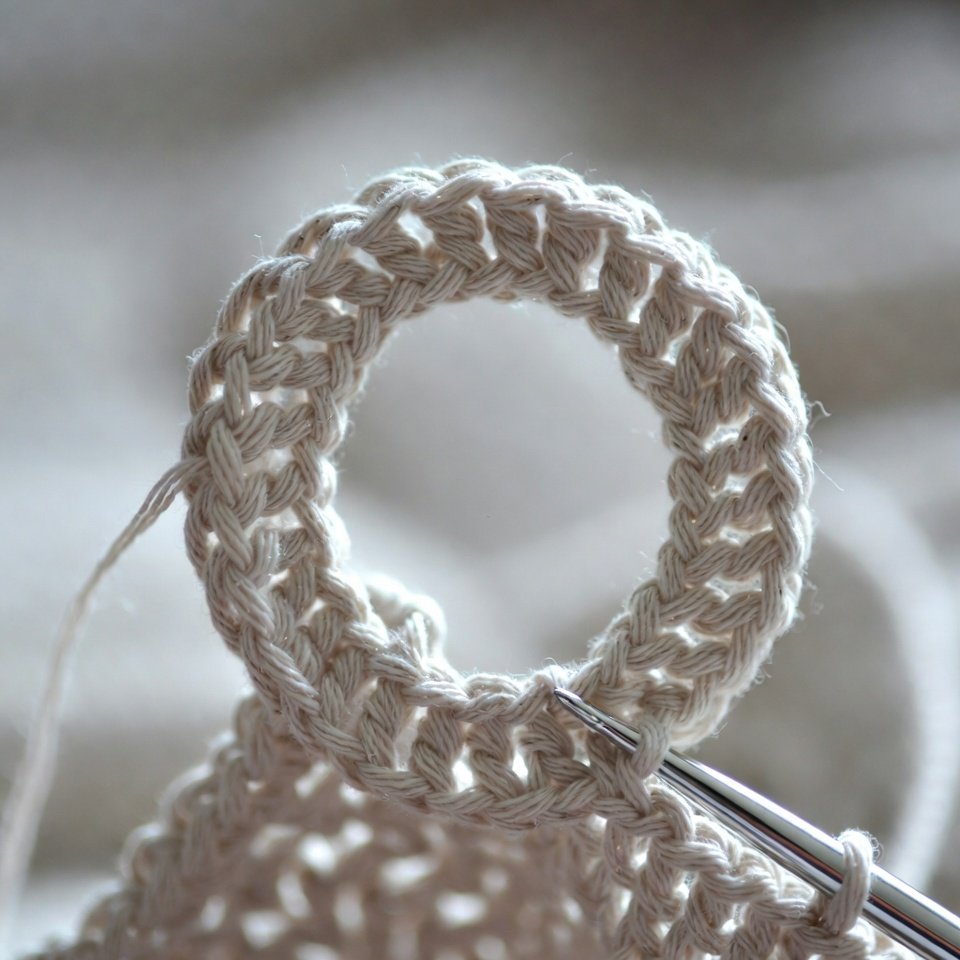
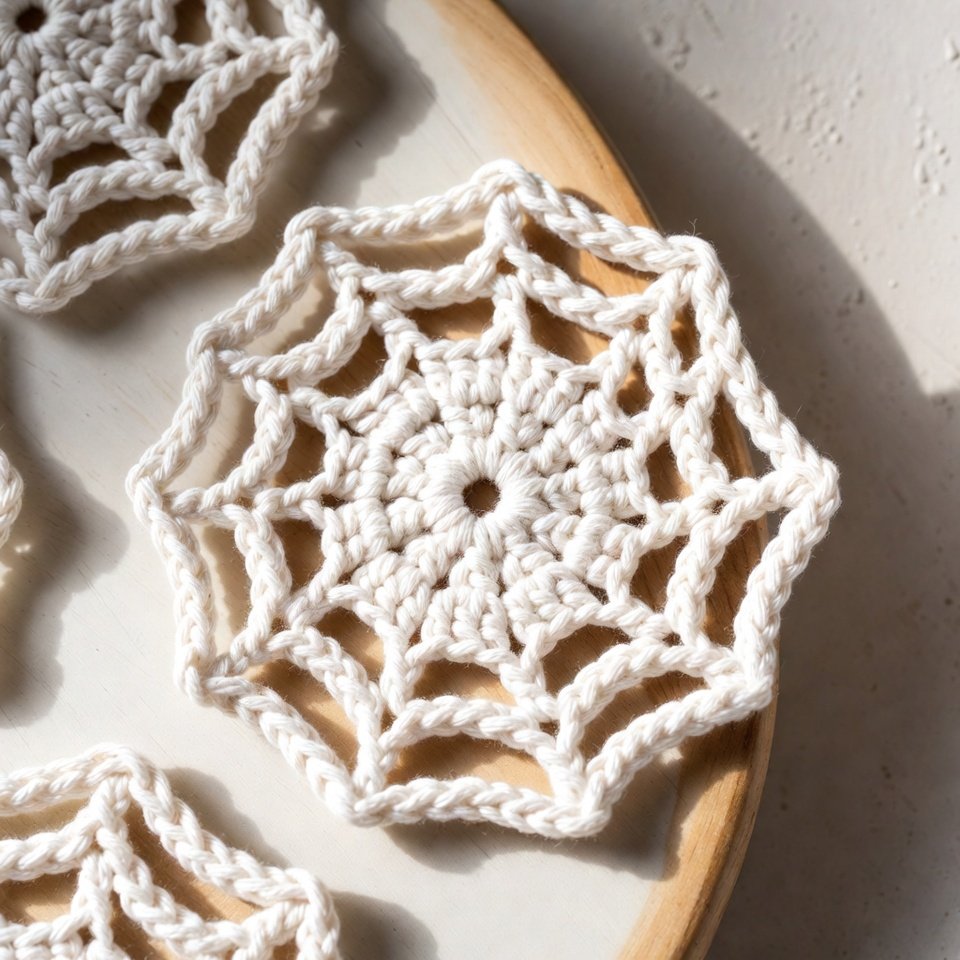
Spider Web Coasters
Flat. Practical. Scrap-yarn friendly.
They protect tables while adding subtle Halloween vibes without going overboard.
Quick & Easy Halloween Crochet Projects
Short on time? These projects still make an impact.
Candy Corn Amigurumi
Three colors. Simple shaping.
Popular for:
- Beginners
- Last-minute decorating
- Craft fair bundles
Mini Crochet Witch Hat
One pattern. Many uses.
Turn it into:
- Table décor
- Keychains
- Costume accessories
A flexible project that works up fast.
Halloween Crochet Keychains
Pumpkins. Ghosts. Bats.
Small projects with high payoff. Easy gifts. Strong sellers.
Halloween Crochet Patterns for Beginners
If you’re new, start simple.
Look for:
- Basic stitches only
- Minimal color changes
- Little or no sewing
Beginner-friendly options include:
- Pumpkins
- Ghosts
- Coasters
- Simple garlands
These Halloween crochet patterns for beginners build confidence without frustration.
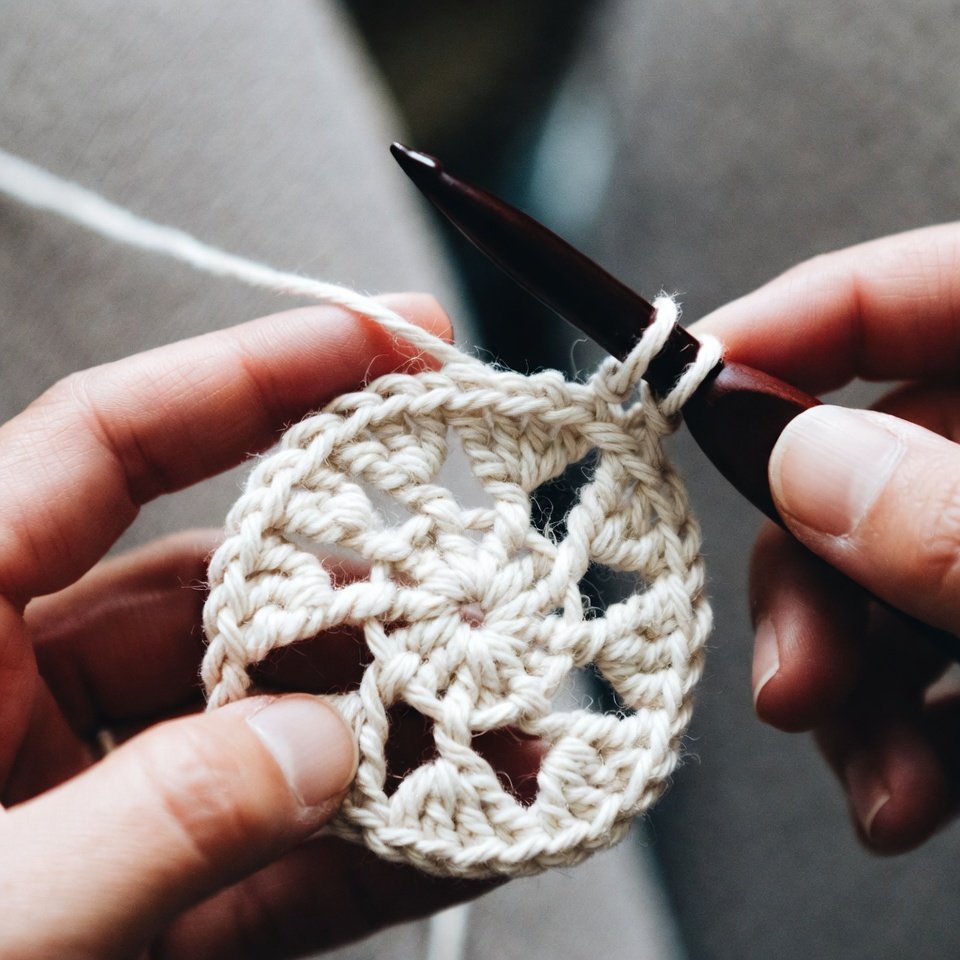
Spider Web Crochet Coasters, Step-by-Step Tutorial
Materials You’ll Need
- Cotton yarn (worsted weight recommended)
- Black, white, gray, or orange work best
- Black, white, gray, or orange work best
- 5 mm (H/8) crochet hook
- Scissors
- Yarn needle
Tip: Cotton yarn is best for coasters. It holds shape and handles heat better than acrylic.
Finished Size
- Approximately 4–4.5 inches across
- Size can be adjusted by adding or removing rounds
Crochet Abbreviations
- ch – chain
- sl st – slip stitch
- sc – single crochet
- dc – double crochet
- sp – space
Step-by-Step Instructions
Step 1: Create the Center Ring
- Make a magic ring
Or chain 4 and join with a slip stitch to form a ring. - Chain 3 (counts as first double crochet).
Step 2: First Web Spokes
- Work 11 double crochets into the ring.
- Join with a slip stitch to the top of the starting chain.
You should now have 12 spokes forming a circle.
Step 3: Build the Web Structure
- Chain 5.
- Slip stitch into the next double crochet from the previous round.
- Repeat chain 5, slip stitch into each stitch around.
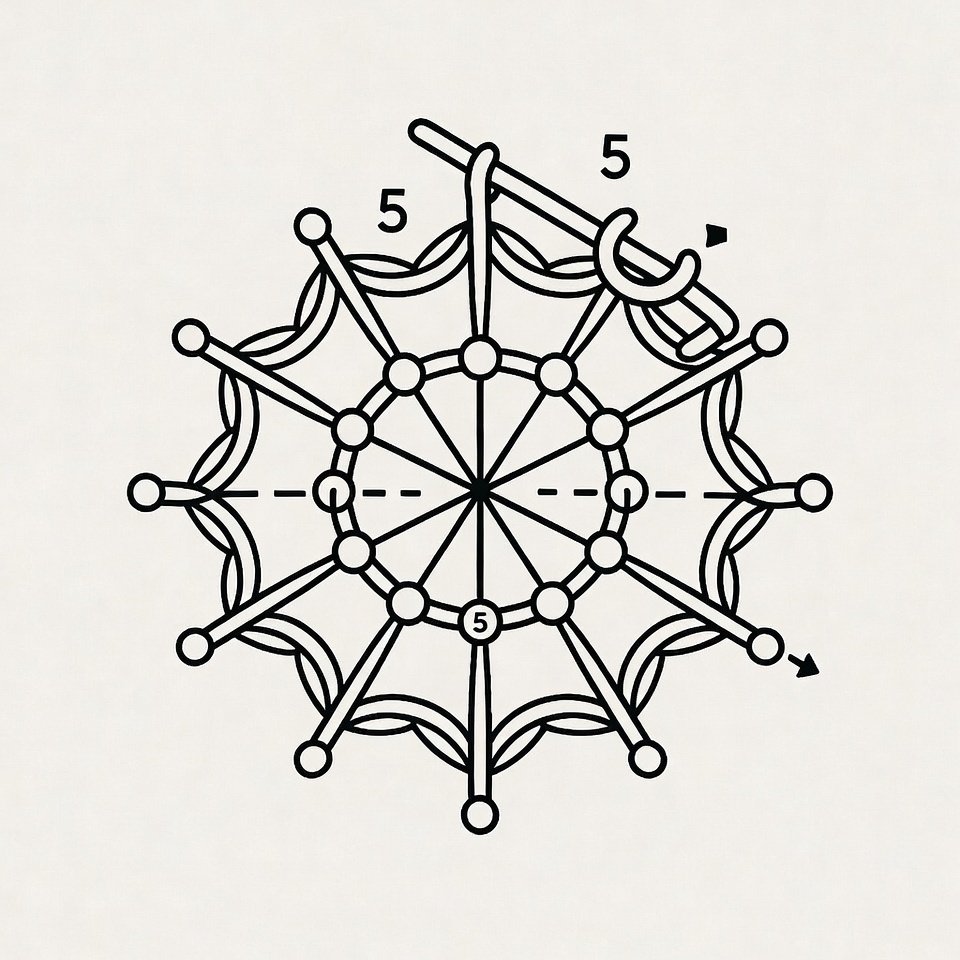
This creates the first web layer.
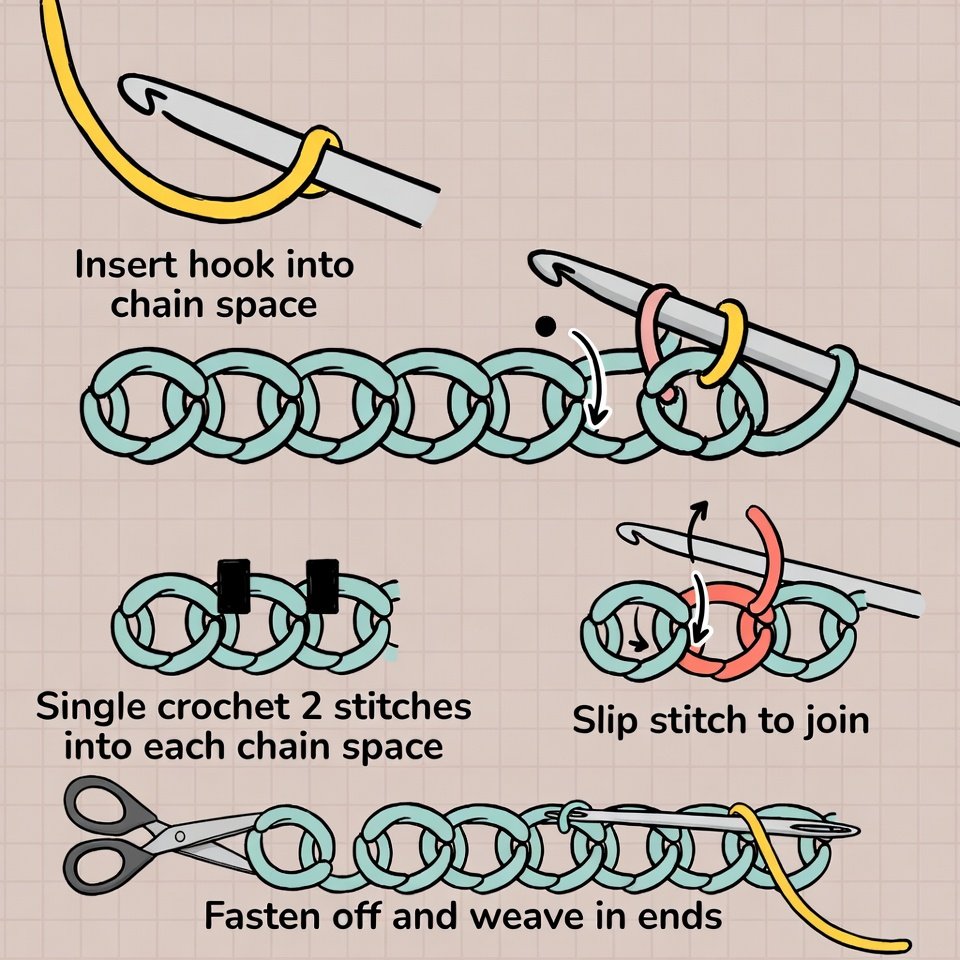
Step 4: Expand the Web
- Slip stitch into the first chain space.
- Chain 6.
- Slip stitch into the next chain space.
Repeat around, increasing the chain length slightly to keep the coaster flat.
Tip: If the coaster starts curling, shorten the chains. If it ripples, reduce stitches.
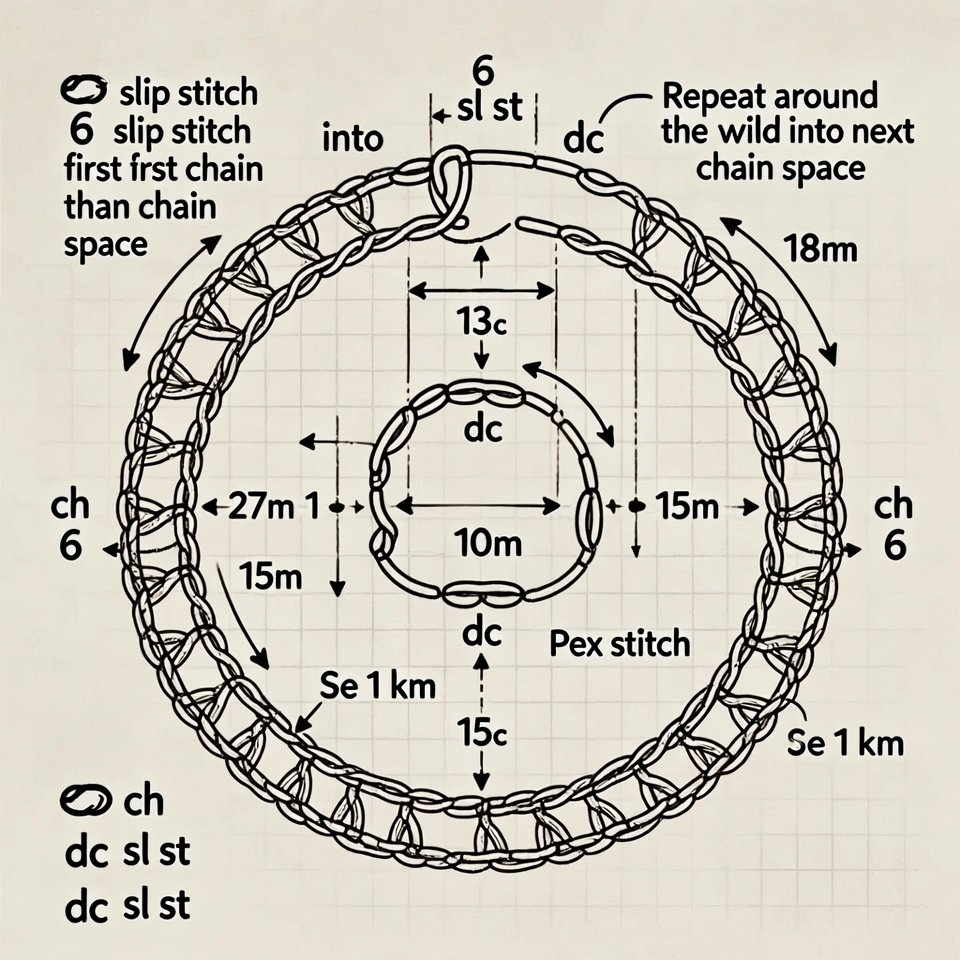
Step 5: Final Round
For a sturdier edge:
- Single crochet 2 stitches into each chain space.
- Slip stitch to join.
- Fasten off and weave in ends.
This step helps the coaster lie flat on tables.
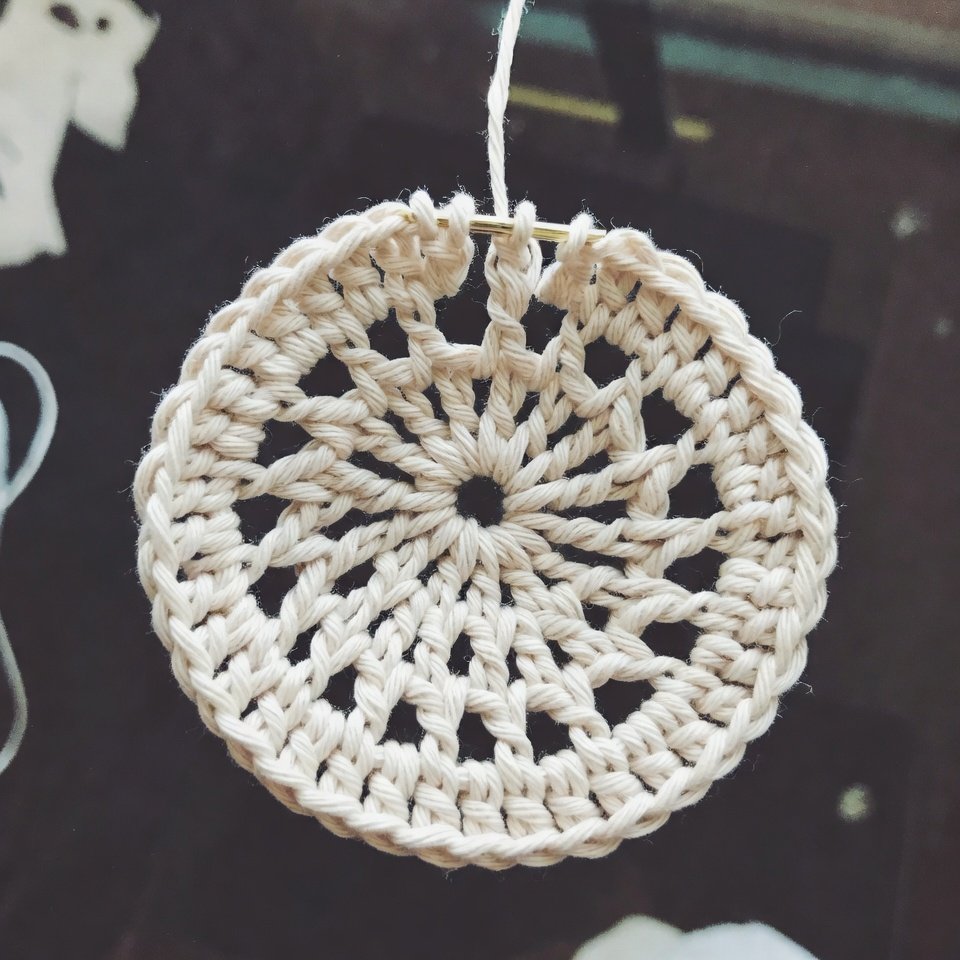
Blocking & Finishing
- Lightly steam the block or wet the block.
- Shape gently into a circle
- Let dry completely before use
Customization Ideas
- Use glow-in-the-dark yarn
- Add a tiny crocheted spider in one corner
- Make sets in black, white, and gray
- Use thicker yarn for larger drink mats
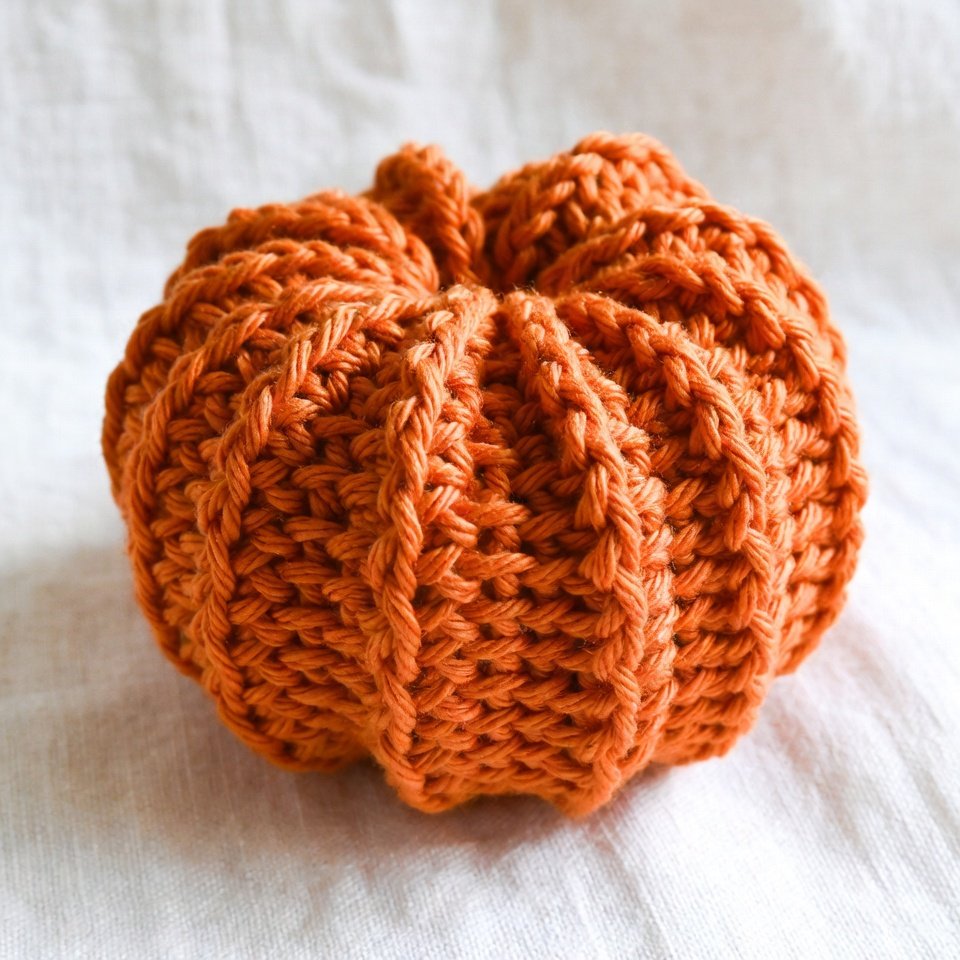
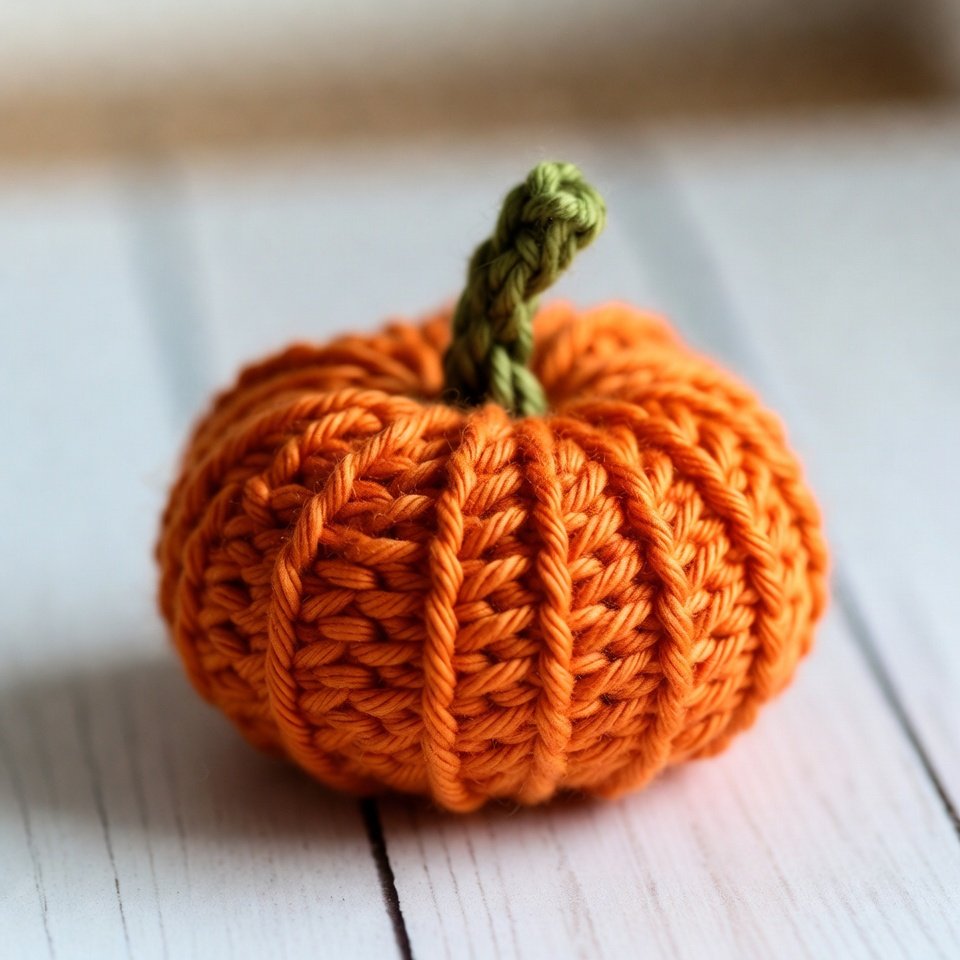
Pumpkin Amigurumi, Step-by-Step Crochet Tutorial
This pumpkin amigurumi is soft, round, and fast to make.
Perfect for fall décor, Halloween displays, or small handmade gifts.
No complex shaping. No tricky colorwork.
Materials You’ll Need
- -Weight: Worsted weight yarn
- Main color: orange
- Stem: brown or green
- Main color: orange
- 4 mm (G/6) crochet hook
- Fiberfill stuffing
- Yarn needle
- Scissors
Finished Size
- About 4–5 inches tall, depending on yarn and hook size
- Easy to resize by changing hook or yarn weight
Crochet Abbreviations
- MR – magic ring
- sc – single crochet
- inc – increase (2 sc in one stitch)
- dec – decrease (single crochet two together)
- sl st – slip stitch
- st(s) – stitch(es)
Step-by-Step Instructions
Step 1: Start the Base
- Make a magic ring.
- Work 6 single crochets into the ring.
- Pull tight to close.
(6 sts)

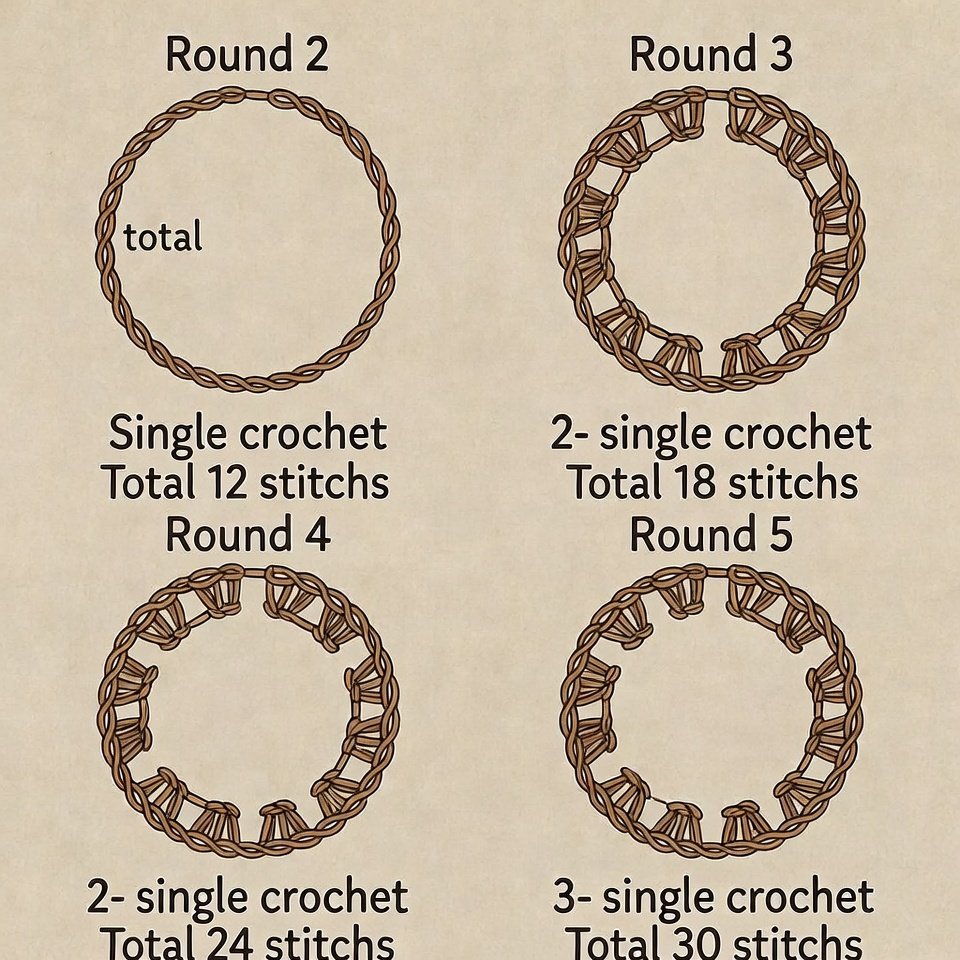
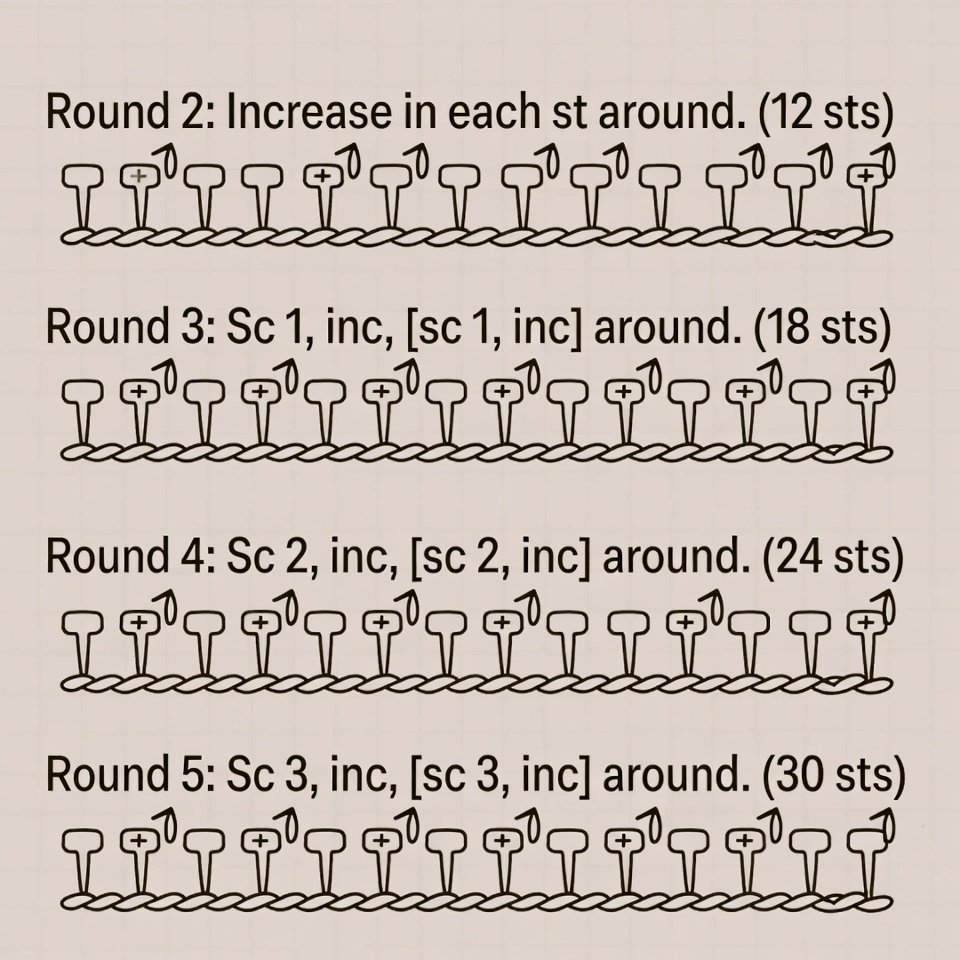
Step 2: Increase for Shape
- Round 2: Inc in each stitch around.
(12 sts) - Round 3: (sc 1, inc) repeat around.
(18 sts) - Round 4: (sc 2, inc) repeat around.
(24 sts) - Round 5: (sc 3, inc) repeat around.
(30 sts)
Step 3: Build the Pumpkin Body
- Rounds 6–11: Sc in each stitch around.
(30 sts each round)
This creates the rounded pumpkin shape.
Step 4: Begin Decreasing
- Round 12: (sc 3, dec) repeat around.
(24 sts) - Round 13: (sc 2, dec) repeat around.
(18 sts)
Step 5: Stuff the Pumpkin
- Firmly stuff the pumpkin with fiberfill.
- Shape it as you go for a smooth, round form.
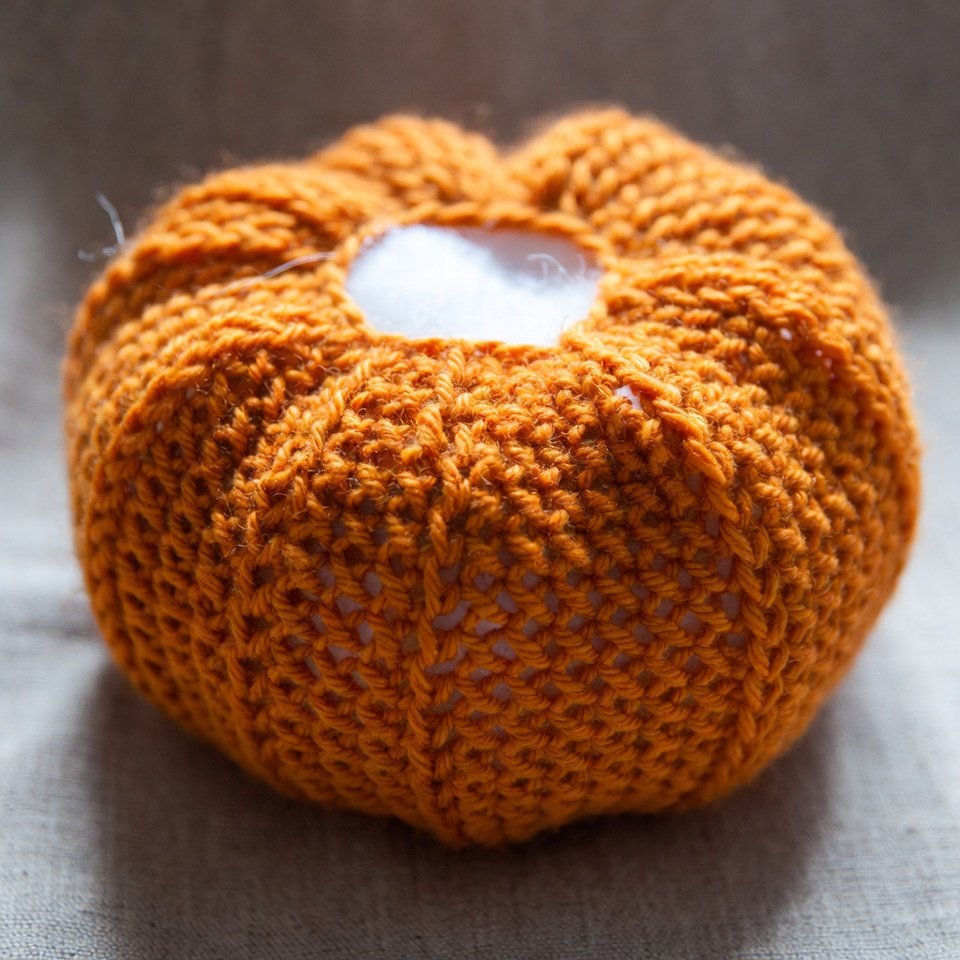
Step 6: Close the Top
- Round 14: (sc 1, dec) repeat around.
(12 sts) - Round 15: Dec around.
(6 sts)
Fasten off. Pull the opening closed. Weave in ends.
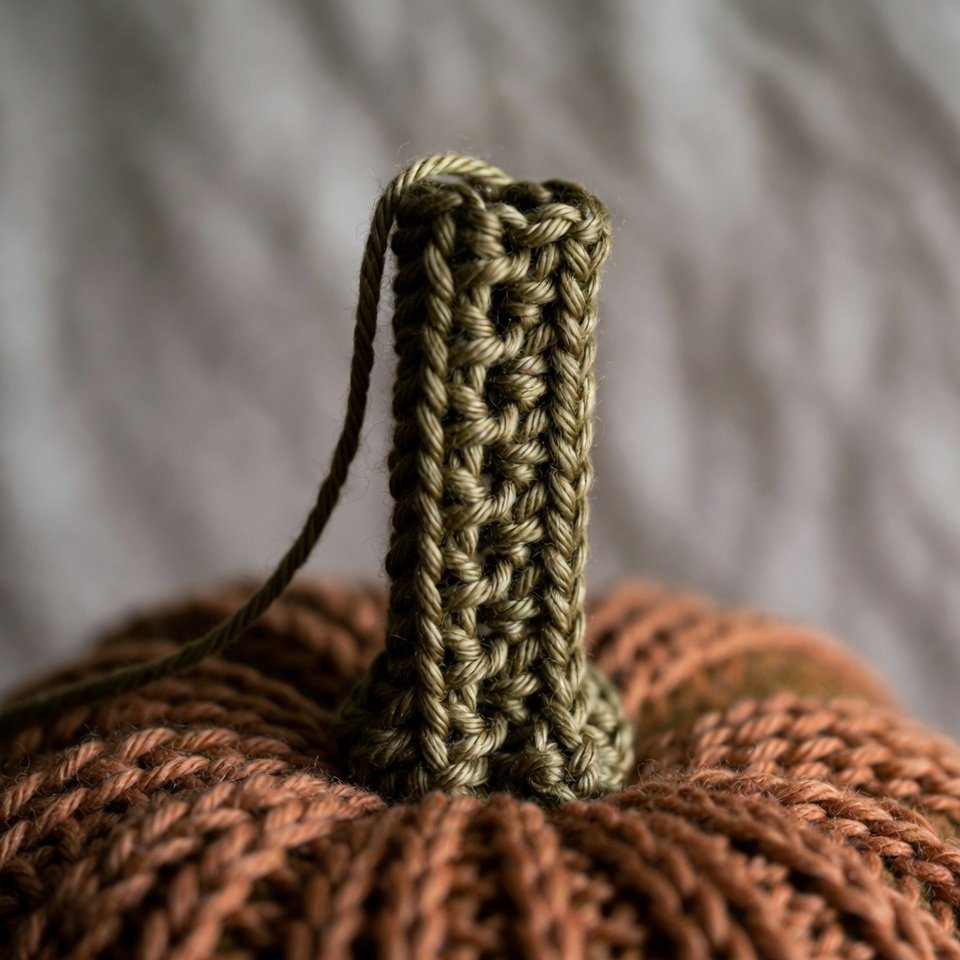
Stem Instructions
Step 7: Crochet the Stem
- Attach brown or green yarn at the top center.
- Chain 5.
- Single crochet in the second chain from the hook and across.
- Slip stitch back into the pumpkin top.
Fasten off and weave in ends.
Optional Pumpkin Texture
- Thread long yarn through the bottom center.
- Pull up through the top.
- Wrap around the pumpkin exterior.
- Pull gently to create a ridge.
- Repeat 4–6 times evenly around.
Secure tightly and hide ends.
Finishing Tips
- Shape gently with your hands
- Steam lightly if needed
- Add embroidered lines for detail
Home Décor & Functional Halloween Crochet Ideas
Halloween Crochet Pillows
Pillows change a room instantly.
Simple faces. Skull motifs. Bold colors.
Statement pieces without complex stitches.
Crochet Halloween Blankets
Try:
- Granny square layouts
- Themed panels
- Simple colorwork
Kitchen Crochet Projects
Small details make spaces feel seasonal.
- Dishcloths
- Pot holders
- Towel toppers
Cotton yarn works best here.
Cute & Spooky Amigurumi Ideas
Amigurumi dominates Halloween crochet searches.
Popular characters:
- Black cats
- Skeleton dolls
- Mummies
- Frankenstein figures
- Mini witches
How to Choose the Right Halloween Crochet Pattern
Before starting, check:
- Stitch list
- Yarn weight
- Pattern notes
If it feels confusing before you begin, skip it.
There are plenty of clear, beginner-tested free Halloween crochet patterns available.
Frequently Asked Questions – Halloween Crochet Patterns
What are the easiest Halloween crochet patterns?
Pumpkins, ghosts, coasters, and simple garlands are the easiest and fastest to complete.
Where can I find free Halloween crochet patterns?
Independent crochet blogs, yarn brand websites, and community pattern collections offer free options.
How long do Halloween crochet projects take?
Small projects take under two hours. Larger décor like blankets may take several days.
What yarn works best for Halloween crochet?
Worsted-weight yarn works for most projects. Bulky yarn is ideal for plush décor.
Can I sell finished items?
Check each pattern’s terms. Many designers allow sales with proper credit.