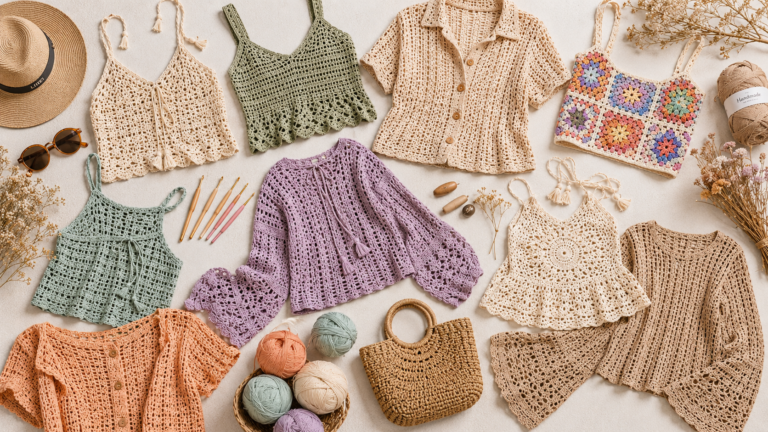
Crochet doilies have a timeless charm, but they don’t have to be complicated. If you’ve ever admired those delicate, detailed pieces and thought, “I could never make that,” think again. With the right pattern, even beginners can create something beautiful. In this collection, you’ll find free crochet doily patterns for every skill level, from simple, quick designs to more intricate pieces for when you’re ready to challenge yourself.
Some are perfect for practice. Some are made to impress.
All of them are worth trying.
Intro to Crochet Doilies
Crochet doilies are decorative lace pieces, traditionally made with cotton thread and worked in the round. Modern designs now include oval, rectangular, pineapple, floral, and mandala-inspired patterns.
What can you do with a doily?
You can use crochet doilies as follows:
- Table centerpieces & placemats
- Wall hangings & hoop art
- Crochet doily earrings & jewelry
- Suncatchers & window décor
- Coasters, plant mats & runners
Are doilies hard to make?
No, many free crochet doily patterns for beginners use simple stitches and clear repeats. Starting with easy crochet doily free patterns builds confidence quickly.
Pattern Suggestions
Like this:
- Free oval crochet doily patterns
- Modern crochet doily patterns free
- Free crochet doily coaster patterns
Also Visit, Easy Crochet Projects
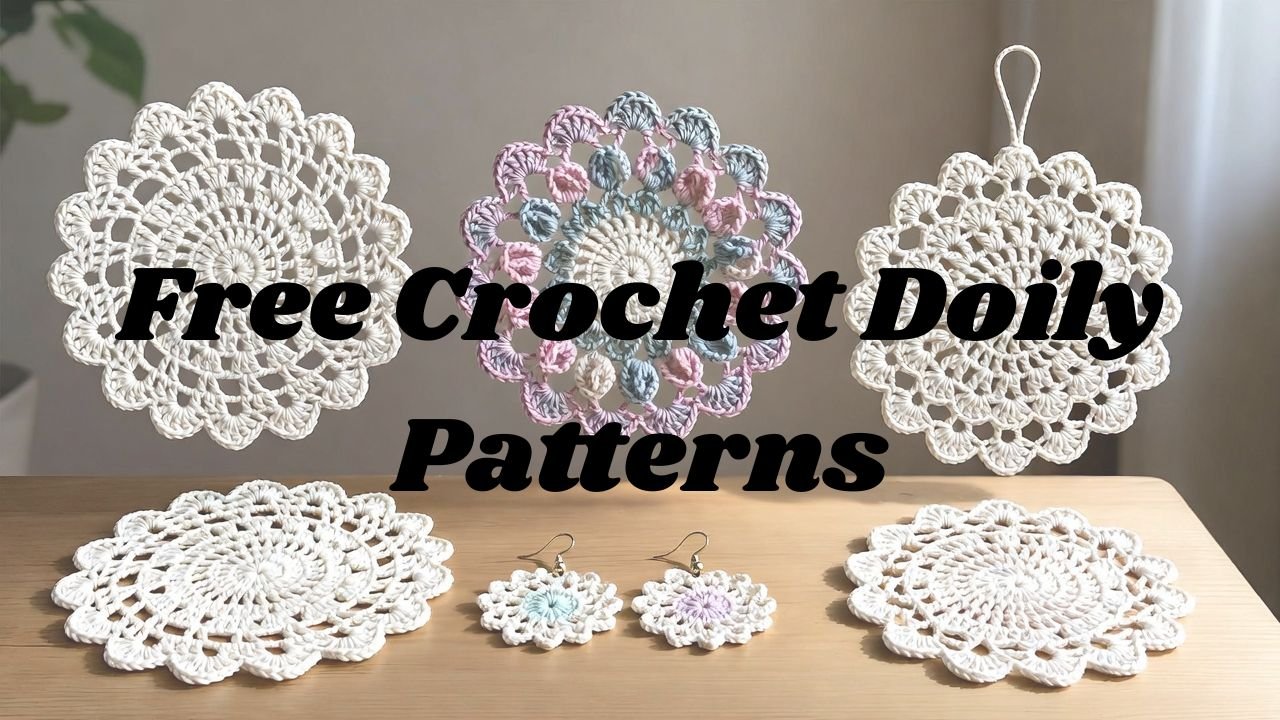
Free Crochet Doily Patterns
Below is a curated mix of free crochet doily patterns, ranging from beginner-friendly to advanced lace designs.
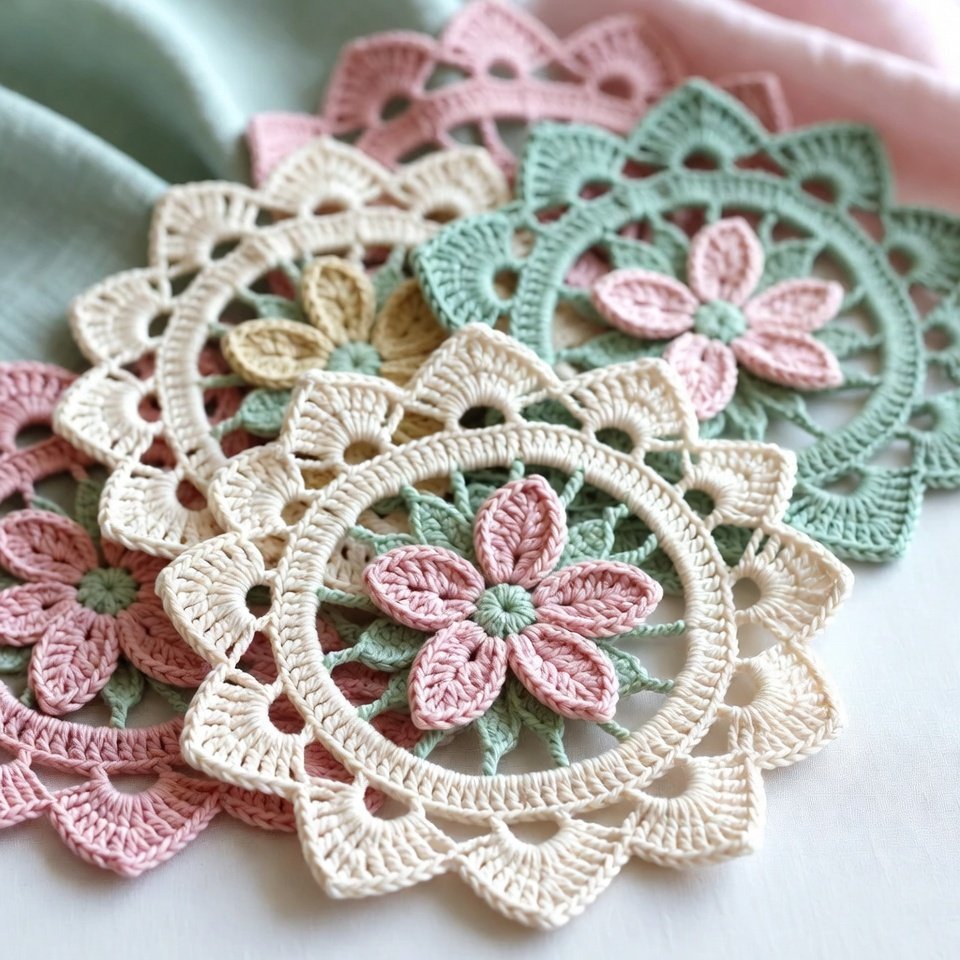
Vintage Pink Doily Placemat
Start this free crochet doily pattern by working with size 10 cotton thread and a 1.75–2 mm hook. Begin with a magic ring and crochet a series of chain spaces and double crochet stitches to create the center flower.
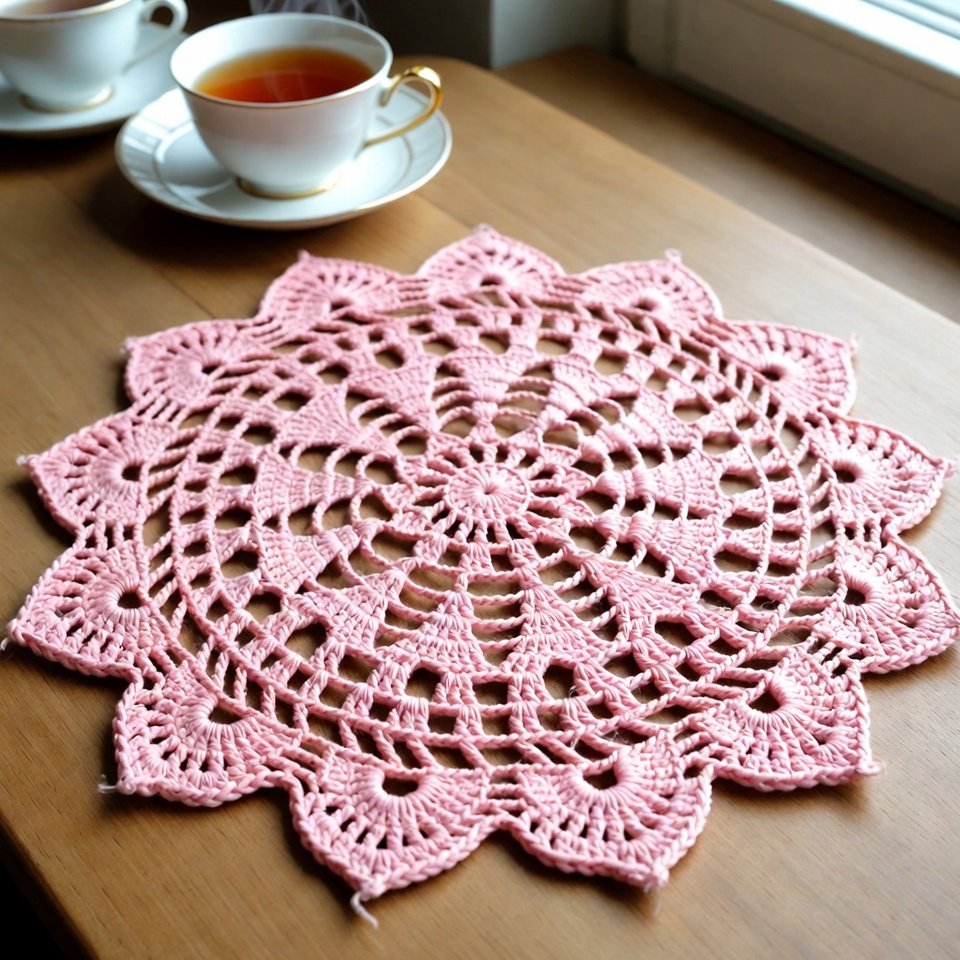
Gradually build outward using shells, picots, and chain arches to form a delicate lace edge. Maintain even tension for a smooth circular shape. Once complete, gently block the doily to highlight stitch definition. This crochet doily pattern is beginner-friendly with patience and perfect for elegant table décor.
Materials Needed
- Cotton yarn in soft pink
- 3 mm crochet hook
- Scissors
- Tapestry needle
Step 1: Create the Center Ring
Make a magic ring and crochet 12 double crochets into the ring. Pull the ring tight and join with a slip stitch.
Step 2: Build the Foundation Rounds
Work two rounds of increases using double crochets to create a flat circular base.
Step 3: Add the Vintage Lace Pattern
Create lace sections using chain spaces and shell stitches. Repeat the pattern evenly around the placemat.
Step 4: Crochet the Decorative Border
Work a round of picots and scallops around the edge to give the placemat a vintage-inspired finish.
Step 5: Block and Finish
Weave in the ends and block the placemat until completely dry.
Blooming Ivy Oval Doily
Start this oval crochet doily by chaining a foundation that matches your desired length. Work double crochet stitches into both sides of the foundation chain to establish the oval shape.
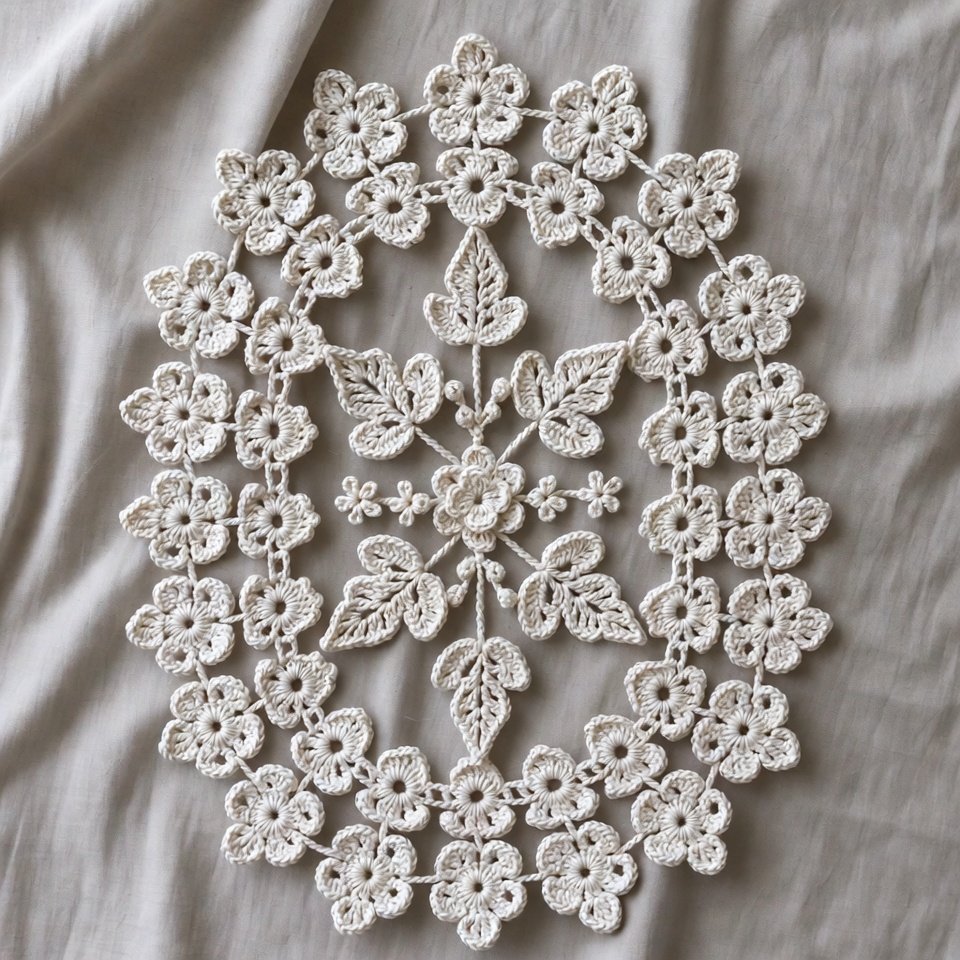
In the next rounds, increase evenly at each end while maintaining straight sides. Ivy-inspired motifs are created using chain spaces, treble crochet stitches, and small picot details that resemble leaves and vines. Continue building outward with lace stitch combinations until the doily reaches its final size. This free crochet doily pattern works best with cotton yarn and creates a beautiful centerpiece for tables or dressers. Finish by blocking to enhance the oval shape and stitch clarity.
Materials Needed
- Green and cream cotton thread
- 2.5 mm crochet hook
- Tapestry needle
Step 1: Make the Oval Base
Chain 35 and work around both sides of the foundation chain to form an oval shape.
Step 2: Increase the Curved Ends
Add extra stitches at each end during every round to maintain the oval design.
Step 3: Create the Ivy Leaf Motifs
Work clusters and chain spaces to form delicate leaf shapes around the doily.
Step 4: Add Blooming Floral Details
Crochet shell-stitch flowers between the leaf sections.
Step 5: Finish the Outer Edge
Complete the doily with a scalloped lace border and block it flat.
Coral Lace Doily
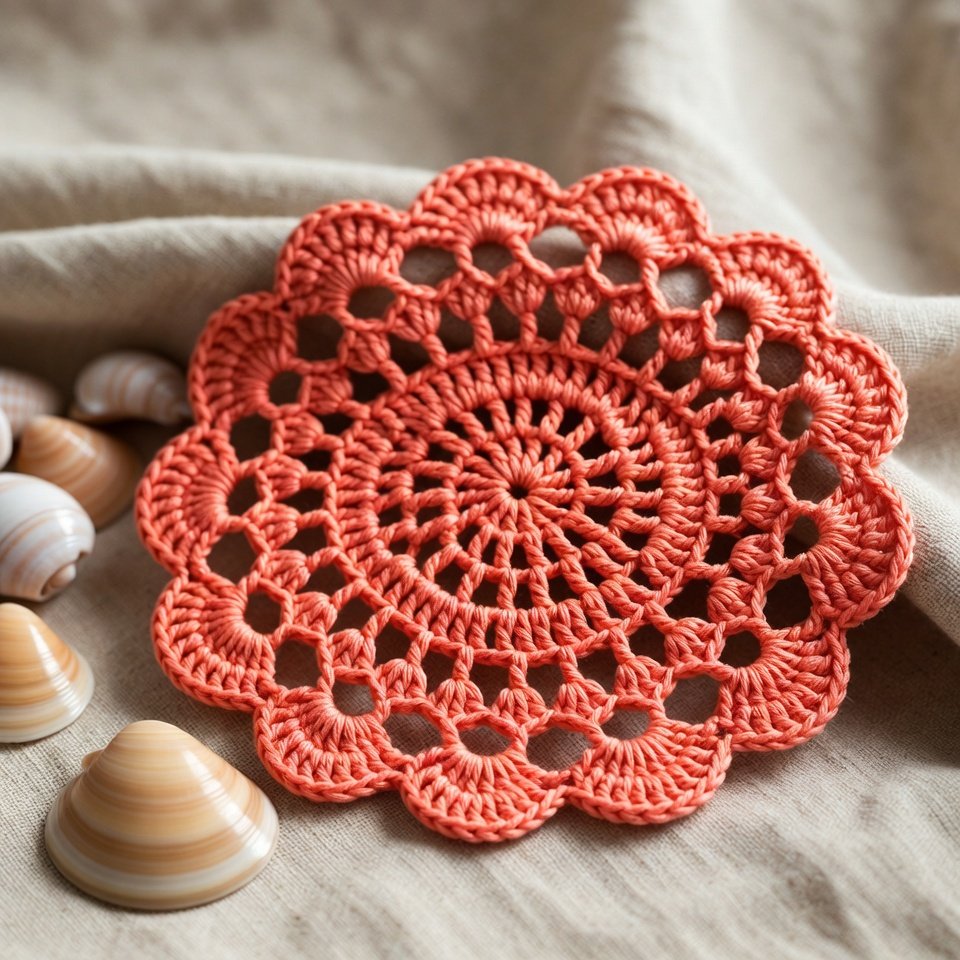
Begin this free crochet doily pattern with a magic ring and work the center in double crochet stitches. As you progress, introduce tall stitches such as treble crochet and chain arches to form the airy coral-style lace. Color choice plays an important role here; soft coral or peach tones enhance the openwork design. This crochet doily pattern is ideal for intermediate crocheters who enjoy lacework. Once complete, lightly steam block the doily to open up the lace and maintain its round shape.
Materials Needed
- Coral-colored cotton thread
- 2 mm crochet hook
- Scissors
- Tapestry needle
Step 1: Start the Center Ring
Create a magic ring and work 16 double crochets into it. Join with a slip stitch.
Step 2: Build the Foundation Rounds
Increase evenly over the next few rounds to create a flat circular base.
Step 3: Create the Lace Pattern
Alternate chain spaces and double crochet stitches to form an open lace design. Repeat the pattern around each round.
Step 4: Add Coral-Inspired Fan Stitches
Work fan stitches into the chain spaces to create a textured, flowing appearance that resembles coral formations.
Step 5: Crochet the Decorative Border
Finish the doily with scallops or shell stitches around the edge for a soft, elegant finish.
Step 6: Block the Finished Doily
Weave in the ends, wash gently, and block the doily flat to showcase the lace details.
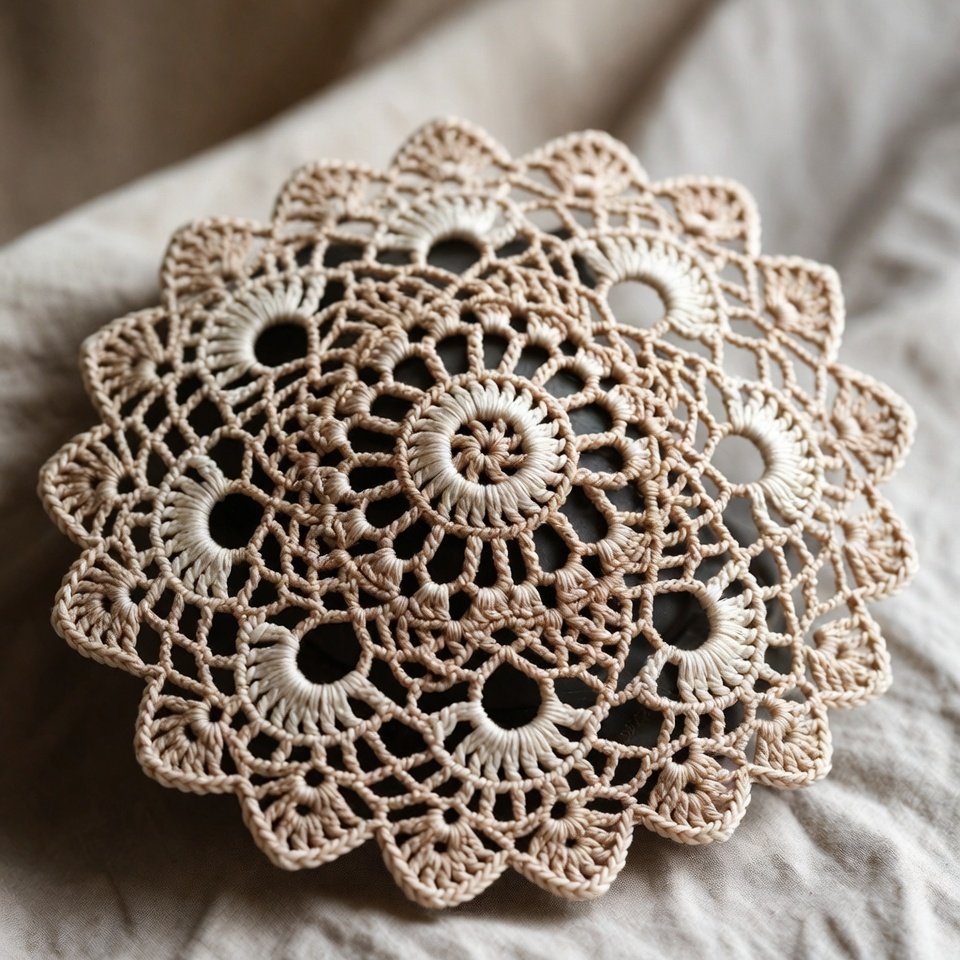
Crochet Doily Pillow Motif Pattern
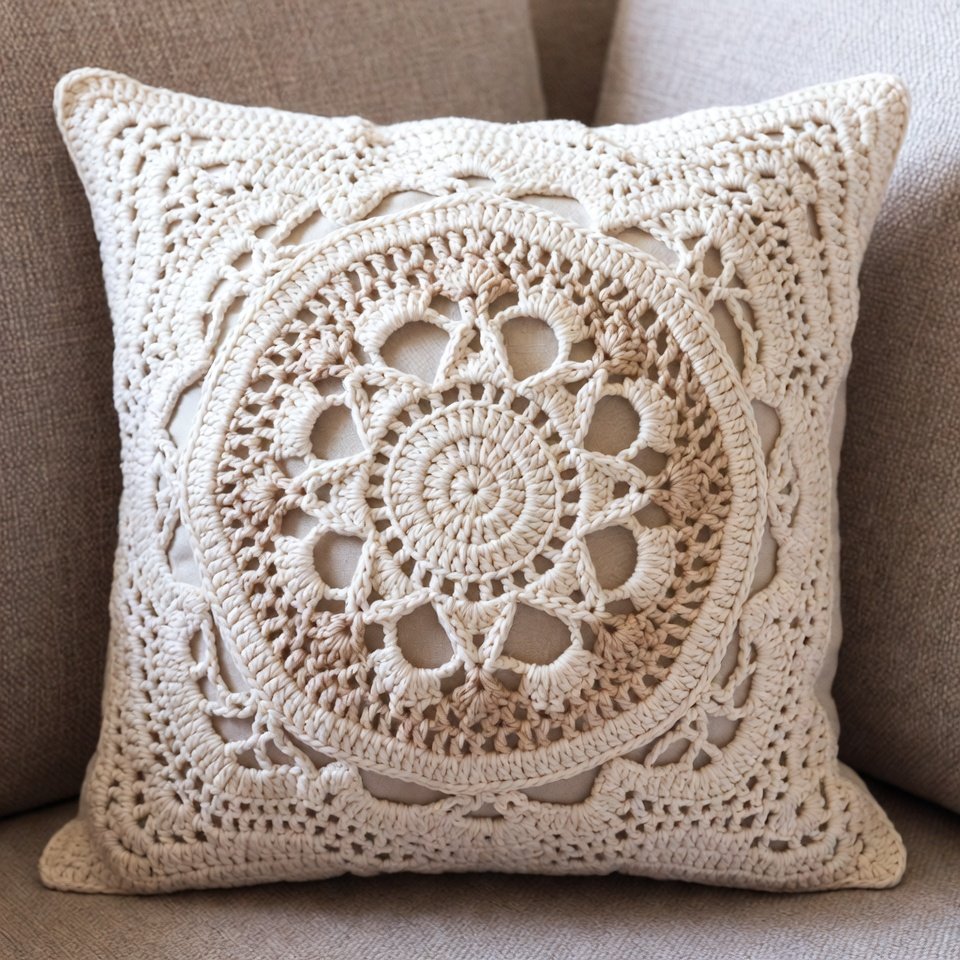
Crochet a medium-sized round doily using a simple lace pattern. Once finished, block it flat before attaching it to a fabric pillow cover. Use invisible stitches or a whip stitch around the edges to secure the doily. This crochet doily pattern transforms traditional lace into modern home décor and is perfect for upcycling plain cushions into statement pieces.
Materials Needed
- Cotton yarn or crochet thread
- 3 mm crochet hook
- Pillow cover
- Tapestry needle
- Scissors
Step 1: Crochet the Center Motif
Begin with a magic ring and work 12 double crochets into the center. Join with a slip stitch. Continue crocheting in rounds, increasing evenly to create a flat circle.
Step 2: Add Floral Lace Details
Work shell stitches, chain spaces, and clusters around the circle. These rounds create the decorative floral motif that will become the focal point of the pillow.
Step 3: Expand to the Desired Size
Continue adding lace rounds until the motif measures slightly smaller than your pillow cover. Keep the design flat by spacing increases evenly.
Step 4: Block the Finished Motif
Soak the motif in lukewarm water, pin it into shape, and allow it to dry completely. This helps open the lace pattern.
Step 5: Attach the Motif to the Pillow Cover
Center the doily on the pillow cover and sew around the outer edge using matching thread. Secure all edges neatly.
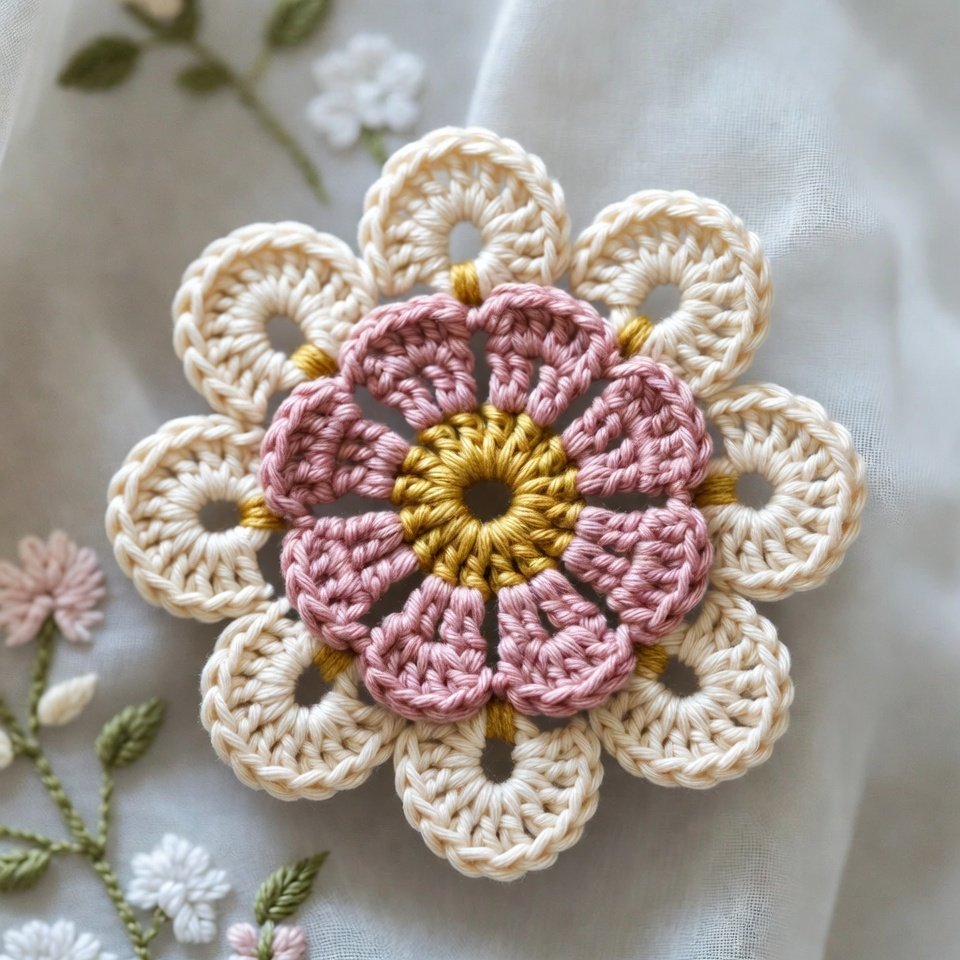
Crochet Floral Doily Coaster
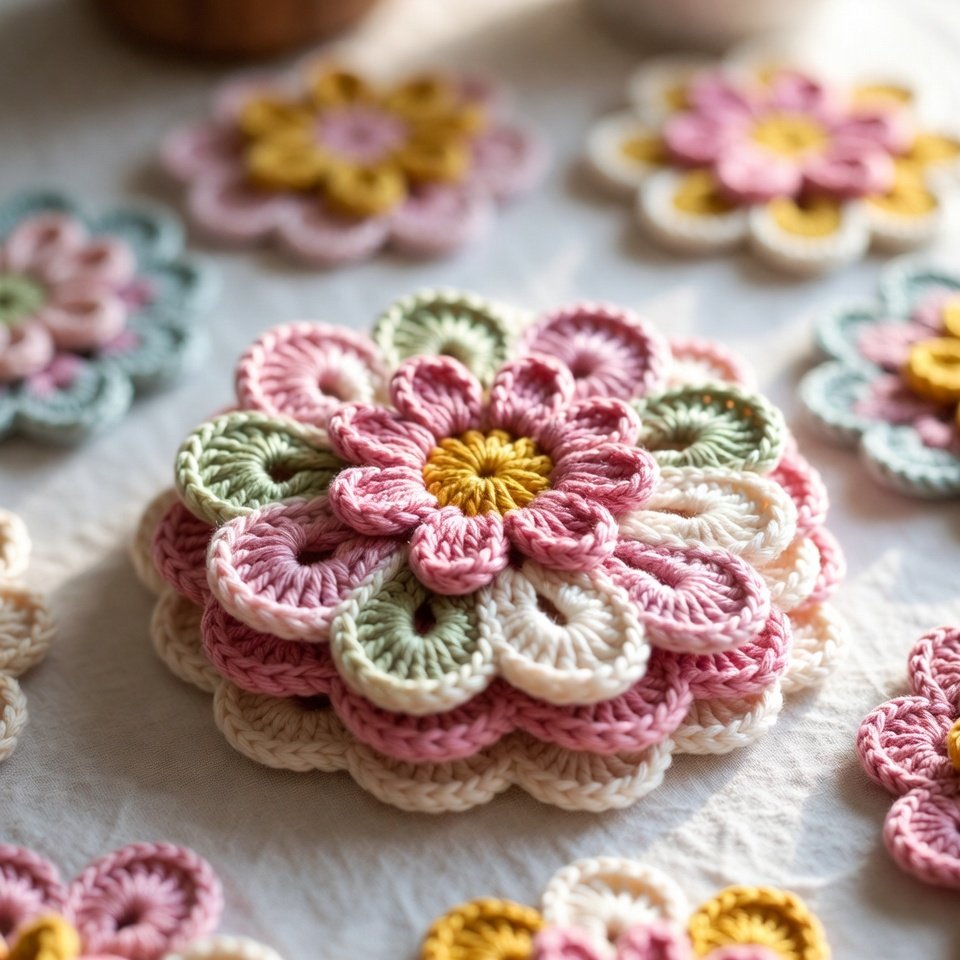
This easy crochet doily free pattern starts with a magic ring, followed by petal-style clusters. Use basic stitches like single crochet, double crochet, and chain spaces to form flower shapes. Keep the stitch count consistent so the coaster lies flat. This pattern is ideal for beginners practicing circular crochet and makes great handmade gifts.
Materials Needed
- Cotton yarn
- 2.5 mm crochet hook
- Scissors
- Tapestry needle
Step 1: Create the Flower Center
Make a magic ring and crochet 10–12 double crochets into the ring. Join with a slip stitch to form the center.
Step 2: Form the Petals
Work shell stitches into each stitch around the center. Each shell creates a flower petal. Continue until a complete flower shape appears.
Step 3: Add a Decorative Lace Round
Crochet a chain between the petals and add small clusters to create a delicate lace effect.
Step 4: Crochet the Border
Work a round of picots or scallops around the edge to give the coaster a finished look.
Step 5: Block the Coaster
Weave in all ends and lightly block the coaster so it stays flat and keeps its floral shape
Little Star Mandala
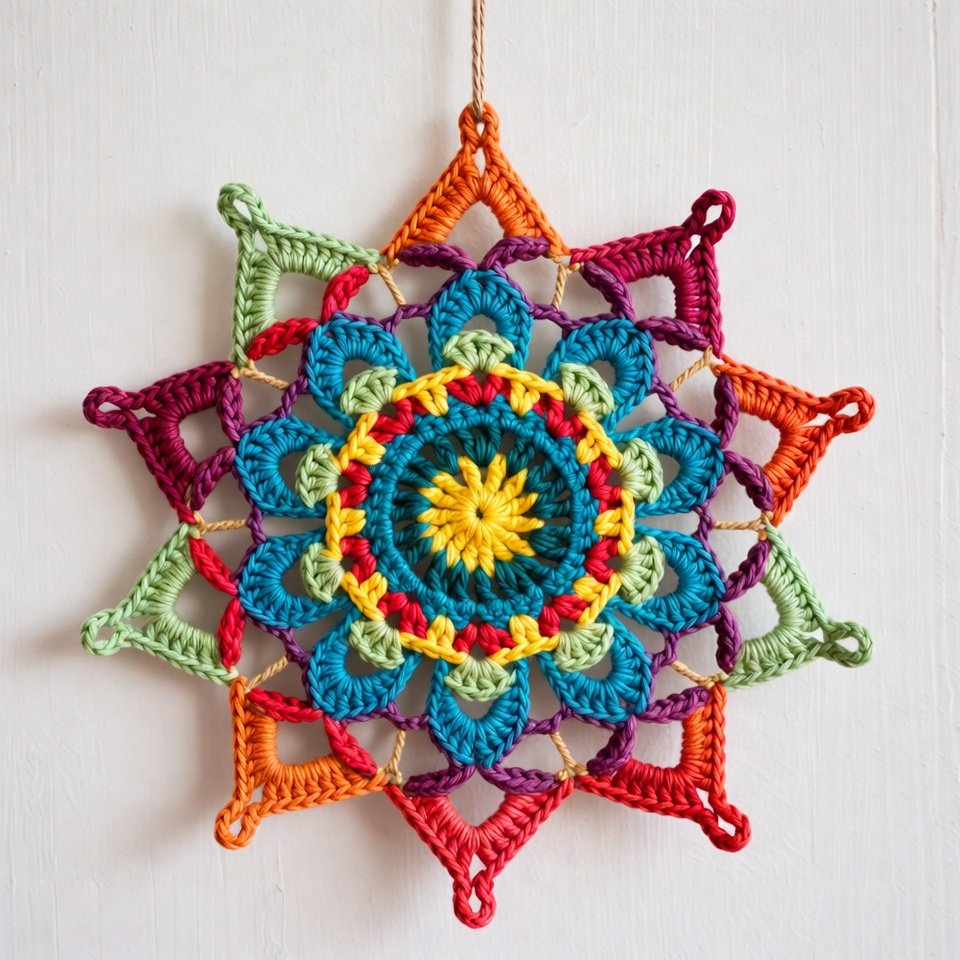
Work this crochet mandala doily in rounds, changing colors if desired to highlight the star shape. Begin with a tight center and gradually expand using chain spaces and double crochet clusters. Stitch markers help maintain symmetry. This free crochet round doily pattern can be used as wall décor or a tabletop accent.
Materials Needed
- Cotton yarn in two or three colors
- 3 mm crochet hook
- Scissors
- Tapestry needle
Step 1: Make the Center Circle
Start with a magic ring and work 12 double crochets into the center. Join with a slip stitch.
Step 2: Create the Star Points
In the next round, use treble crochets and chain spaces to form evenly spaced star points around the circle.
Step 3: Add Decorative Mandala Rounds
Work rounds of shells, clusters, and chain spaces between the points. Change colors if desired to highlight the design.
Step 4: Expand the Mandala
Continue crocheting outward while maintaining the star shape. Add increases where needed so the mandala remains flat.
Step 5: Finish the Outer Edge
Crochet a picot or scalloped border around the final round for extra detail.
Step 6: Block and Shape
Pin the mandala flat, shaping each star point carefully. Allow it to dry completely before displaying.
Filet Crochet Leaf Centerpiece
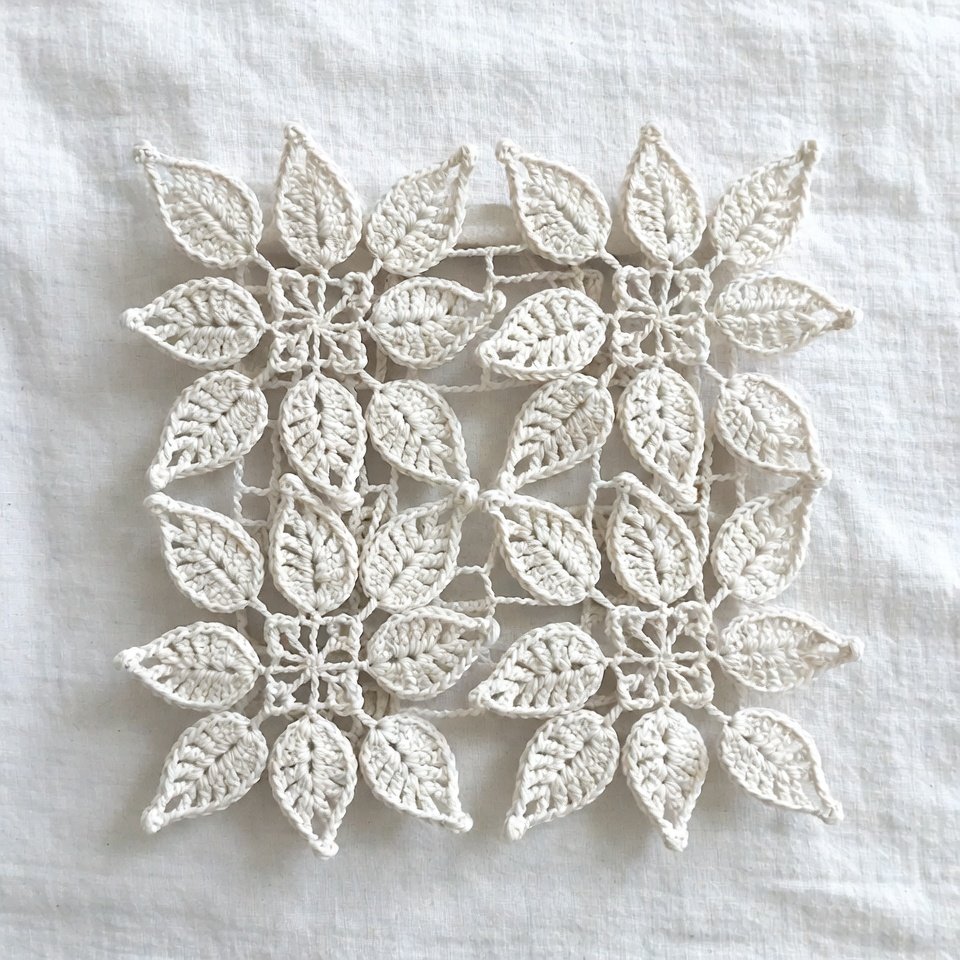
This crochet doily pattern uses filet crochet techniques with open and closed mesh stitches. Start from the center and follow a chart or written instructions to form leaf motifs. Fine cotton thread gives the best definition. This traditional crochet doily looks elegant on dining tables and sideboards.
Materials Needed
- Cotton crochet thread
- 2 mm crochet hook
- Scissors
- Tapestry needle
Step 1: Create the Center Ring
Start with a magic ring and crochet 12 double crochets into the center. Join with a slip stitch to form a small circle.
Step 2: Build the Foundation Rounds
Work several rounds of double crochets and chain spaces, increasing evenly to keep the centerpiece flat.
Step 3: Create the Filet Leaf Design
Use a combination of open mesh squares (chain spaces) and filled blocks (double crochets) to form leaf shapes around the center. Repeat the leaf motif evenly around the circle.
Step 4: Expand the Centerpiece
Continue adding rounds of filet crochet, making the leaves larger and more detailed with each round.
Step 5: Add the Decorative Border
Finish with a round of shell stitches or picots around the edge to frame the leaf design.
Step 6: Block the Finished Piece
Weave in the ends and block the centerpiece flat to highlight the filet crochet pattern.
Crochet Swirly Doily Pattern

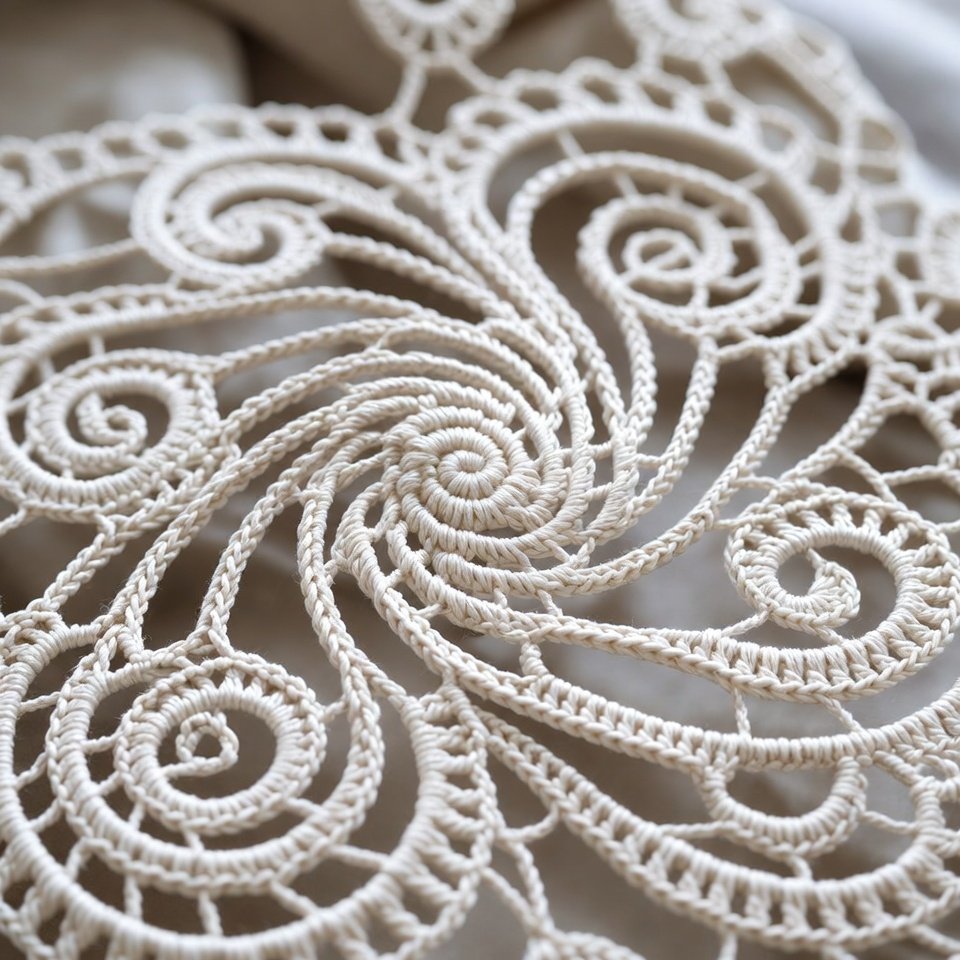
Begin with a standard round base, then introduce increases on one side of each round to create the swirling effect. Tall stitches and chain spaces enhance the movement. Blocking is essential for clearly defining the swirl. This crochet doily pattern adds a modern touch to classic lace designs.
Materials Needed
- Cotton yarn or thread
- 2.5 mm crochet hook
- Scissors
- Tapestry needle
Step 1: Make the Center Circle
Create a magic ring and work 12 double crochets into it. Join the round with a slip stitch.
Step 2: Form the First Swirls
Use groups of double crochets separated by chain spaces. Slightly offset each group from the previous round to create a spiral effect.
Step 3: Continue the Swirling Design
Work additional rounds, increasing gradually while maintaining the curved stitch placement that forms the swirl pattern.
Step 4: Add Texture
Use shell stitches and clusters along the spiral lines to make the swirls more visible.
Step 5: Finish the Border
Crochet a scalloped edge around the doily to enhance the flowing design.
Step 6: Block and Shape
Block the doily carefully so the spiral pattern opens and becomes clearly visible.
Doily Plant Mat
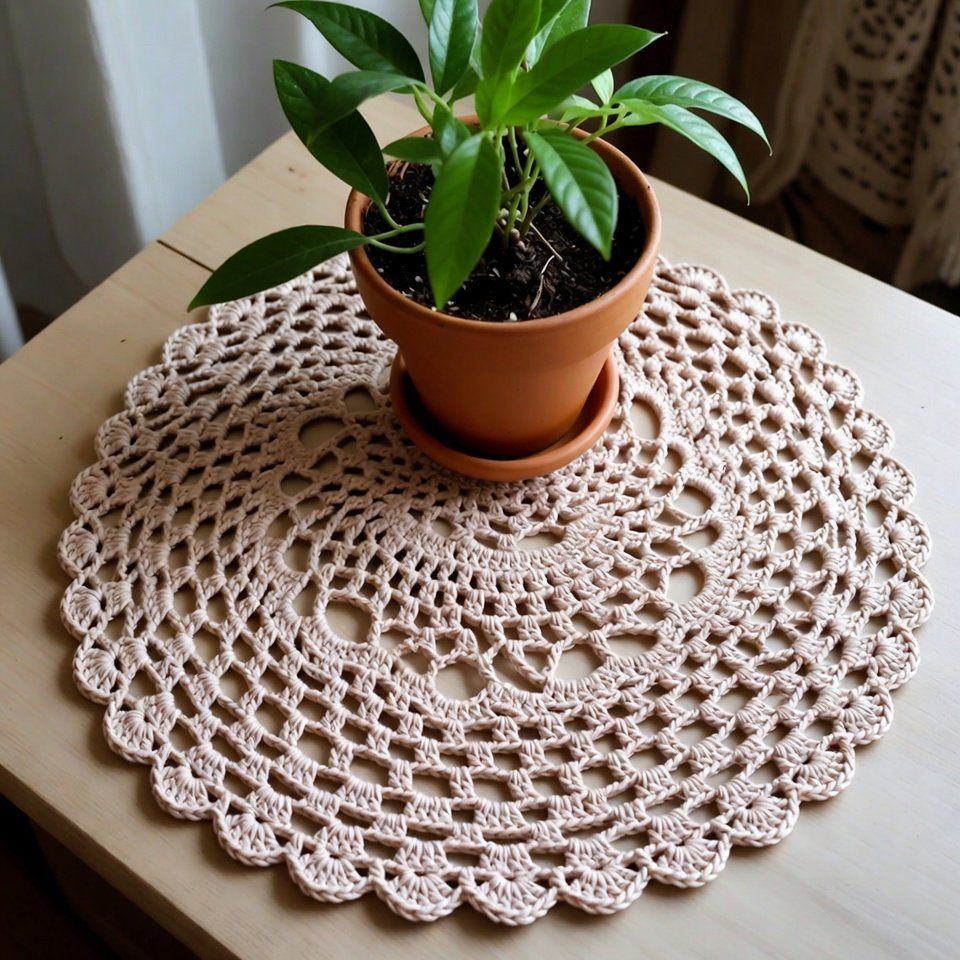
Use durable cotton yarn to crochet a dense center that supports plant pots. Gradually switch to lace stitches for decorative edges. This modern crochet doily pattern is both functional and stylish, protecting surfaces while adding handmade charm.
Materials Needed
- Cotton yarn
- 4 mm crochet hook
- Scissors
- Tapestry needle
Step 1: Start the Center
Make a magic ring and crochet 12 double crochets into the ring. Join with a slip stitch.
Step 2: Build a Strong Base
Work several rounds of increases using double crochets. Since the mat will support plant pots, keep the stitches firm and even.
Step 3: Add Decorative Lace Sections
Alternate rounds of chain spaces and shell stitches to create a decorative but sturdy pattern.
Step 4: Increase to Plant Mat Size
Continue crocheting until the mat is large enough for your chosen plant pot.
Step 5: Create a Durable Border
Finish with a round of single crochets followed by a scalloped edge for extra stability.
Step 6: Block the Mat
Block lightly so the mat remains flat while preserving the lace details.
Chunky Crochet Doily Pattern
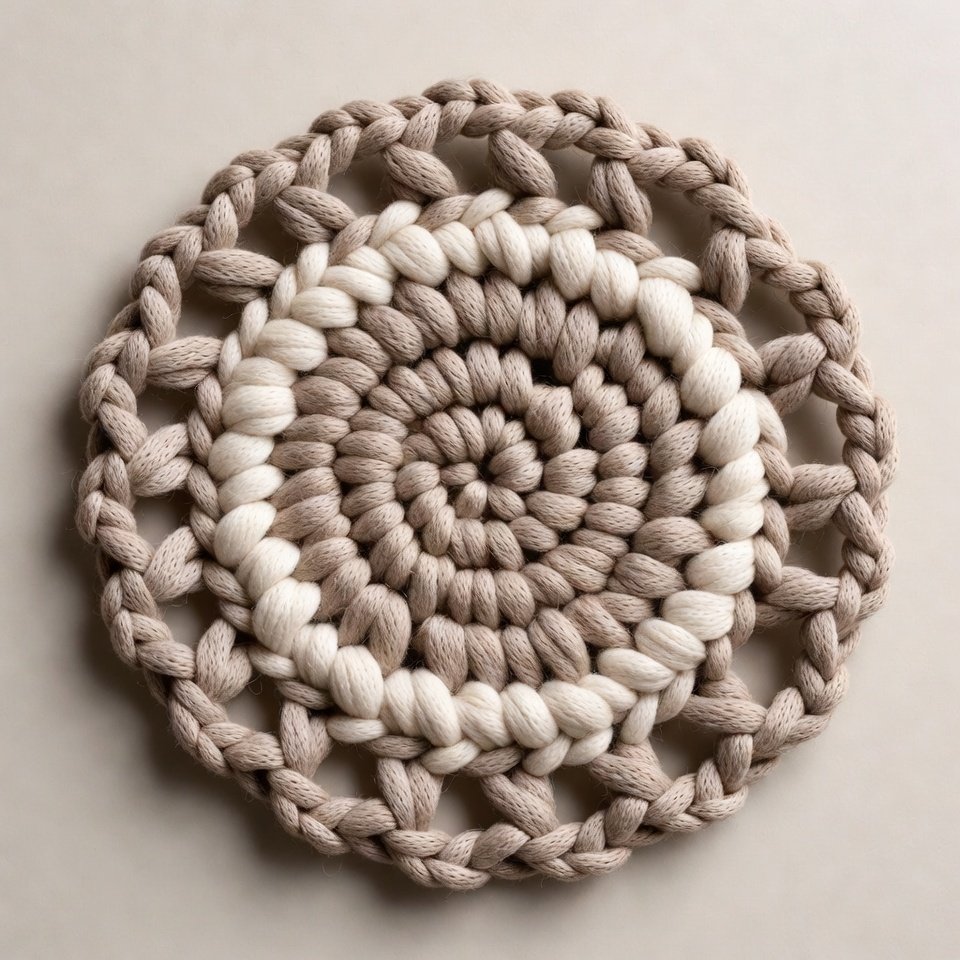
This easy crochet doily pattern uses thicker yarn and a larger hook. Work simple stitch repeats, such as double crochet and chain spaces. The chunky texture makes it quick to finish and beginner-friendly while still visually striking.
Materials Needed
- Chunky cotton yarn
- 6 mm crochet hook
- Scissors
- Tapestry needle
Step 1: Create the Center Ring
Make a magic ring and crochet 12 double crochets into the center.
Step 2: Work Large Foundation Rounds
Increase evenly using double crochets in each round. The thick yarn will help the doily grow quickly.
Step 3: Add Chunky Lace Details
Create large chain spaces and oversized shell stitches to give the doily an open, modern appearance.
Step 4: Expand the Design
Continue alternating textured stitches and lace sections until the desired size is reached.
Step 5: Finish with a Bold Border
Use large shell stitches around the edge for a dramatic finish.
Step 6: Shape the Doily
Lightly block to define the stitch pattern while maintaining the chunky texture.
Diamond Doily

Create diamond shapes by repeating stitch blocks with chain spaces and double crochet clusters. Careful counting is important to keep the geometric design balanced. This crochet doily pattern looks best when blocked firmly.
Materials Needed
- Cotton thread
- 2 mm crochet hook
- Scissors
- Tapestry needle
Step 1: Make the Center Circle
Start with a magic ring and work 12 double crochets into the center.
Step 2: Build the Base Rounds
Increase evenly for several rounds to create a flat foundation.
Step 3: Form Diamond Motifs
Use chain spaces and double crochet groups to create repeating diamond shapes around the doily.
Step 4: Expand the Diamond Pattern
Continue adding rounds while enlarging each diamond motif. Keep stitch counts consistent for symmetry.
Step 5: Add the Outer Border
Work picots or shell stitches around the edge to complement the geometric design.
Step 6: Block the Finished Doily
Pin the doily flat and shape the diamond points carefully before drying
8-Petal Flower Doily
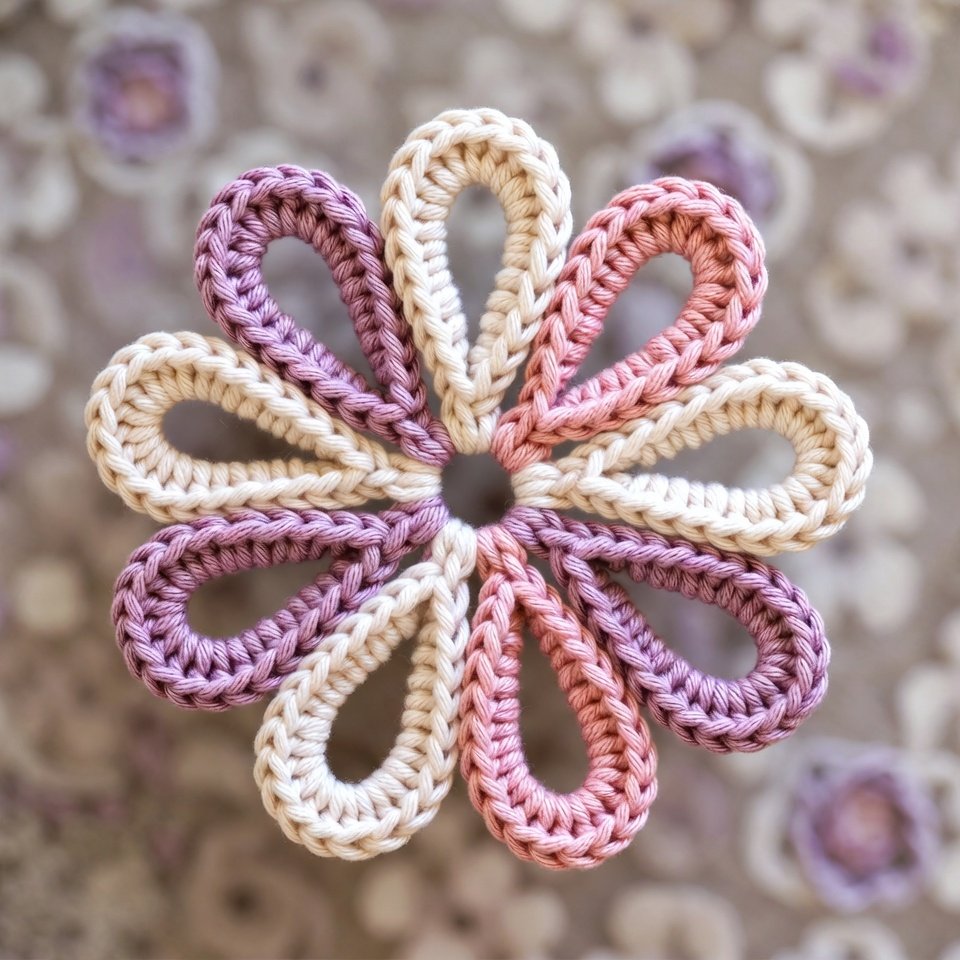
This free crochet doily pattern begins with a magic ring worked in double crochet stitches to form a stable center. Each petal is created using clusters of treble crochet separated by chain spaces, giving the doily a soft, floral look. Count stitches carefully so all eight petals stay even in size. This crocheted flower doily is ideal for table décor or as a base for wall hangings. Blocking helps define each petal clearly and enhances the lace texture.
Materials Needed
- Cotton yarn
- 2.5 mm crochet hook
- Scissors
- Tapestry needle
Step 1: Create the Flower Center
Make a magic ring and crochet 16 double crochets into it. Join with a slip stitch.
Step 2: Divide the Petal Sections
Work chain spaces evenly around the circle to create eight sections for the petals.
Step 3: Crochet the Petals
Into each section, work shell stitches made of multiple double crochets to form large flower petals.
Step 4: Add Lace Around the Petals
Crochet chain loops and small clusters between the petals to create an airy lace effect.
Step 5: Finish the Floral Border
Add picots around the petal edges for extra detail and texture.
Step 6: Block and Shape
Carefully pin each petal into place and allow the doily to dry completely for a crisp flower shape.
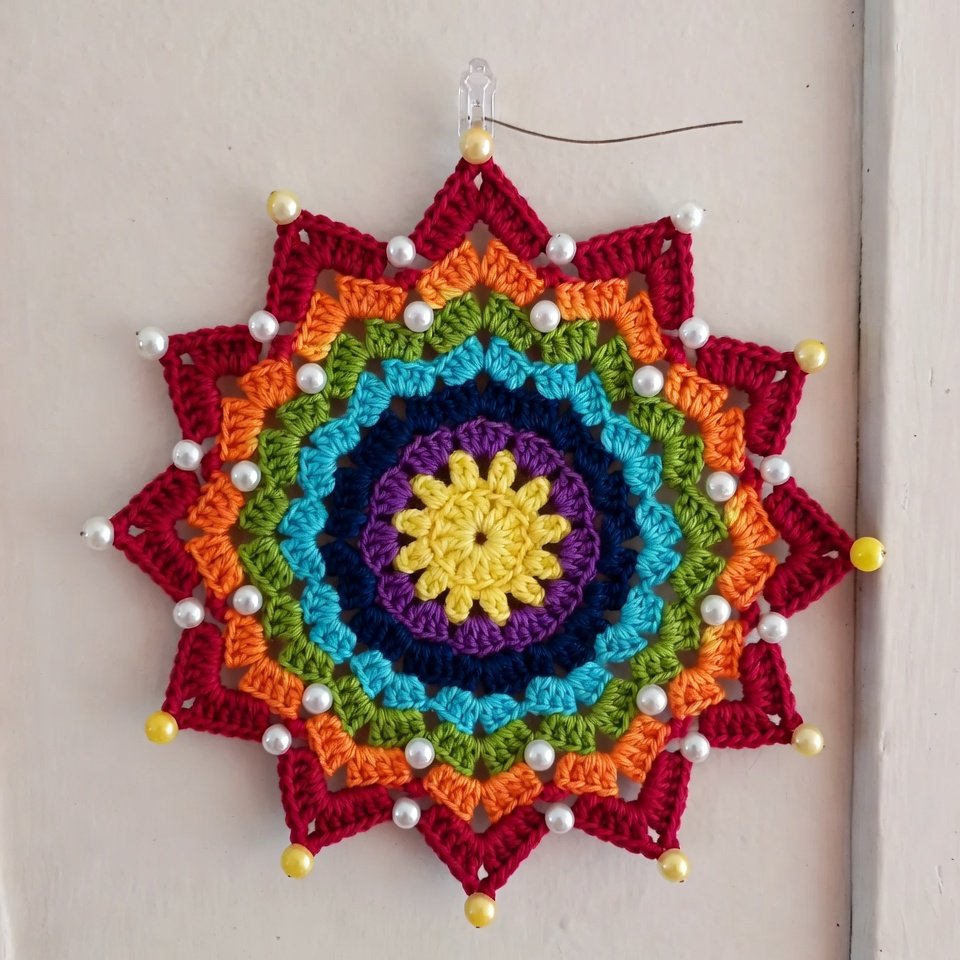
Crochet Star Doily

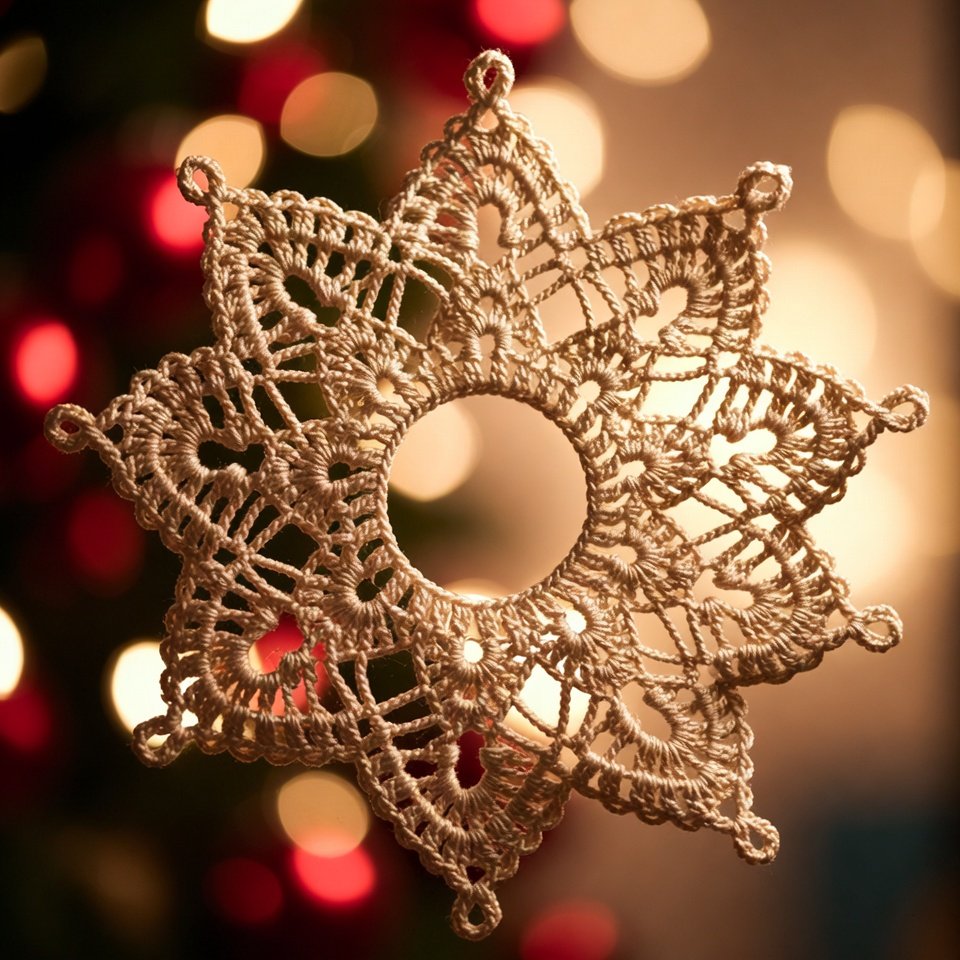
Start from the center using a magic ring and build outward with chain loops and tall stitches to form star points. Each round increases slightly to maintain a flat shape. Stitch markers help align the star tips evenly. This crochet doily pattern works beautifully in white or pastel yarns and suits both beginners and intermediate crocheters. Once complete, block firmly to sharpen the star edges.
Materials Needed
- Cotton crochet thread
- 2 mm crochet hook
- Scissors
- Tapestry needle
Step 1: Create the Center Ring
Begin with a magic ring and work 12 double crochets into the ring. Join with a slip stitch.
Step 2: Form the Star Points
In the next round, work 2 treble crochets, chain 2, 2 treble crochets into designated stitches to create evenly spaced points around the circle.
Step 3: Expand the Star Shape
Continue adding rounds, placing increases at each point to maintain the star design. Use chain spaces between points for an airy look.
Step 4: Add Decorative Lace
Work shell stitches and chain loops around the star points to soften the design and add texture.
Step 5: Finish the Border
Create a picot edge around the outer round for a delicate finish.
Step 6: Block and Shape
Pin each point carefully and allow the doily to dry completely.
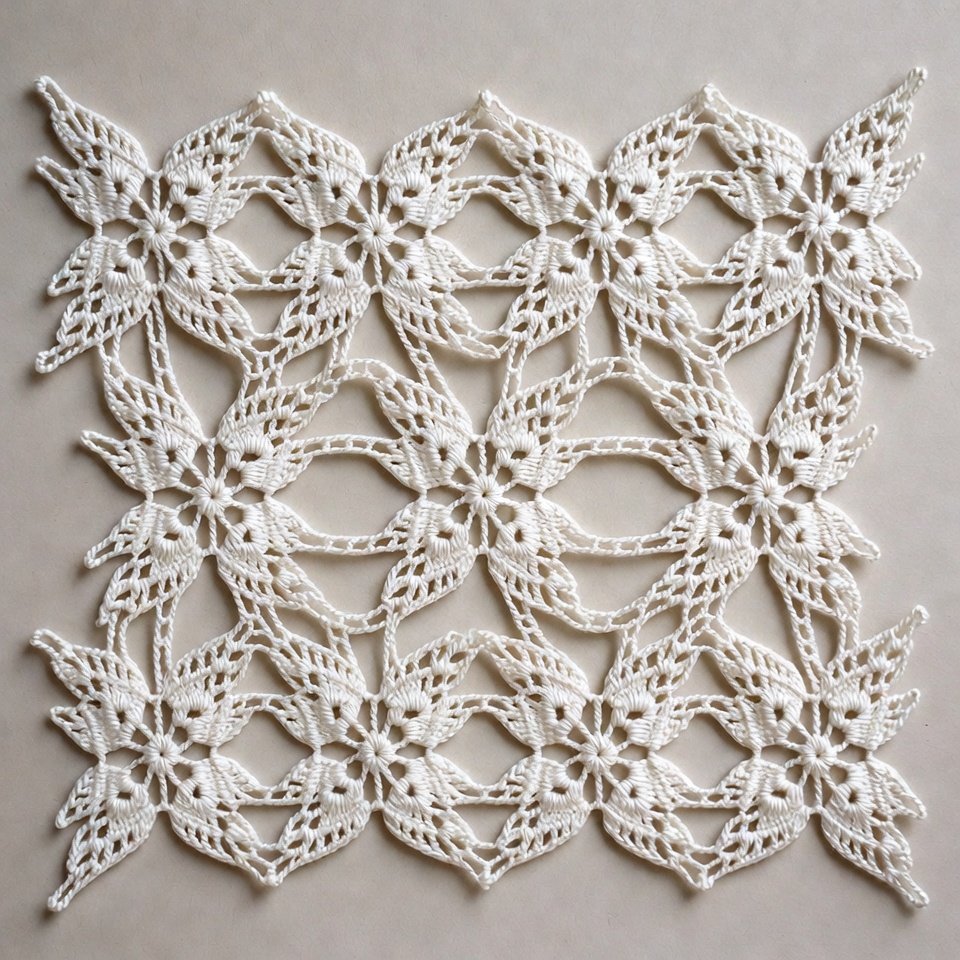
Crochet Square Lace Doily
This crochet doily pattern is worked from the center outward in square rounds. Corners are formed using chain spaces and double crochet clusters. Lace sections are added between solid stitches for balance. Square crochet doilies are perfect for table runners, trays, or layered décor. Blocking is essential to keep the corners crisp and symmetrical.
Materials Needed
- Cotton thread
- 2 mm crochet hook
- Scissors
- Tapestry needle
Step 1: Crochet the Center Square
Start with a magic ring and crochet groups of double crochets separated by chain spaces to form four corners.
Step 2: Build the Square Shape
Increase at each corner by working additional stitches and chain spaces. This keeps the doily square as it grows.
Step 3: Add Lace Panels
Create openwork sections using chain spaces and clusters between the corners.
Step 4: Expand the Design
Continue repeating the lace pattern while maintaining sharp square corners.
Step 5: Crochet the Decorative Edge
Finish with shell stitches or picots around the border.
Step 6: Block the Doily
Stretch the corners gently and pin into a perfect square before drying.
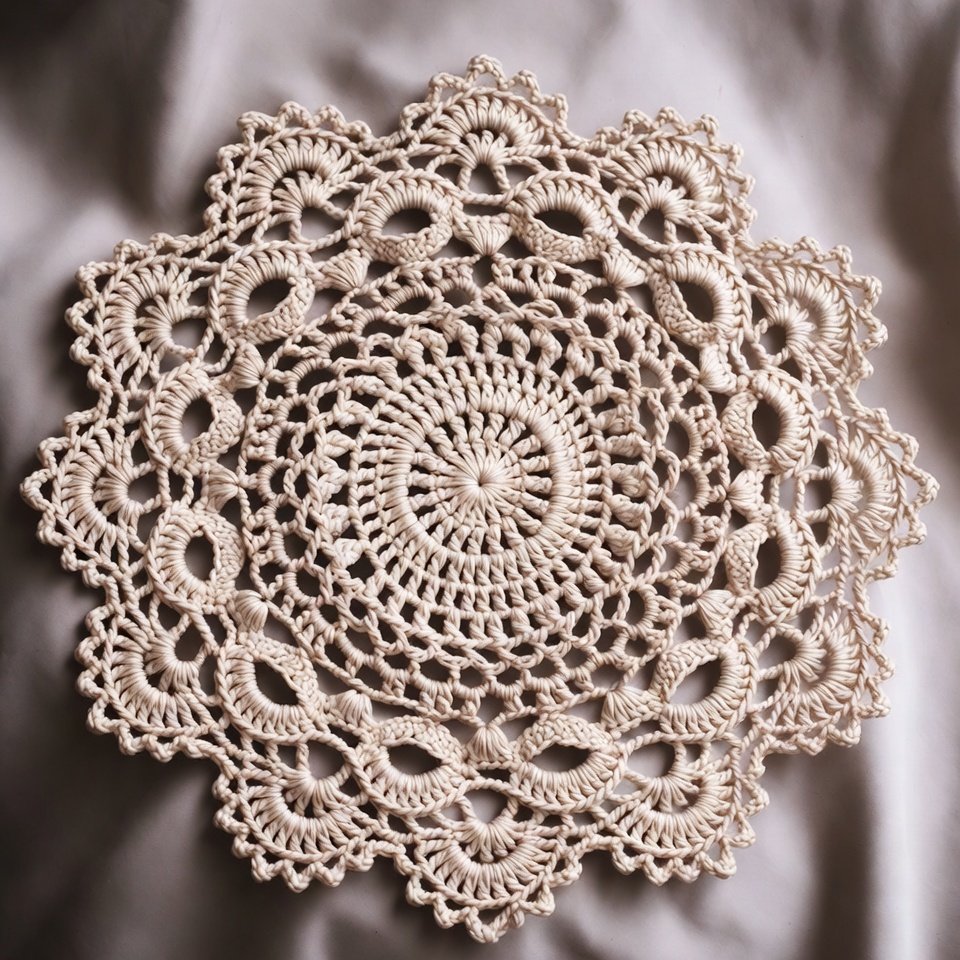
Elegant Crochet Cotton Doily
Using fine cotton thread, begin with a tight circular base. Gradually introduce lace stitch combinations such as shells, picots, and chain arches. This traditional crochet doily pattern focuses on stitch definition and balance. Work slowly and evenly for the best results. Light steam blocking opens up the lace and gives the doily its elegant finish.
Materials Needed
- Fine cotton thread
- 1.75 mm crochet hook
- Scissors
- Tapestry needle
Step 1: Start the Center Circle
Make a magic ring and crochet 16 double crochets into the center.
Step 2: Create Foundation Rounds
Work several rounds of increases using double crochets and chain spaces.
Step 3: Add Elegant Lace Details
Use fan stitches, shells, and picots to create delicate lace sections around the doily.
Step 4: Expand the Pattern
Continue adding decorative rounds until the desired size is reached.
Step 5: Finish the Outer Border
Work a scalloped lace edge to give the doily a refined appearance.
Step 6: Block for a Professional Finish
Pin the doily flat and shape the lace details carefully.
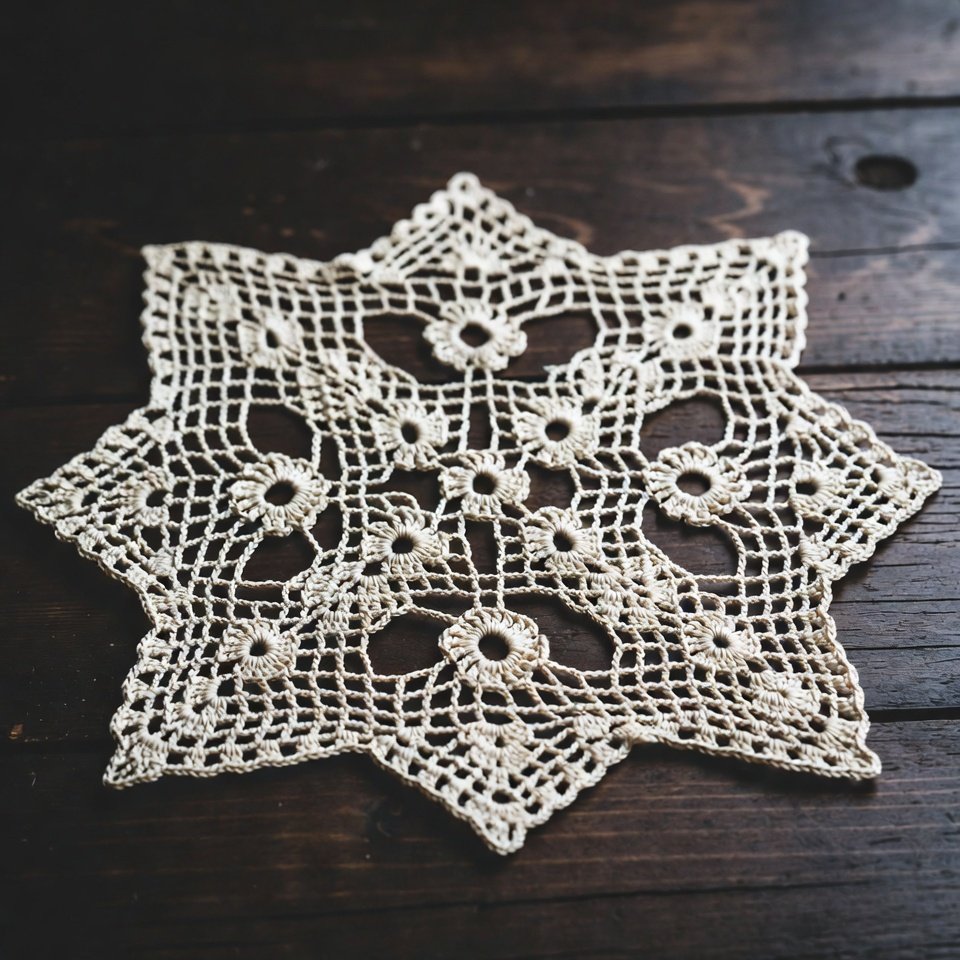
Starflower Lace

This crochet doily pattern combines star shapes with floral lace. Begin with a small center ring and alternate between solid stitch rounds and chain-heavy lace rounds. The starflower motif emerges naturally as the pattern expands. This design is perfect for vintage-style home décor. Blocking enhances the layered texture.
Materials Needed
- Cotton crochet thread
- 2 mm crochet hook
- Scissors
- Tapestry needle
Step 1: Make the Flower Center
Begin with a magic ring and crochet 12 double crochets into the center.
Step 2: Form the Flower Petals
Work shell stitches around the center to create flower petals.
Step 3: Create the Star Effect
Between the petals, use chain spaces and treble crochet stitches to form pointed star tips.
Step 4: Add Lace Rounds
Continue crocheting outward with open lacework and decorative clusters.
Step 5: Crochet the Final Border
Add picots around each star point for extra detail.
Step 6: Block and Shape
Carefully pin the flower petals and star points into position before drying.
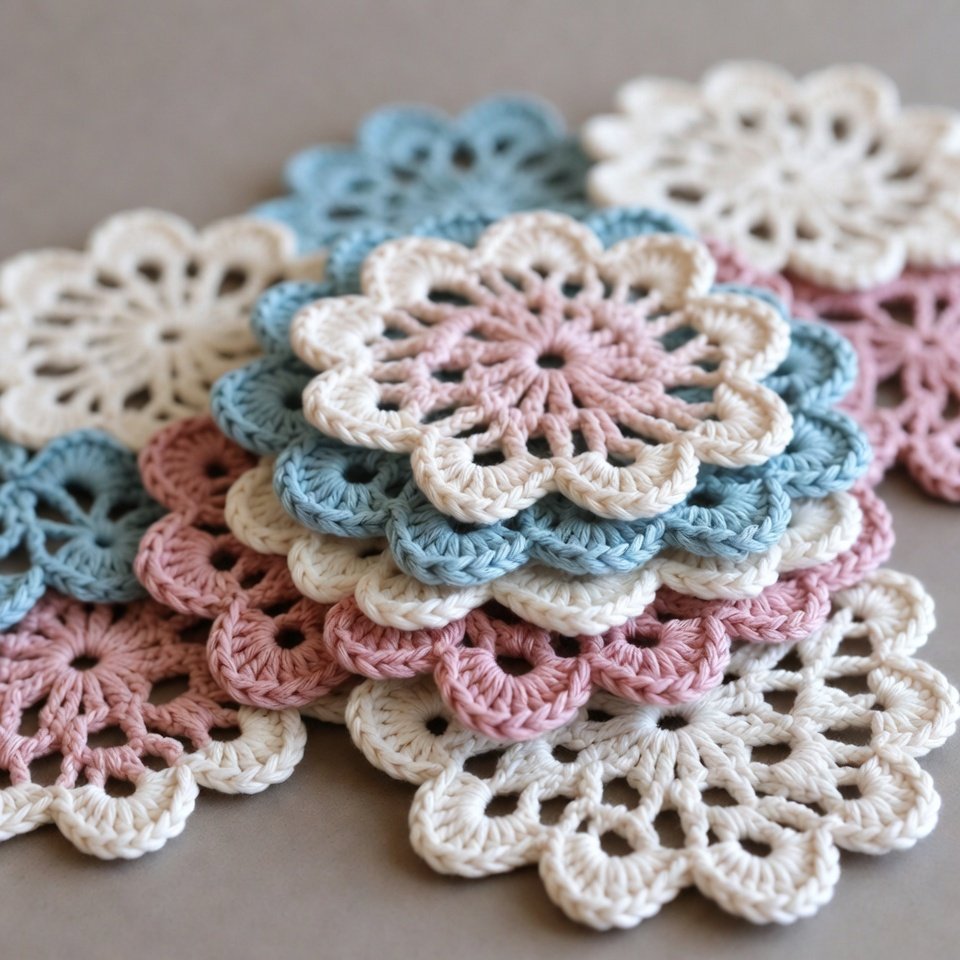
Dreaming of Spring Doilies

Work this floral-inspired crochet doily in soft pastel shades. Start from the center and build outward using flower-like stitch repeats and chain loops. The pattern creates a light, airy feel ideal for seasonal décor. This free crochet doily design looks beautiful as a centerpiece or wall accent.
Materials Needed
- Pastel cotton yarn
- 2.5 mm crochet hook
- Scissors
- Tapestry needle
Step 1: Create the Center
Start with a magic ring and work 12 double crochets into the center.
Step 2: Add Floral Rounds
Work petals using shell stitches and chain spaces around the center circle.
Step 3: Build Spring-Inspired Lace
Create open lace sections with clusters and picots to resemble blooming flowers.
Step 4: Expand the Doily
Continue alternating floral rounds and lace rounds until the desired size is reached.
Step 5: Finish with a Delicate Border
Crochet small scallops around the edge for a soft springtime look.
Step 6: Block the Finished Doily
Shape the petals and lace sections carefully while drying.
Triple Flavor
This modern crochet doily pattern uses three repeating stitch sections for texture contrast. Begin with a dense center, transition into lace stitches, and finish with decorative edging. The mix of textures gives the doily depth and visual interest. Use solid colors to highlight stitch variation.
Materials Needed
- Three coordinating yarn colors
- 2.5 mm crochet hook
- Scissors
- Tapestry needle
Step 1: Crochet the Center Round
Using the first color, make a magic ring and crochet 12 double crochets into it.
Step 2: Add the Second Color
Join the second color and work a round of shells and chain spaces to create contrast.
Step 3: Introduce the Third Color
Use the third color for decorative clusters and lace sections around the outer rounds.
Step 4: Expand the Multi-Color Design
Continue alternating colors every few rounds while maintaining the stitch pattern.
Step 5: Crochet the Decorative Border
Finish with shells, picots, or scallops using your favorite color combination.
Step 6: Block and Finish
Weave in all ends and block the doily to showcase the colorful layered design.
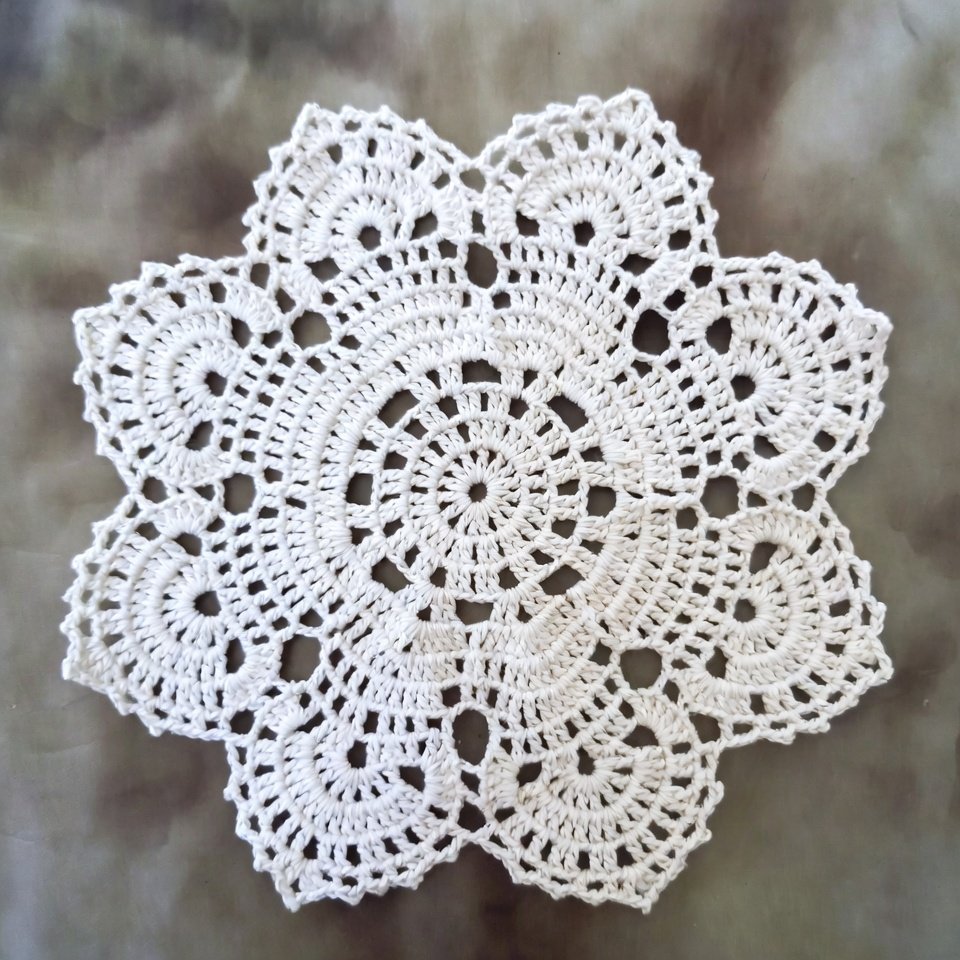
Moonpetals
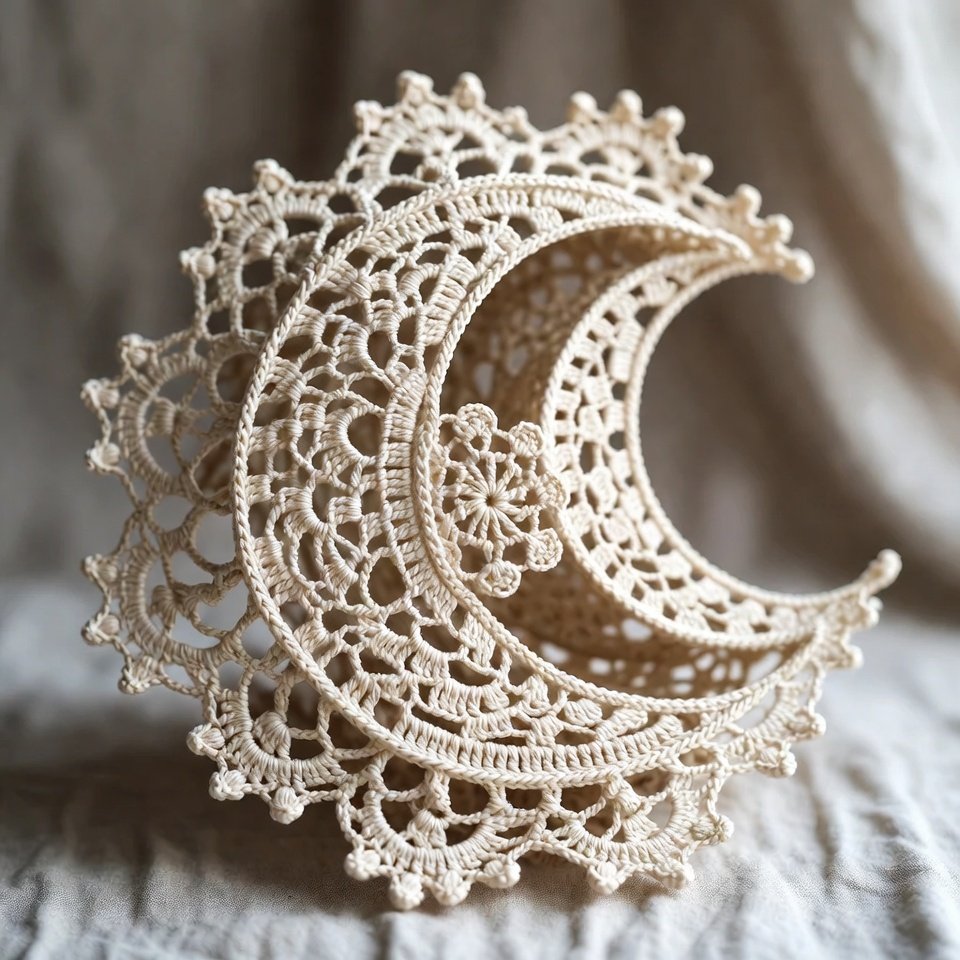
Moonpetals is a round crochet doily pattern featuring curved petal-like arches. Start with a magic ring and gradually build larger chain loops in each round.
Tall stitches shape the petals, creating a flowing design. This free crochet doily pattern works beautifully in light neutral tones.
Materials Needed
- Cotton crochet thread
- 2 mm crochet hook
- Scissors
- Tapestry needle
Step 1: Create the Center Ring
Start with a magic ring and work 12 double crochets into the ring. Join with a slip stitch.
Step 2: Build the Moon Center
Work several rounds of double crochets and chain spaces, increasing evenly to create a flat circular base.
Step 3: Form the Petal Sections
Create chain loops around the circle. Into each loop, work shell stitches to form rounded moon-like petals.
Step 4: Add Lace Details
Crochet open lace rounds between the petals using chains and clusters to create an airy effect.
Step 5: Finish the Outer Edge
Add picots along each petal edge to highlight the moonpetal shape.
Step 6: Block the Doily
Pin the petals evenly and allow the doily to dry completely
Sweetheart Soiree
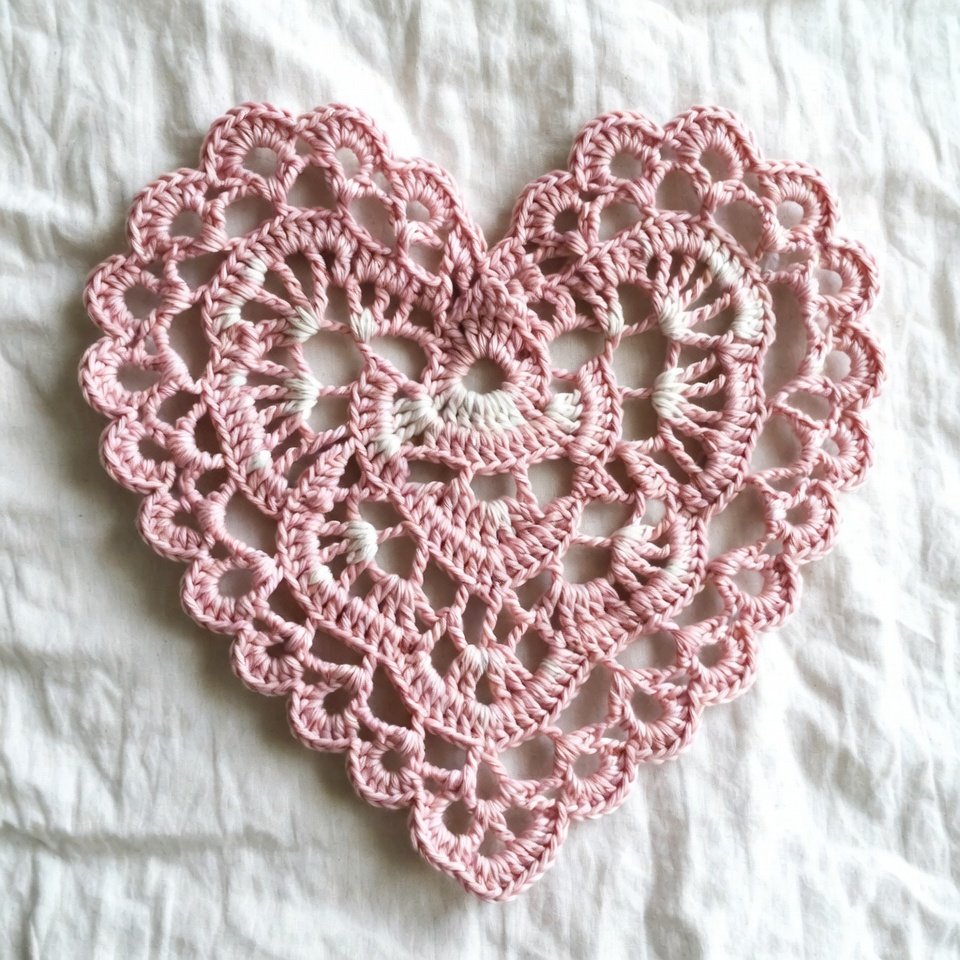
This romantic crochet doily design features heart-inspired curves and lace clusters. Begin with a simple round base and introduce decorative arches in later rounds. Keep tension consistent to maintain symmetry. This doily is perfect for gifting or special-occasion décor.
Materials Needed
- Cotton thread in pink or cream
- 2 mm crochet hook
- Scissors
- Tapestry needle
Step 1: Crochet the Center Circle
Begin with a magic ring and crochet 14 double crochets into the center.
Step 2: Create Heart-Inspired Sections
Work chain spaces and clusters evenly around the circle. These sections will later form subtle heart motifs.
Step 3: Shape the Decorative Hearts
Use treble crochets and chain stitches to create heart-like arches around the doily.
Step 4: Add Romantic Lace Rounds
Continue with shells, picots, and lace fans to give the design a delicate appearance.
Step 5: Crochet the Border
Finish with scallops and picots around the outer edge.
Step 6: Block and Shape
Carefully stretch the heart motifs while blocking.
Mable
The Mable doily uses repetitive lace rounds that are easy to memorize. Start with basic stitches and gradually add complexity with picots and chain loops. This crochet doily pattern is ideal for relaxing projects and looks stunning when blocked flat.
Materials Needed
- Fine cotton thread
- 1.75 mm crochet hook
- Scissors
- Tapestry needle
Step 1: Start the Center
Create a magic ring and work 16 double crochets into the ring.
Step 2: Build Foundation Rounds
Crochet several rounds of double crochets and chain spaces, increasing evenly.
Step 3: Add Floral Lace Motifs
Work shell stitches and clusters around the center to create a soft floral pattern.
Step 4: Expand the Lace Design
Continue adding decorative rounds using fans, chains, and picots.
Step 5: Finish the Decorative Edge
Crochet a scalloped border around the final round.
Step 6: Block the Finished Doily
Pin the doily flat and allow it to dry fully.
Table Topper in 3D

Materials Needed
- Cotton yarn
- 3 mm crochet hook
- Scissors
- Tapestry needle
Step 1: Crochet the Center Base
Begin with a magic ring and crochet several rounds of double crochets to create a sturdy circular base.
Step 2: Create Raised Petals
Work front-post stitches and layered shell stitches to create petals that stand above the surface.
Step 3: Build the 3D Design
Add additional layers of petals behind the first layer by crocheting into skipped stitches from earlier rounds.
Step 4: Expand the Table Topper
Continue adding textured rounds and decorative lace sections around the raised flowers.
Step 5: Finish with a Decorative Border
Crochet large shells or picots around the edge.
Step 6: Shape the 3D Elements
Lightly block the base while gently shaping the raised petals by hand.
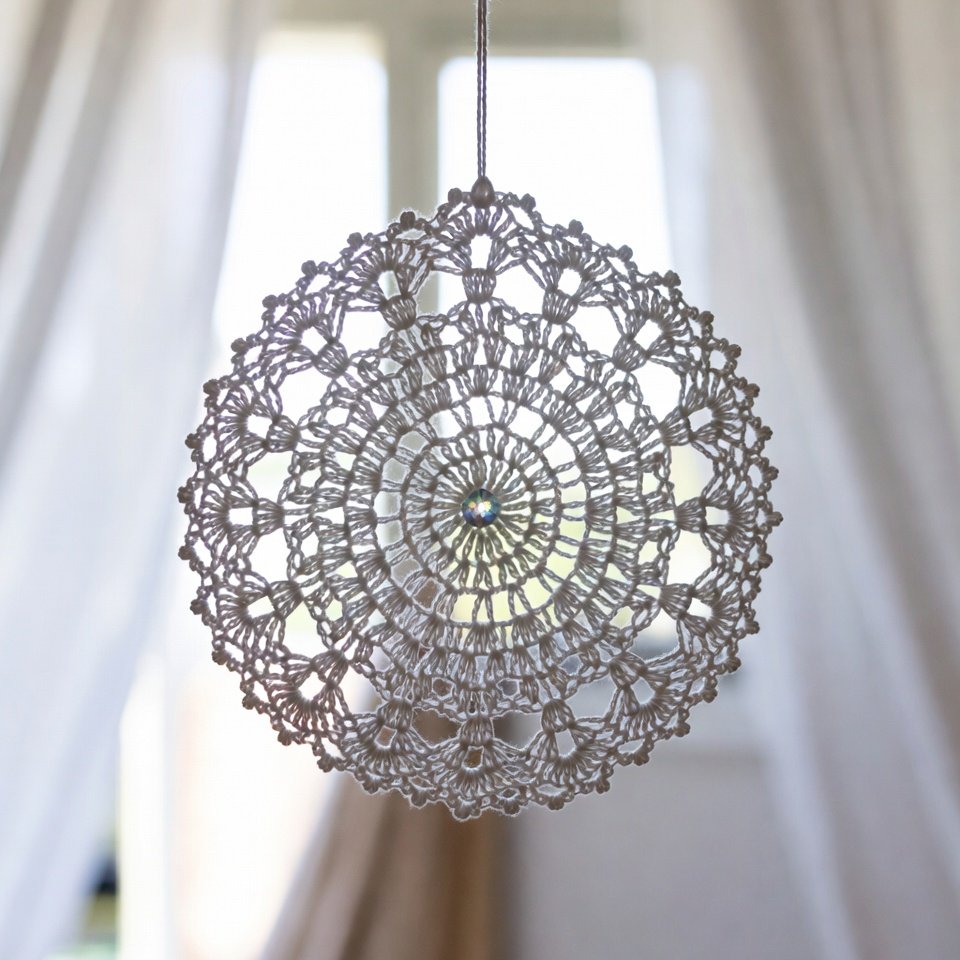
Crochet Suncatcher Mini Doily Pattern
Materials Needed
- Cotton crochet thread
- 1.5 mm crochet hook
- Metal ring or embroidery hoop
- Scissors
- Tapestry needle
Step 1: Crochet the Mini Doily
Start with a magic ring and work a small lace doily using double crochets, chains, and shell stitches.
Step 2: Expand the Lace Pattern
Add a few rounds of decorative openwork to create a delicate circular design.
Step 3: Attach to the Ring
Stretch the finished mini doily over a metal ring or small hoop and secure evenly around the edge.
Step 4: Add Hanging Details
Attach chains, beads, crystals, or tassels to the bottom of the hoop.
Step 5: Create the Hanging Loop
Crochet a chain loop at the top for hanging.
Step 6: Block and Display
Shape the doily carefully and hang it in a sunny window.
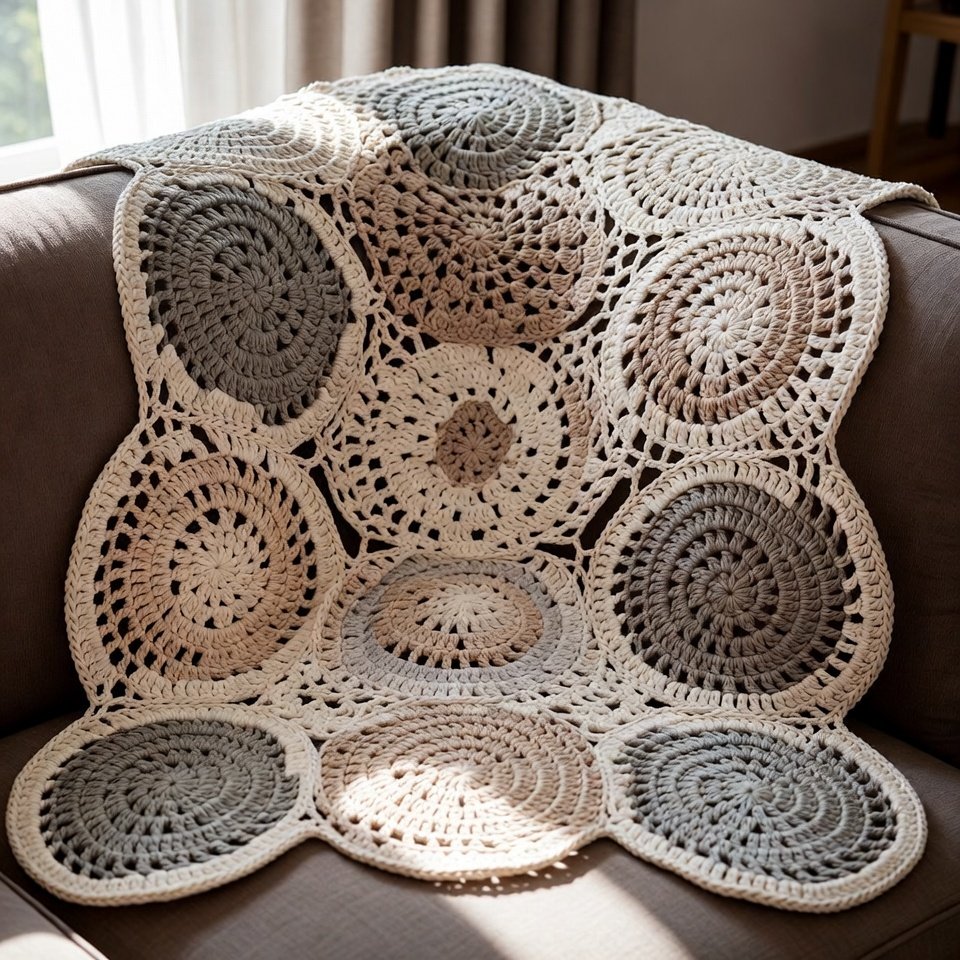
Crochet Lacy Accent Doily Afghan Pattern
Materials Needed
- Worsted-weight yarn
- 5 mm crochet hook
- Scissors
- Tapestry needle
Step 1: Crochet the Center Doily Motif
Begin with a magic ring and work several lace rounds using double crochets, shells, and chain spaces.
Step 2: Expand the Accent Panel
Continue increasing the motif until it becomes a large decorative centerpiece.
Step 3: Create the Afghan Sections
Crochet rows around the doily using basic stitches such as double crochet and half-double crochet to form a blanket shape.
Step 4: Blend Lace and Solid Stitches
Alternate lace sections with solid rows to balance texture and warmth.
Step 5: Add the Border
Work several rounds of shells or scallops around the entire afghan.
Step 6: Finish and Block
Weave in all ends, wash gently, and block the afghan so the lace centerpiece opens beautifully while the blanket lies flat.
Supplies for Crocheting Doilies
Recommended Yarn for Doilies
- Mercerized cotton thread (size 10)
- Lightweight cotton yarn for beginners
Recommended Hooks
- Steel hooks (1.5–2.25 mm)
- 3–4 mm hooks for yarn-based doilies
Tips for Crocheting Doilies
Read the pattern notes
Start with a thicker yarn
Choose patterns with pictures or video tutorials
Use stitch markers
Block your doily
Blocking transforms even simple crochet doily patterns into professional-looking pieces.
Explore More Free Crochet Patterns
If you enjoy free crochet doily patterns, you may also love the following:
- Crochet table runner patterns
- Mandala wall décor
- Beginner crochet home accessories
H2: Frequently Asked Questions (FAQ)
H3: Are there free crochet doily patterns for beginners?
Yes. Many easy crochet doily patterns include written instructions, charts, and PDFs.
Can I print free crochet doily patterns?
Absolutely. Many designers offer printable free crochet doily patterns and PDF downloads.
What thread size is best for doilies?
Size 10 cotton thread is the most popular and beginner-friendly.
Should I block every doily?
Yes. Blocking improves stitch definition and overall shape.
Conclusion
Free crochet doily patterns give you endless creative freedom from classic table décor to modern wall art and accessories. With the right pattern, supplies, and a bit of patience, anyone can crochet beautiful lace pieces.
Choose one pattern today, start small, block your work, and enjoy the magic of handmade crochet.