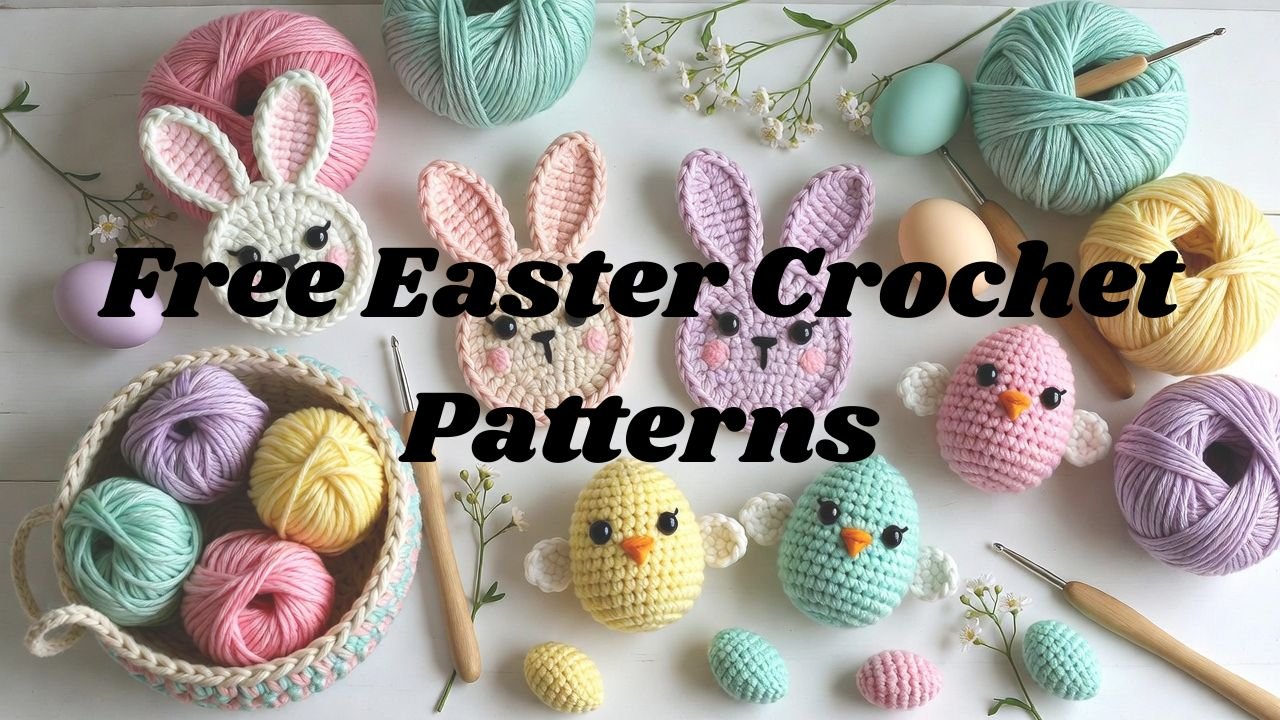
Free Easter Crochet Patterns: Beginner-Friendly Bunnies, Eggs, Baskets & Decor
Easter is the perfect season to refresh your crochet hook with cheerful colors, soft yarns, and quick handmade projects. Whether you’re decorating your home, creating gifts, or crafting something fun for kids, crochet patterns for Easter offer endless creative possibilities.
From adorable bunnies and fluffy chicks to decorative eggs and practical baskets, Easter-themed crochet projects are typically small, quick, and highly rewarding. Even better, many designs are beginner-friendly and free, making them ideal for spring crafting.
This curated guide focuses on easy, free, and practical Easter crochet ideas, especially helpful if you’re new to crocheting or short on time.
Free Easter Crochet Patterns You’ll Love
Below are inspiring Easter crochet project ideas categorized by theme. These ideas are intentionally simple, versatile, and adaptable for different skill levels.
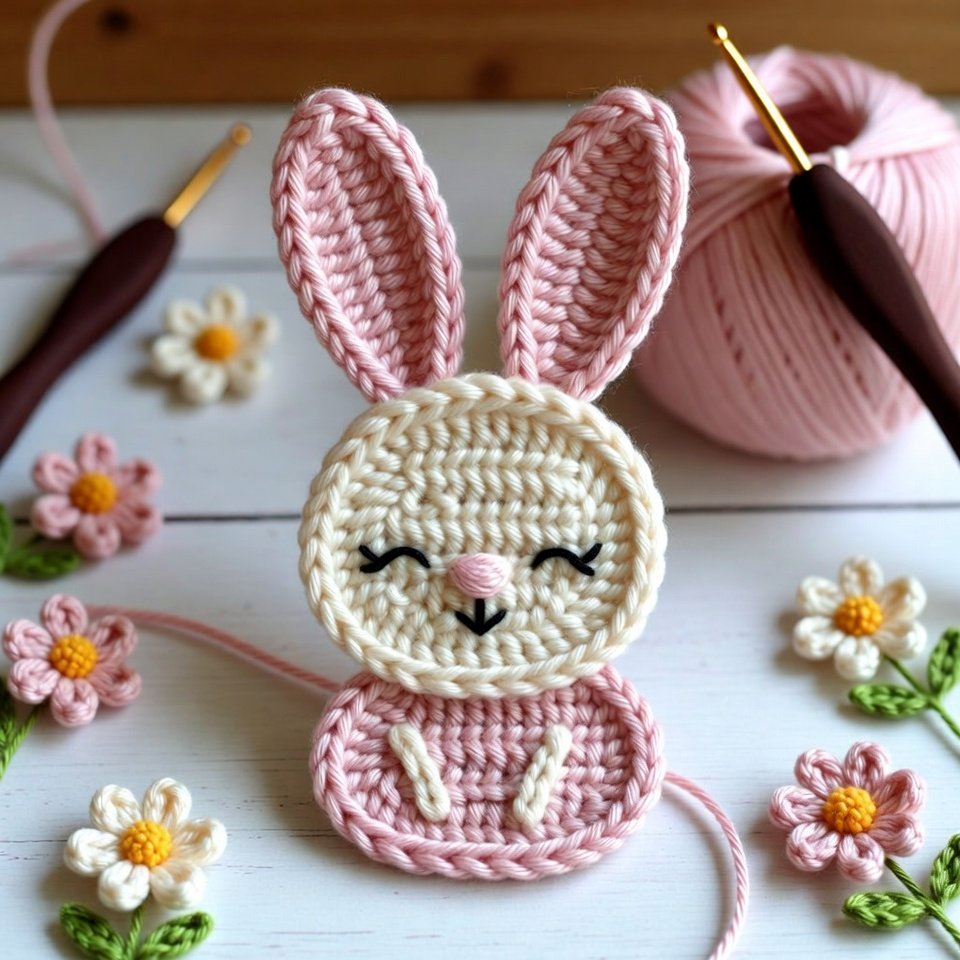
Bunny Appliqués for Blankets, Bags, and Cards
Bunny appliqués are one of the easiest and most versatile Easter crochet projects. They work beautifully on baby blankets, tote bags, gift tags, greeting cards, and even clothing. This tutorial walks you through making a flat crochet bunny appliqué with simple stitches and minimal shaping, perfect for beginners.
Skill Level
Beginner
Finished Size
Approximately 3.5–4 inches tall (size may vary depending on yarn and hook)
Materials Needed
- Worsted weight yarn (white, cream, or pastel color)
- Small amount of pink yarn (for nose or inner ears)
- Crochet hook (4 mm or 4.5 mm)
- Yarn needle
- Scissors
- Stitch marker (optional)
Crochet Abbreviations
- ch – chain
- sc – single crochet
- hdc – half double crochet
- dc – double crochet
- sl st – slip stitch
- st(s) – stitch(es)
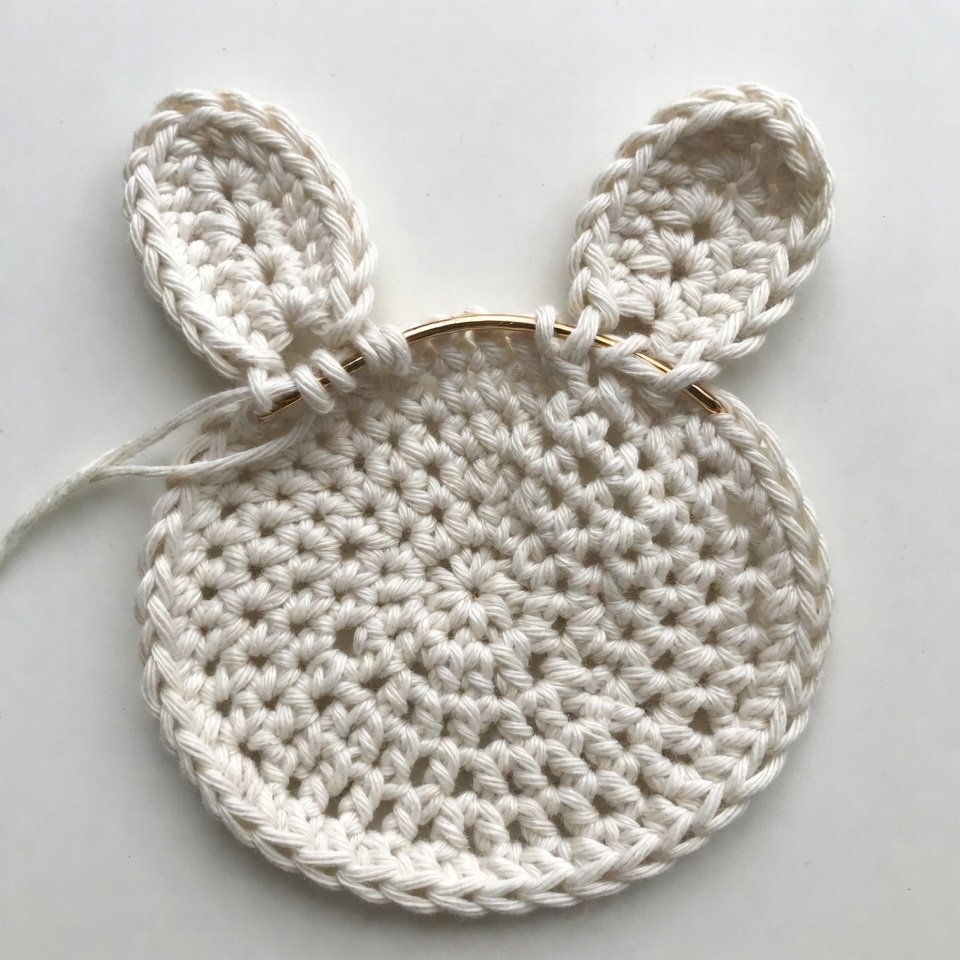
Step-by-Step Bunny Appliqué Tutorial
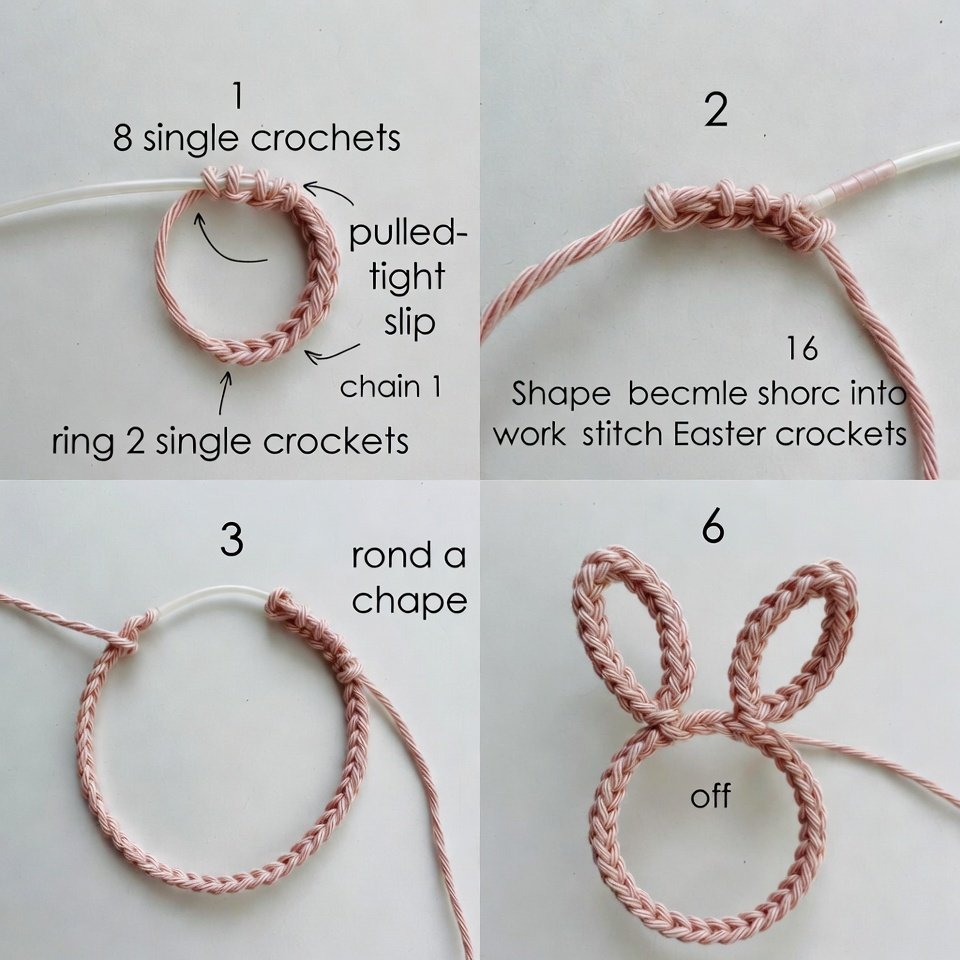
Step 1: Make the Bunny Head
- Start with a magic ring.
- Work 8 single crochet stitches into the magic ring.
- Pull the ring tight and join with a slip stitch to the first stitch.
- Chain 1 (this does not count as a stitch).
Step 2: Shape the Head
- Work 2 single crochets into each stitch around (16 stitches total).
- Join with a slip stitch.
- Chain 1 and fasten off if you want a perfectly round head, or continue directly to the ears for a no-sew option.
At this point, your circle should lie flat. If it curls, switch to a slightly larger hook.
Step 3: Create the First Bunny Ear
- Attach yarn at the top of the circle with a slip stitch.
- Chain 6.
- Working back down the chain:
- 1 sc in the second chain from the hook
- 1 hdc in next stitch
- 2 dc in next two stitches
- 1 hdc in last stitch
- Slip stitch into the same stitch where the ear began.
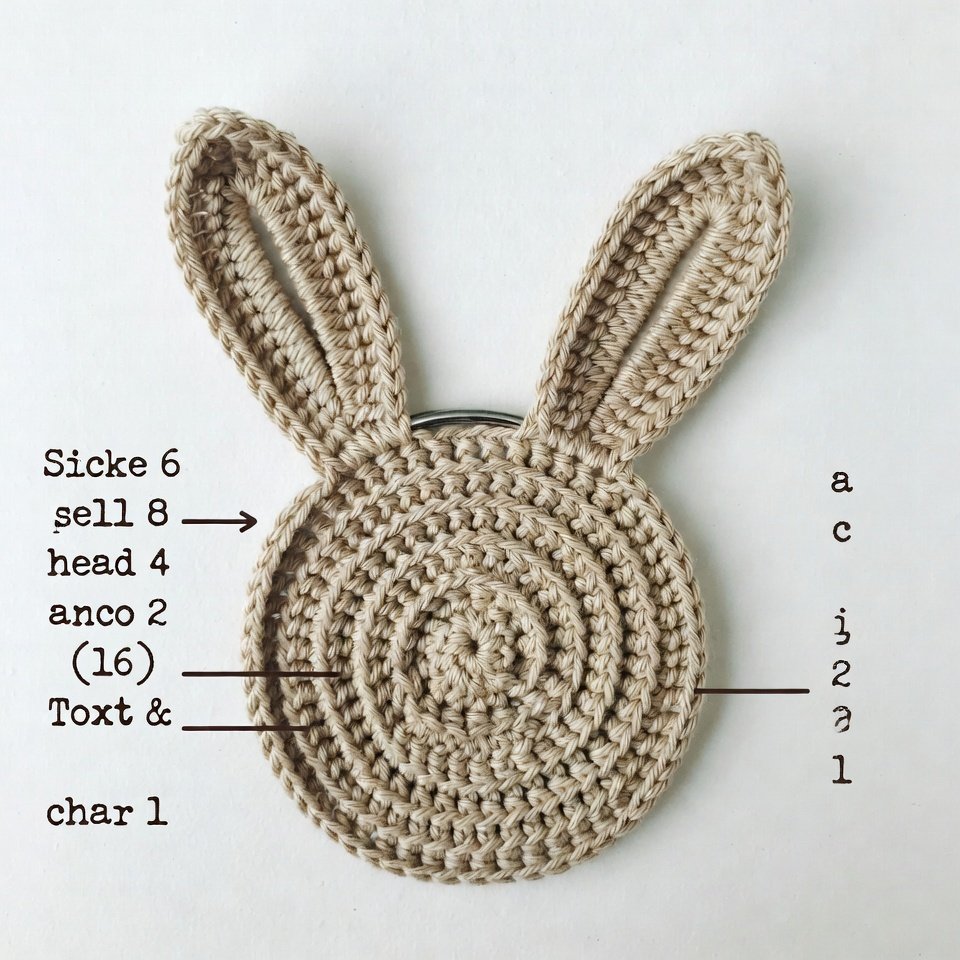
Step 4: Create the Second Bunny Ear
- Skip 2 stitches across the top of the head.
- Repeat the same ear steps:
- Chain 6
- Work sc, hdc, dc stitches back down
- Slip stitch to secure
The ears should stand tall and symmetrical.
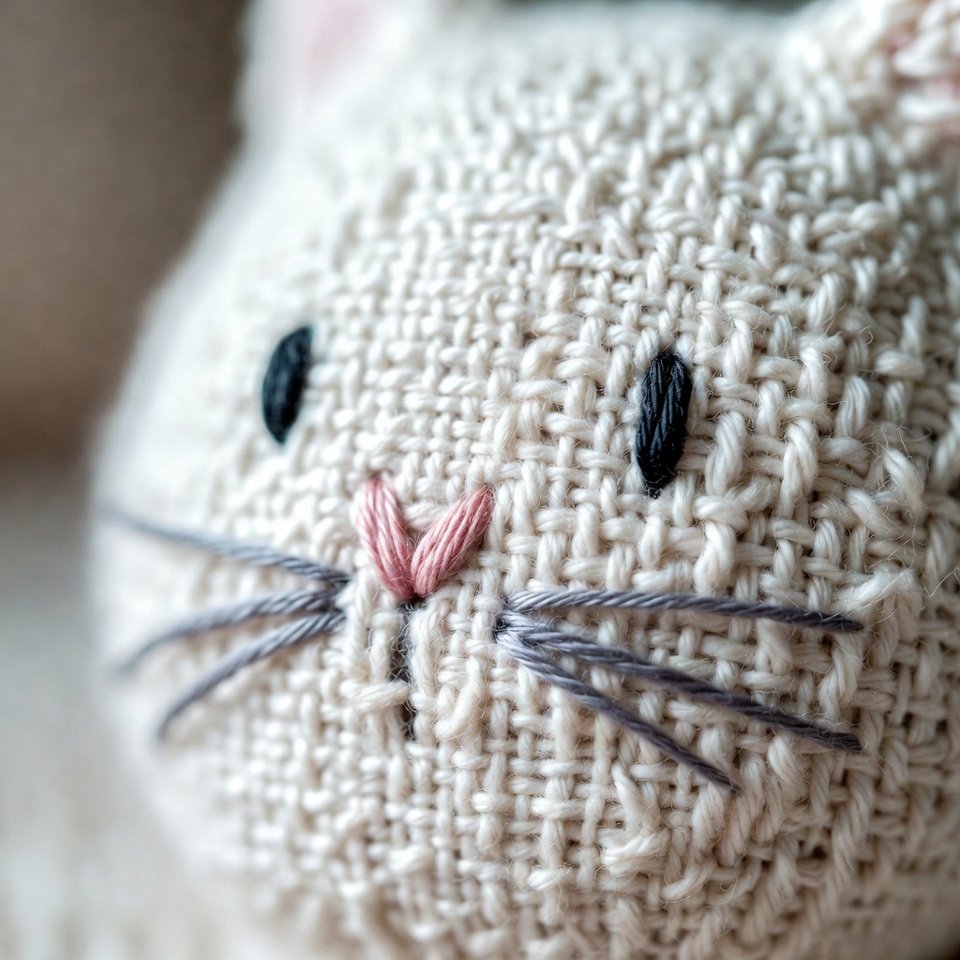
Step 5: Add Facial Details
- Use black yarn or embroidery thread to stitch two small straight lines or French knots for eyes.
- Stitch a tiny “V” shape or triangle using pink yarn for the nose.
- Optionally add whiskers with thin gray or black thread.
Step 6: Finish and Block
- Fasten off and weave in all yarn ends securely at the back.
- Lightly steam block or press with a warm iron (use a cloth between the iron and the crochet).
- Allow the appliqué to fully cool and flatten.
How to Attach Bunny Appliqués
For Blankets:
- Sew around the edges using a whip stitch or mattress stitch.
For Bags:
- Stitch firmly using matching yarn to ensure durability.
For Cards:
- Use fabric glue or double-sided craft tape.
Customization Ideas
- Change ear length for different bunny styles
- Use variegated yarn for playful designs
- Add bows, flowers, or embroidery details
- Create mini versions for gift tags
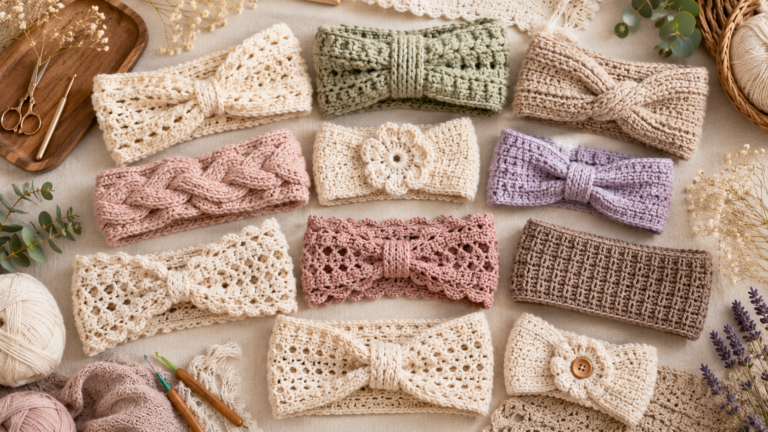
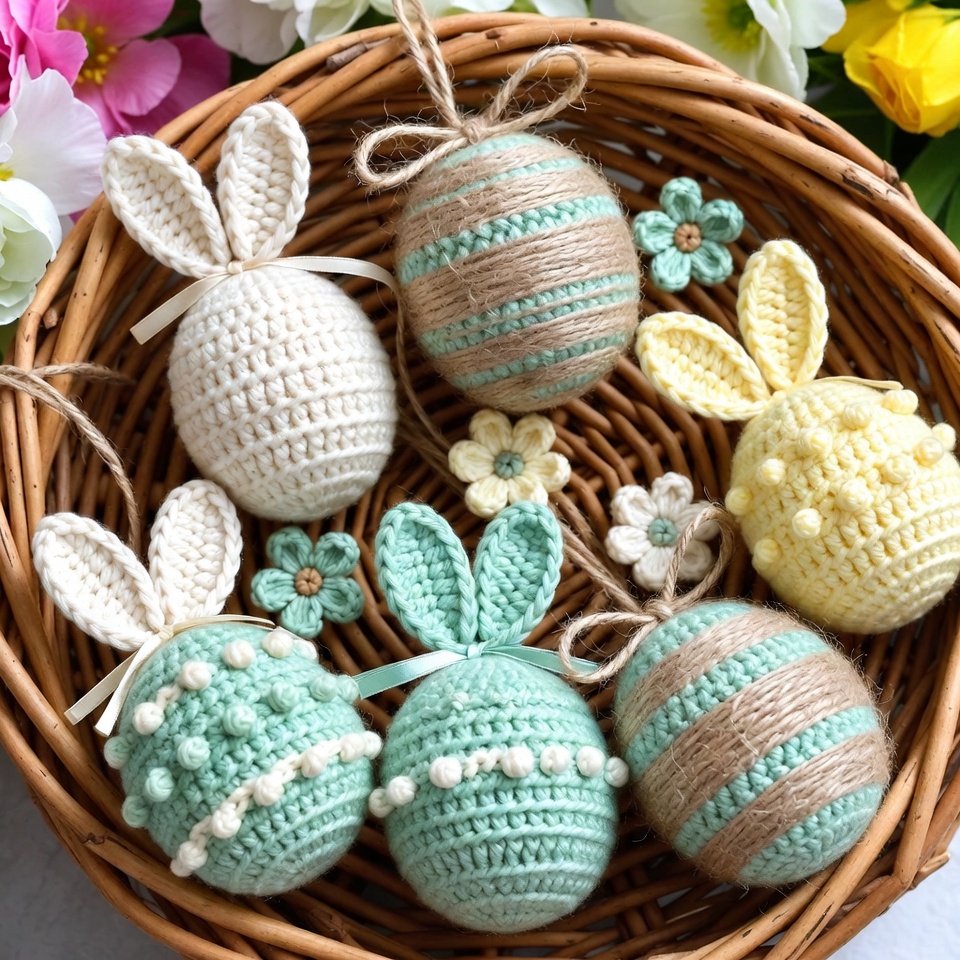
Farm-Style Decor Basket decorations
rustic farmhouse charm to Easter décor. These are quick projects that work well as: They’re great stash-busters and usually finished in under an hour.
Crochet Basket Decorations
Crochet basket decorations are small, quick projects that instantly elevate plain baskets. These decorations can be tied, stitched, or clipped onto Easter baskets, gift hampers, or home décor baskets. This tutorial shows you how to make simple crochet motifs perfect for beginners and ideal for seasonal decorating.
Skill Level
Beginner
Finished Size
Each decoration: 2–3 inches
(Exact size depends on yarn and hook)
Materials Needed
- Worsted or cotton yarn (pastels or neutrals)
- Crochet hook (3.5 mm–4.5 mm)
- Yarn needle
- Scissors
- Optional: ribbon, jute twine, mini wooden beads
Crochet Abbreviations
- ch – chain
- sc – single crochet
- hdc – half double crochet
- dc – double crochet
- sl st – slip stitch
- st(s) – stitch(es)
Step-by-Step Basket Decoration Tutorial
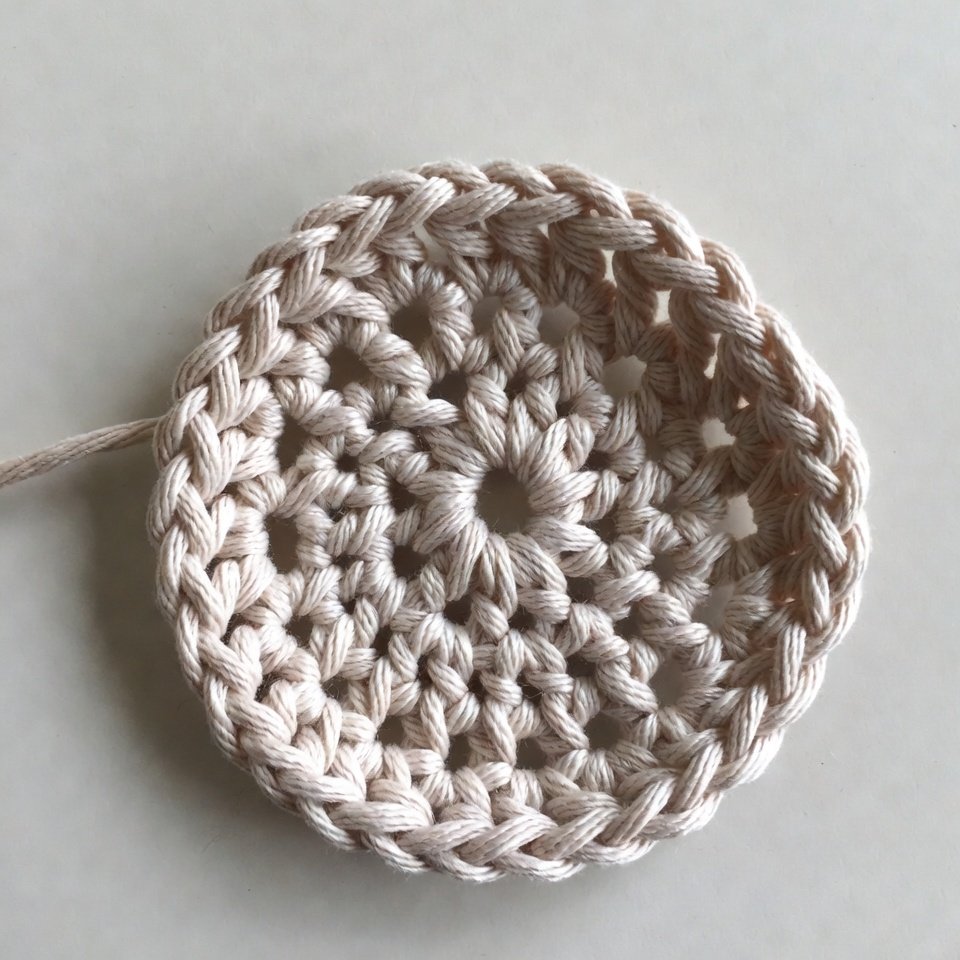
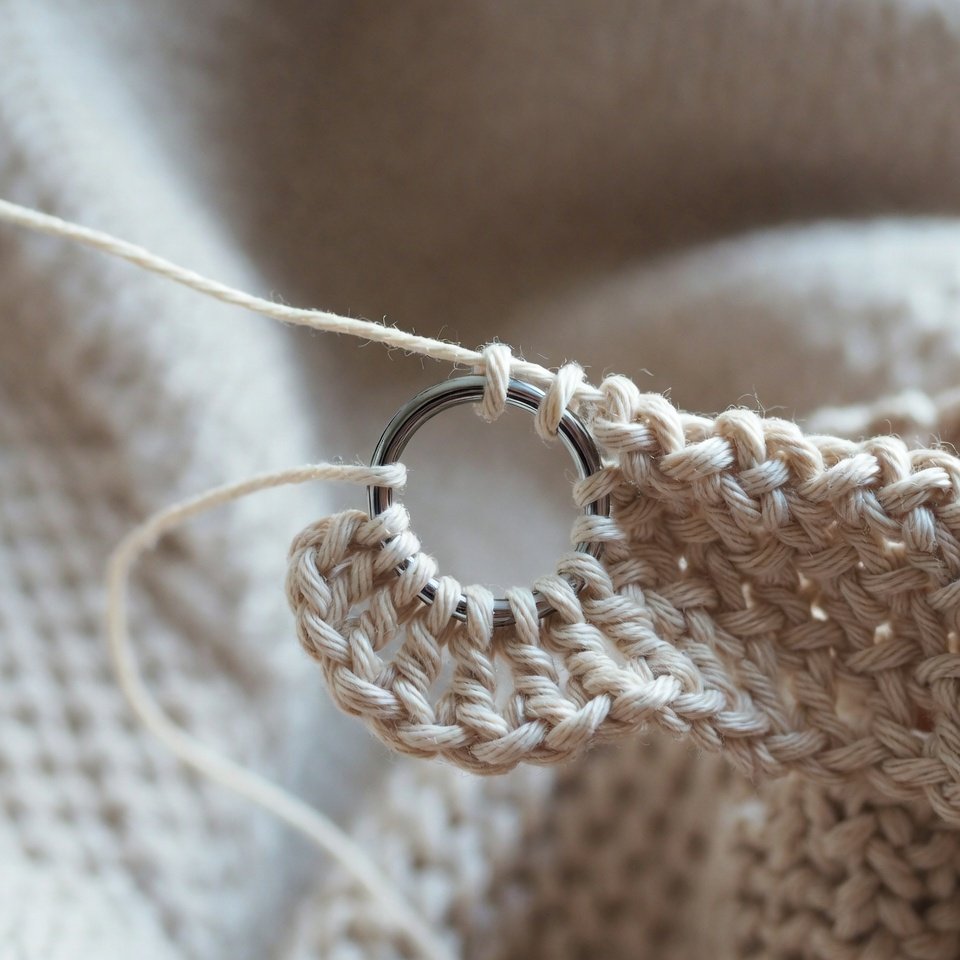
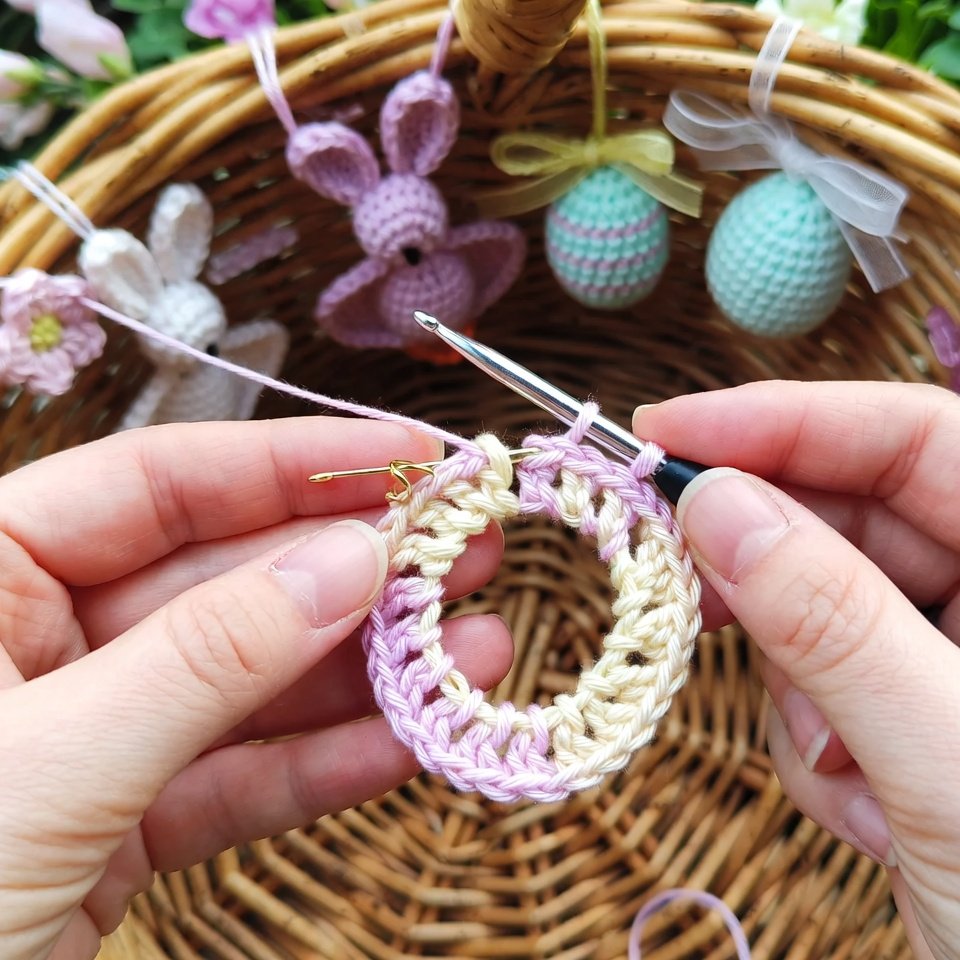
Step 1: Create the Base Motif (Egg or Circle)
- Begin with a magic ring.
- Work 8 single crochets into the ring.
- Pull tight and join with a slip stitch.
- Chain 1 to secure.
This circle forms the base for most basket decorations.
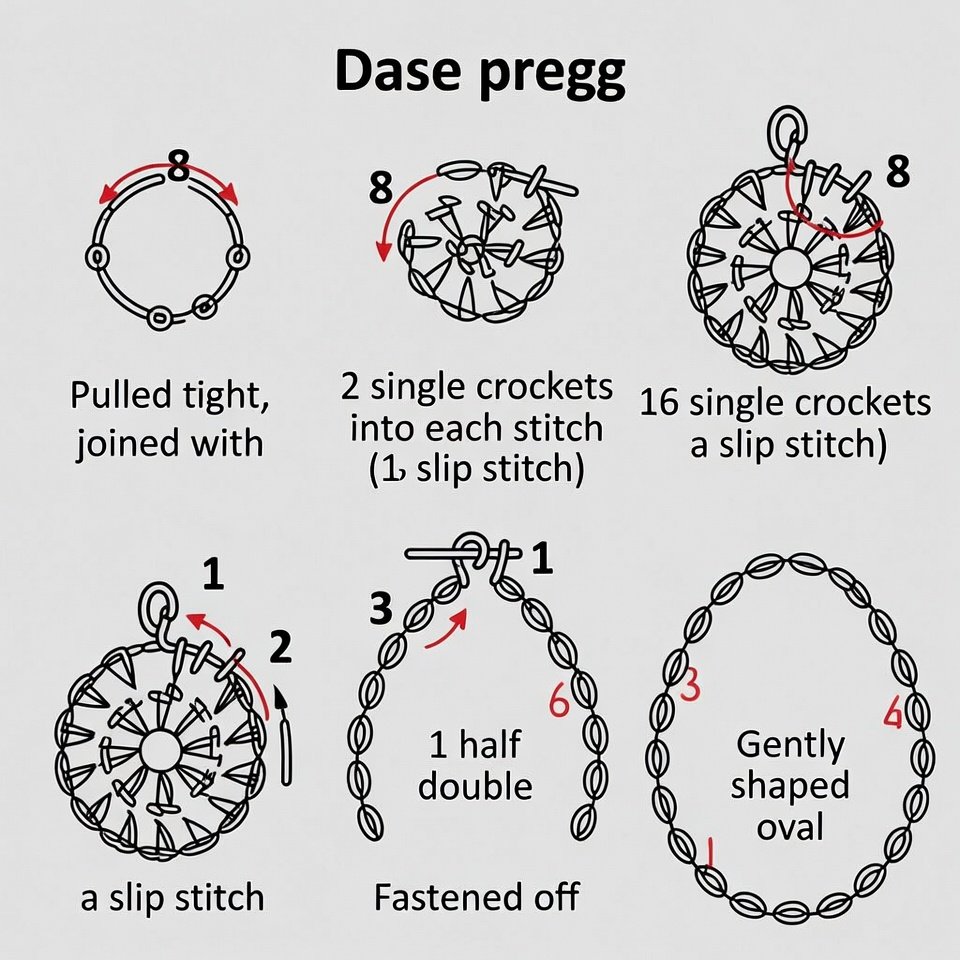
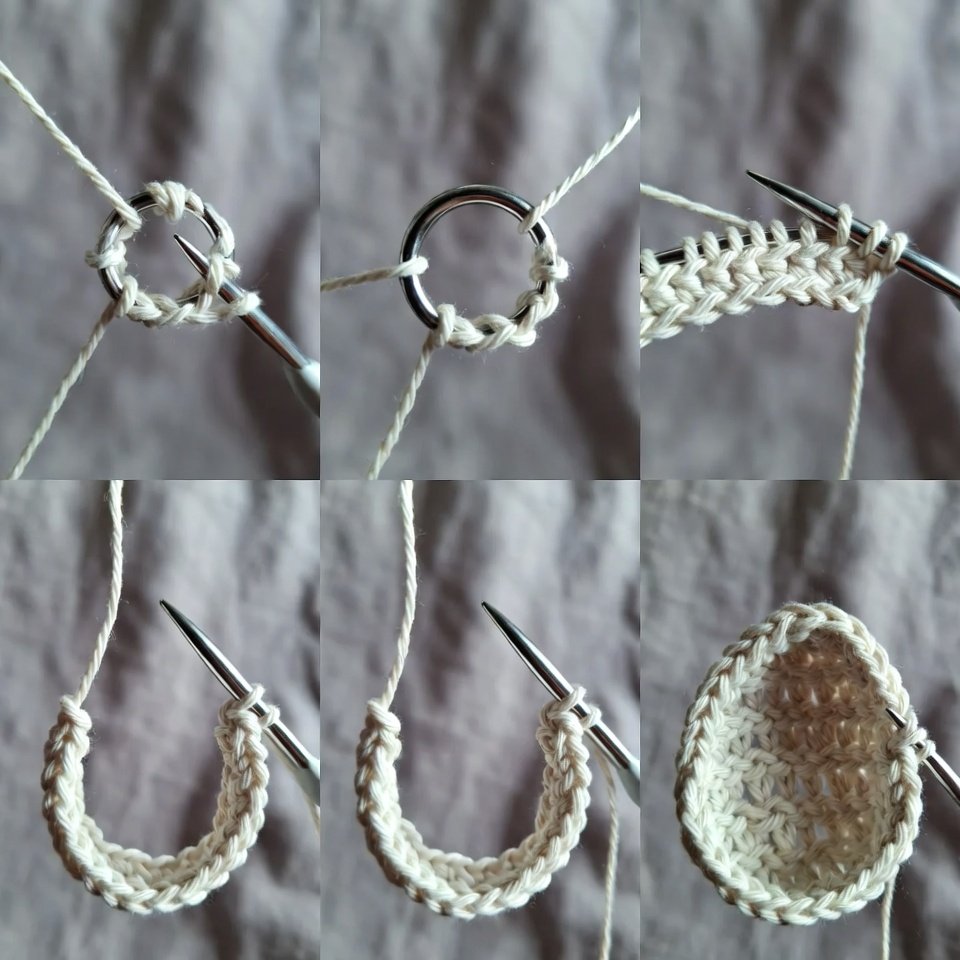
Step 2: Shape the Decoration
Option A: Easter Egg Shape
- Work 2 single crochets into each stitch (16 stitches).
- Join with a slip stitch.
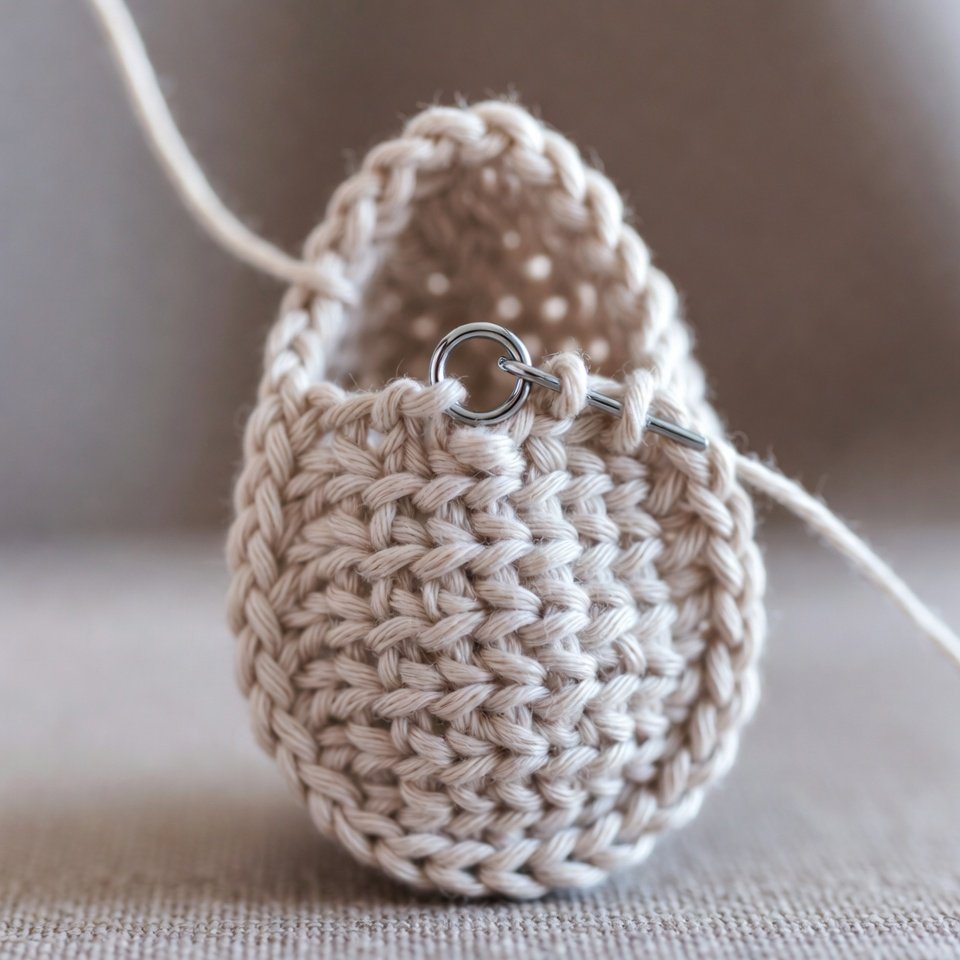
- For height, work one round of half double crochets.
- Fasten off and gently shape into an oval.
Option B: Bunny Accent
- Attach yarn at the top of the circle.
- Chain 6 for the first ear.
- Work back down the chain using sc, hdc, and dc.
- Slip stitch into the base.
- Repeat for the second ear.
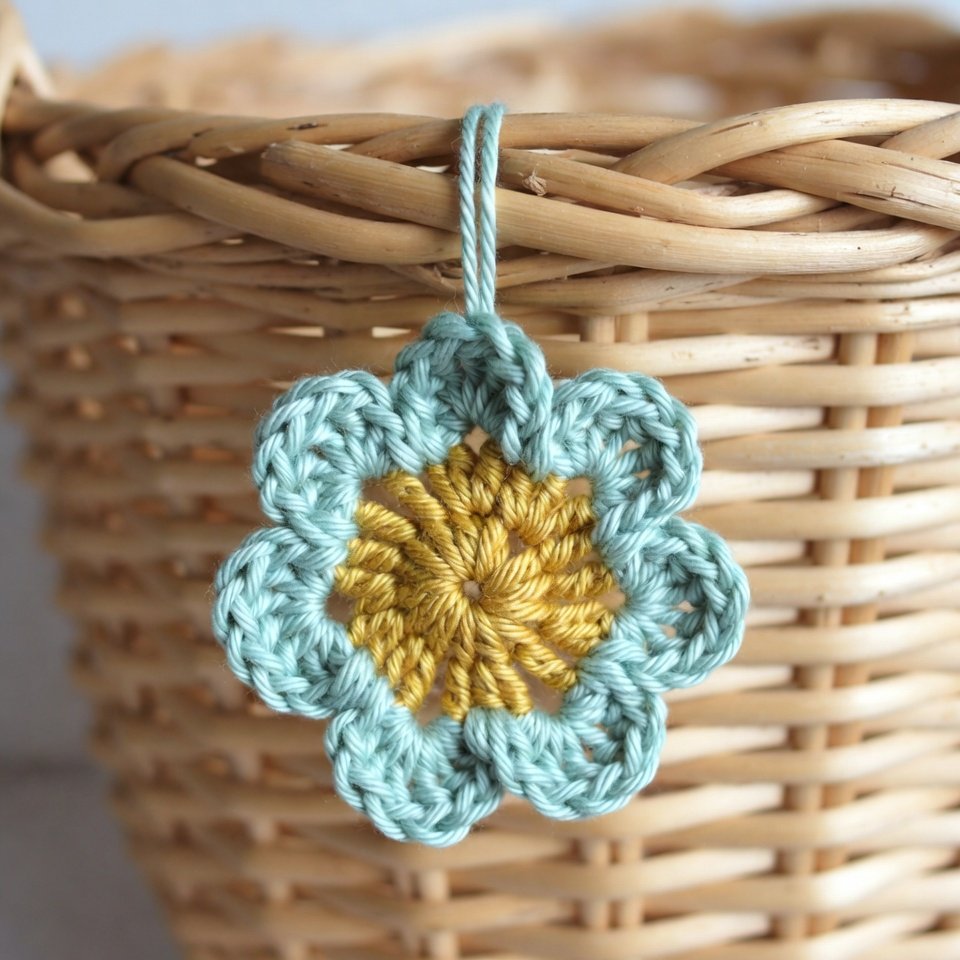
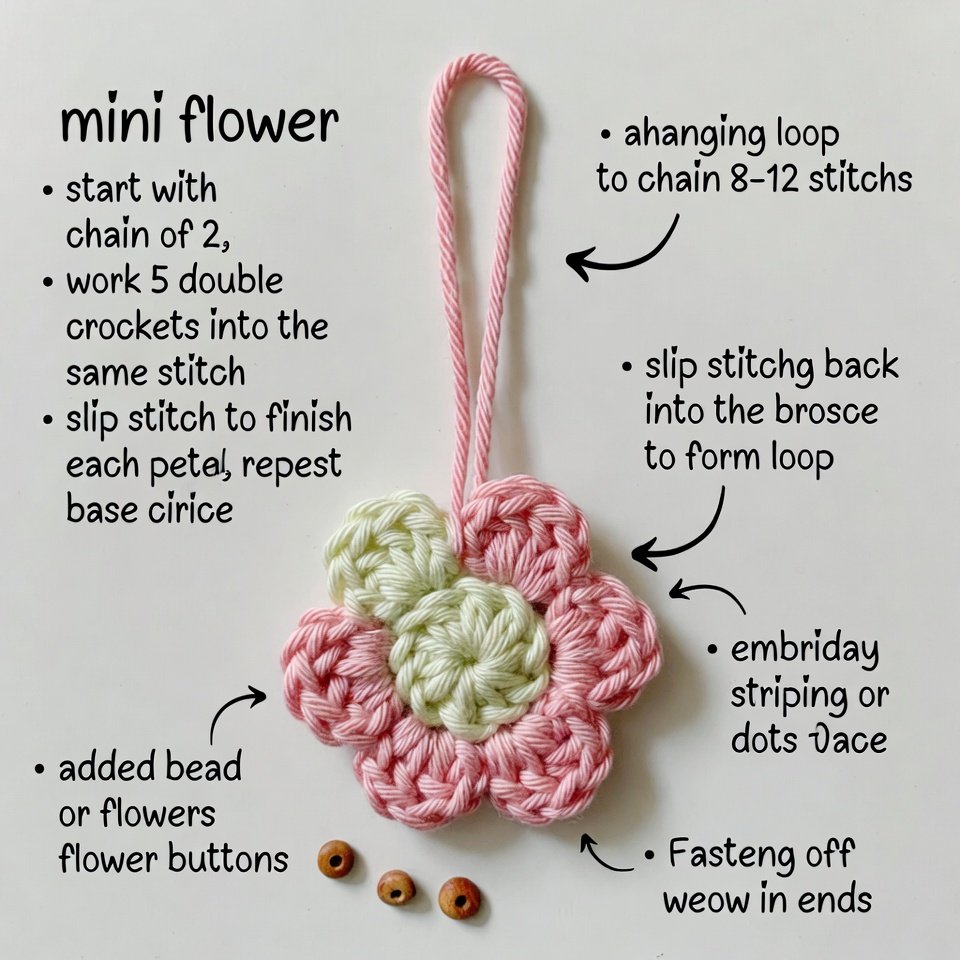
Option C: Mini Flower
- Chain 2.
- Work 5 double crochets into the same stitch.
- Slip stitch to finish each petal.
- Repeat around the base circle.
Step 3: Add Decorative Details
- Use contrasting yarn to embroider stripes, dots, or faces.
- Stitch small bows or flowers for a layered look.
- Add beads or wooden buttons if desired.
Step 4: Create the Hanging Loop
- Attach yarn to the back of the motif.
- Chain 8–12 stitches.
- Slip stitch back into the motif to form a loop.
- Fasten off and weave in ends.
This allows you to tie or hook the decoration onto baskets.
Step 5: Attach to the Basket
- Tie with ribbon or twine
- Sew directly onto the basket
- Clip with mini clothespins
- Thread through basket handles
Customization Ideas
- Use cotton yarn for washable baskets
- Match colors to basket liners
- Add names or initials
- Make sets for coordinated décor
Tips for Best Results
- Keep stitches tight for clean edges
- Use stitch markers for symmetry
- Block lightly for flat motifs
- Avoid heavy embellishments on lightweight baskets
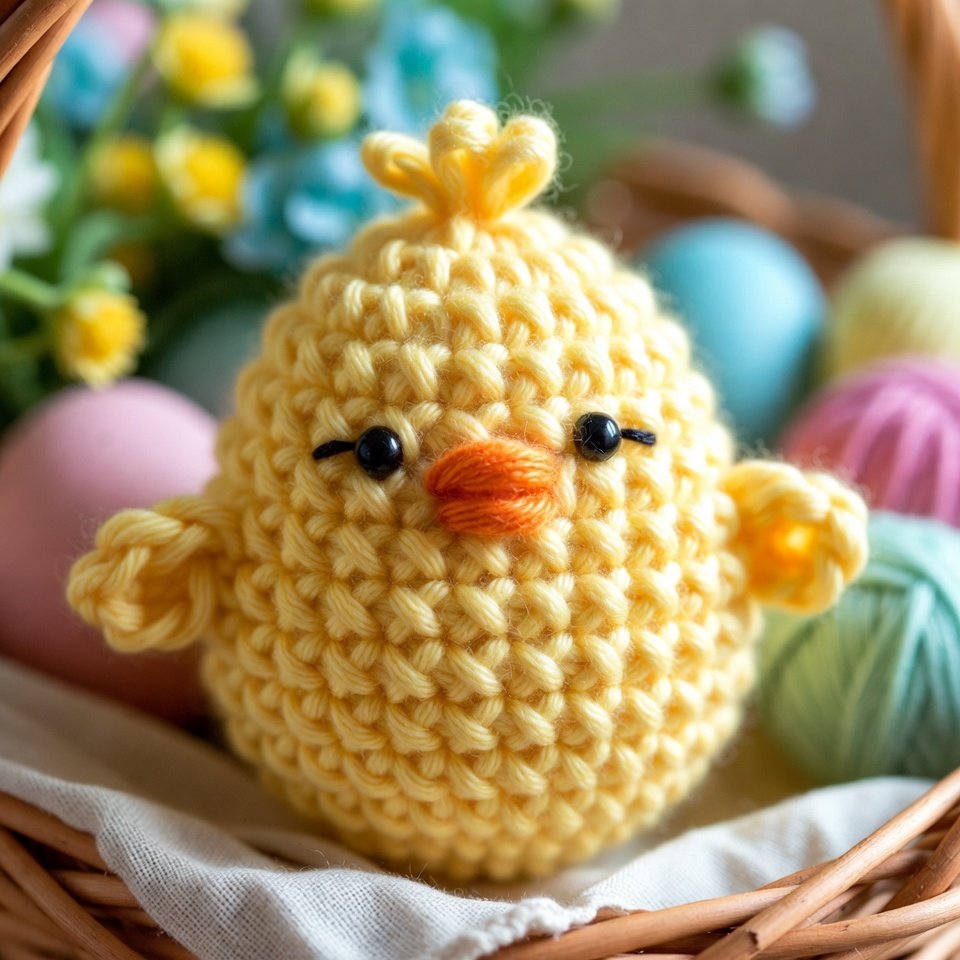
Egg-Shaped Crochet Chicks
Egg-shaped chicks are one of the cutest and quickest Easter crochet projects. Their simple oval shape makes them perfect for beginners, while the tiny wings and beak add charming character. These little chicks work beautifully as Easter basket fillers, table décor, gifts, or springtime keepsakes.
Skill Level
Beginner
Finished Size
Approximately 4 inches tall
(Size may vary based on yarn and hook)
Materials Needed
- Worsted weight yarn (yellow for body)
- Small scraps of orange yarn (beak & feet)
- Small scraps of black yarn or safety eyes
- Crochet hook (3.5 mm–4.5 mm)
- Fiberfill stuffing
- Yarn needle
- Scissors
- Stitch marker (recommended)
Crochet Abbreviations
- MR – magic ring
- sc – single crochet
- inc – increase (2 sc in same stitch)
- dec – decrease (sc 2 together)
- sl st – slip stitch
- st(s) – stitch(es)
Step-by-Step Egg-Shaped Chick Tutorial
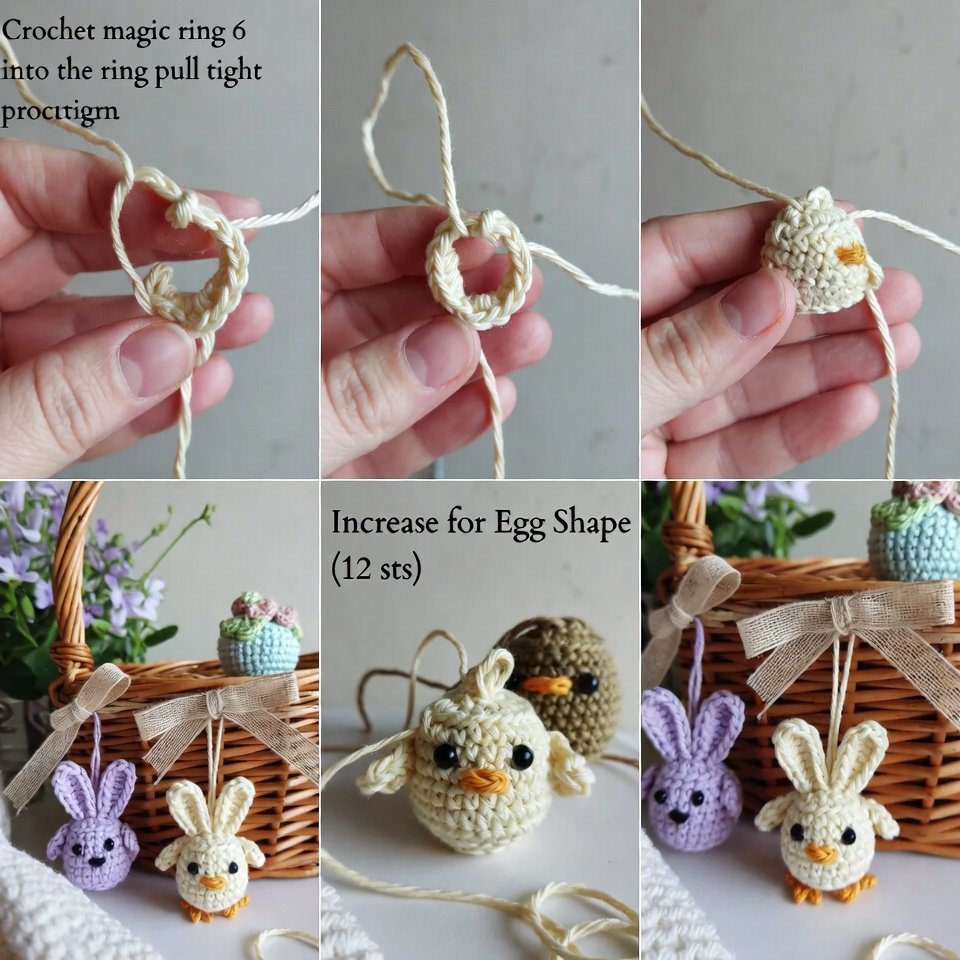
Step 1: Start the Chick Body
- Make a magic ring.
- Crochet 6 single crochets into the ring.
- Pull tight and place a stitch marker in the first stitch.
Step 2: Increase for Egg Shape
- Round 2: Increase in each stitch (12 sts).
- Round 3: 1 sc, inc repeat around (18 sts).
- Round 4: 2 sc, inc repeat around (24 sts).
The base should be round and slightly cupped.
Step 3: Build Height
- Rounds 5–8: Single crochet in each stitch around (24 sts).
- This creates the tall egg shape of the chick.
Step 4: Insert Safety Eyes (Optional)
- Insert safety eyes between rounds 5 and 6, about 5 stitches apart.
- If crocheting for children, embroider eyes instead.
Step 5: Begin Decreasing
- Round 9: 2 sc, dec repeat around (18 sts).
- Start stuffing the chick firmly.
- Round 10: 1 sc, dec repeat around (12 sts).
- Add more stuffing to maintain shape.
Step 6: Close the Top
- Round 11: Decrease around (6 sts).
- Fasten off and pull tight to close the opening.
- Weave in ends securely.
Wings (Make 2)
- Create a magic ring.
- Work 5 single crochets into the ring.
- Slip stitch to close.
- Fasten off, leaving a long tail for sewing.
- Stitch wings onto the sides of the chick.
Beak
- With orange yarn, chain 2.
- Make 3 single crochets in the second chain from the hook.
- Fasten off.
- Stitch the small triangle between the eyes.

Optional Feet (Beginner Version)
- Stitch small V-shapes at the base using orange yarn
OR - Crochet tiny half-circle feet and sew on.
Finishing Touches
- Gently shape the chick with your hands
- Lightly brush the yarn for a fuzzy look
- Add blush using pink yarn or pastel chalk
Uses for Egg-Shaped Chicks
- Easter basket fillers
- Spring table décor
- Nursery decorations
- Party favors
- Handmade gifts
Tips for Best Results
- Keep stitches tight to prevent stuffing from showing
- Use stitch markers to track rounds
- Avoid over-stuffing the top
- Cotton yarn gives a clean look; acrylic feels softer
Easy Easter Crochet Patterns for Beginners
If you’re just starting, don’t worry, Easter crochet is one of the most beginner-friendly seasonal niches.
Why beginners love Easter projects:
- Small sizes = quick finishes
- Repetitive stitches
- Minimal shaping
- Easy color changes
Many Easter crochet patterns for beginners can be completed in a single afternoon, making them perfect for weekend crafting or last-minute gifts.
Supplies You’ll Need
Most Easter crochet projects use simple materials you probably already have.
Basic supplies include:
- Worsted or DK weight yarn
- Crochet hook (3.5–5 mm)
- Yarn needle
- Stitch markers
- Fiberfill (for amigurumi)
Soft cotton yarn works well for decor, while acrylic or plush yarn is great for toys.
Tips for Crocheting Easter Projects
- Use lighter pastel colors for a classic Easter look
- Choose tight stitches for baskets and egg cozies
- Avoid safety eyes for baby items
- Practice magic rings for amigurumi projects
These small tips can dramatically improve the final result, especially when working on crochet patterns for easter that include shaping.
Frequently Asked Questions (FAQ)
Are Easter crochet patterns suitable for beginners?
Yes, many Easter designs are specifically created with beginners in mind. Simple bunnies, eggs, and baskets use basic stitches and minimal shaping.
What are the easiest Easter crochet projects?
Appliqués, garlands, crochet eggs, and mini baskets are some of the easiest projects to start with.
How long does it take to crochet Easter decorations?
Most small Easter projects can be completed in 30 minutes to 2 hours, depending on complexity and experience.
What yarn is best for Easter crochet?
Cotton yarn is ideal for decor and baskets, while acrylic or plush yarn works best for toys and snugglers.
Final Thoughts
Easter is the perfect time to experiment with cheerful colors and playful designs. With so many free and beginner-friendly options available, crochet patterns for easter allow you to create meaningful handmade items without stress or complexity.
Whether you’re making gifts, decorations, or keepsakes, these projects are a wonderful way to celebrate spring with creativity and yarn