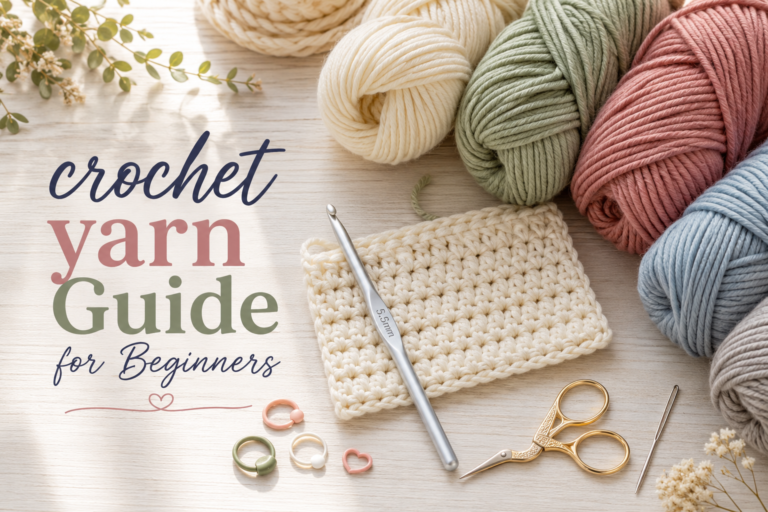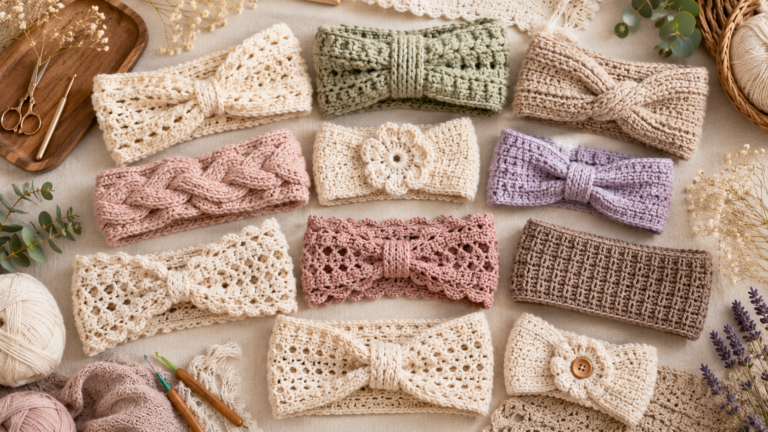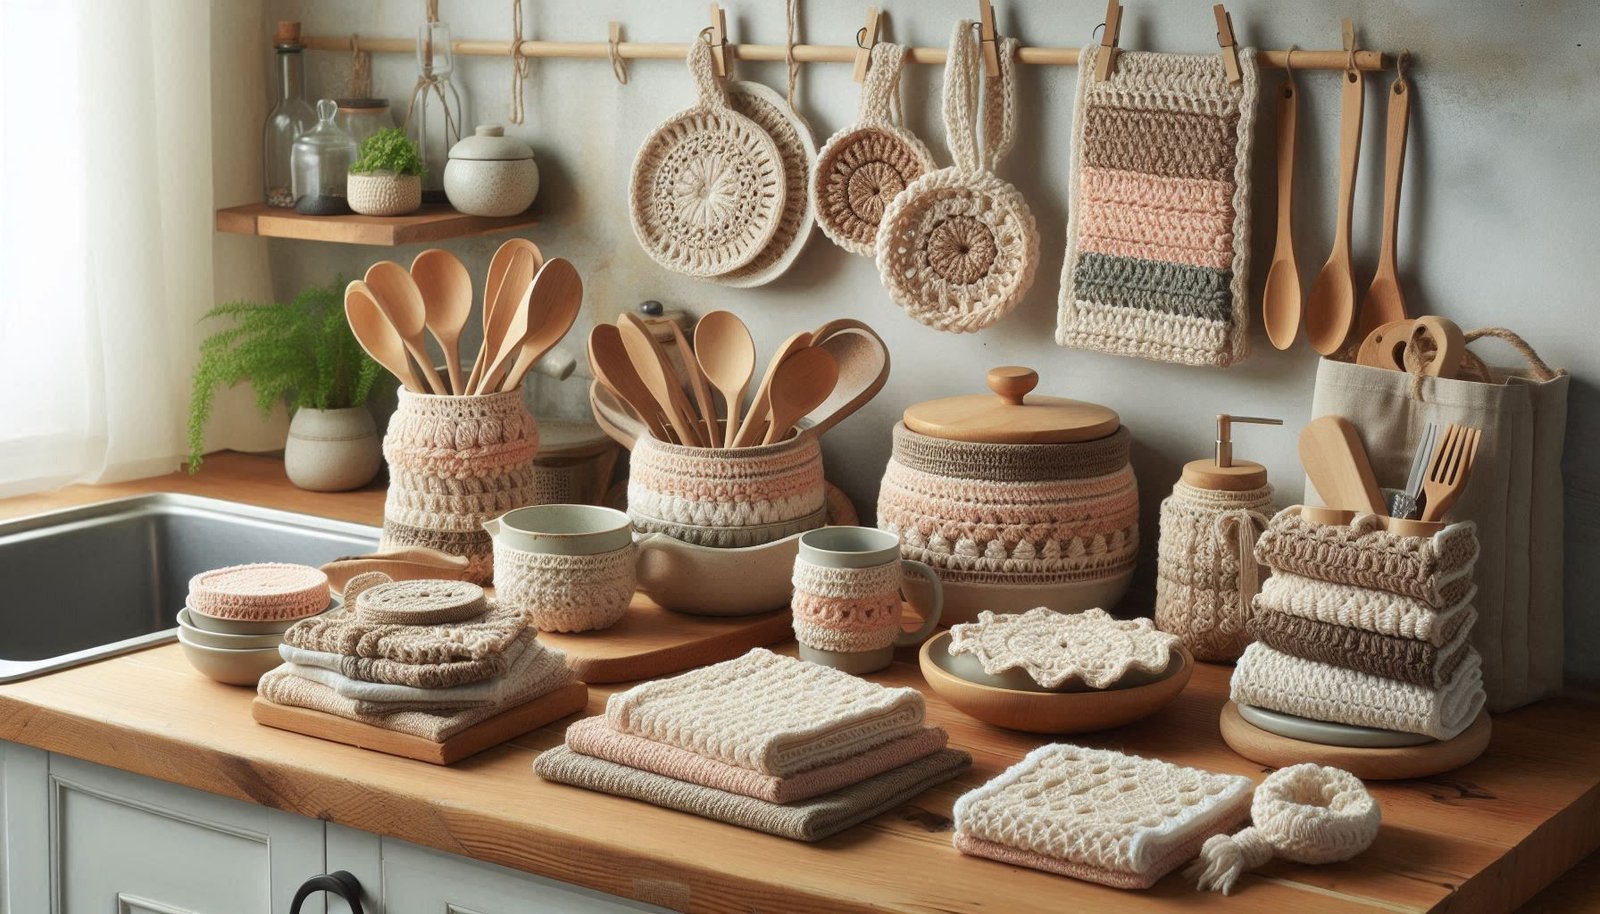
Handcrafted Crochet Kitchen Items
Crochet kitchen items are a perfect blend of beauty, functionality, and sustainability, making them a popular choice for modern handmade homes. From crochet dishcloths and pot holders to mug cozies, trivets, and hanging towels, these practical accessories add warmth and charm to everyday kitchen routines. Made using durable cotton yarn, crochet kitchen accessories are reusable, washable, and eco-friendly, helping reduce single-use products while enhancing your kitchen décor.
Handmade crochet kitchen items are designed to be both stylish and highly functional. Textured stitches provide excellent absorbency and heat protection, while thoughtful designs ensure long-lasting use. Whether you prefer a minimalist look, rustic farmhouse style, or cozy boho décor, crochet kitchen items can be customized in colors and patterns to suit any kitchen aesthetic.
Upgrade your kitchen with handcrafted crochet kitchen items that combine comfort, style, and sustainability in every stitch.
Crochet Tea Cozy with Floral Motif
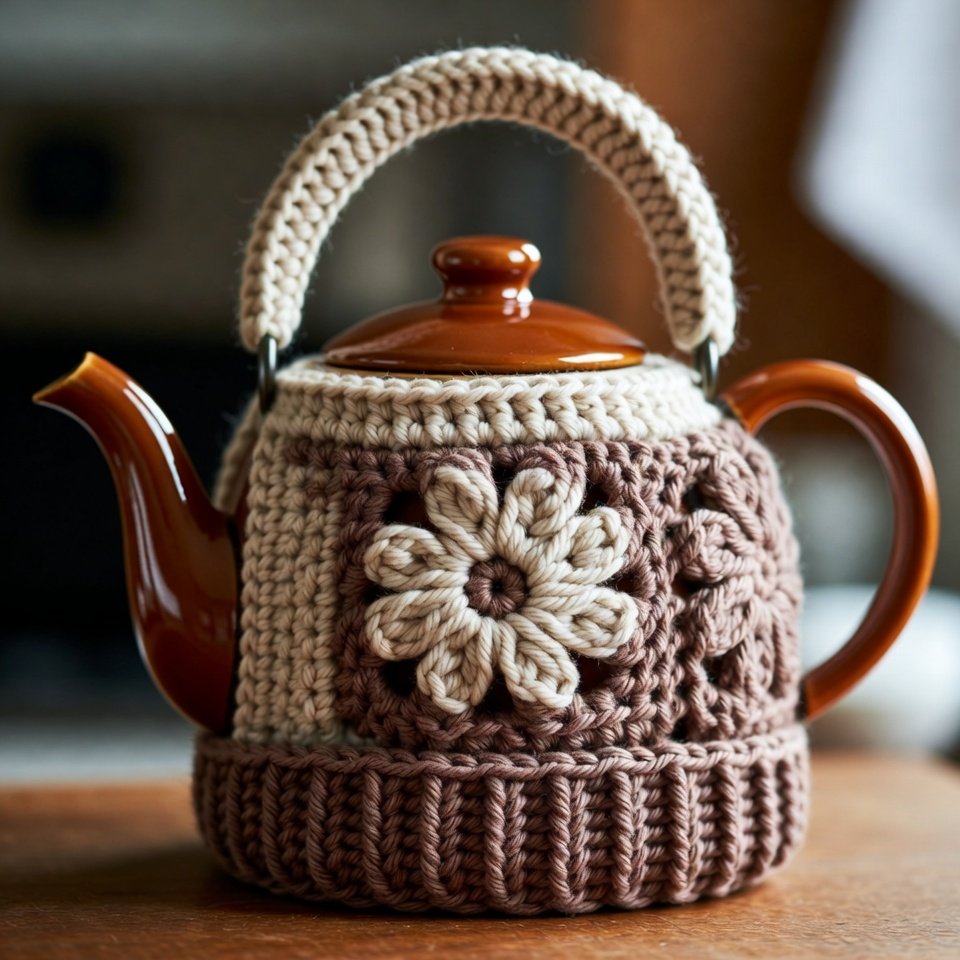
Crochet Tea Cozy with Floral Motif Making Tutorial
Materials Needed
- 100% cotton yarn (2–3 colors: base, contrast, flower)
- Crochet hook: 4 mm or 4.5 mm
- Scissors
- Tapestry needle
- Stitch markers
- Button or loop (optional)
Measure Your Teapot
- Circumference of the teapot body
- Height from base to lid
- Distance between the spout and the handle
These measurements ensure a perfect fit.
Crochet the Base Panel
- Chain enough stitches to match half the teapot circumference.
- Work rows of single crochet (SC) or half-double crochet (HDC).
- Continue until the panel reaches the height of the teapot body (stop below the lid).
- Make two identical panels (front and back).
Create Ribbed Bottom Border
- Attach yarn to the bottom edge.
- Work front-post double crochet (FPDC) and back-post double crochet (BPDC) alternately.
- Crochet 4–5 rows for a stretchy ribbed finish.
Crochet the Flower Motif
Simple 3D Flower:
- Magic ring.
- Round 1: 10 double crochets.
- Round 2: (Chain 3, 2 DC, chain 3, slip stitch) in each stitch.
- Fasten off and leave a long tail.
Attach Flower
- Position the flower in the center of the front panel.
- Sew securely using a tapestry needle.
Join Panels
- Place panels together (right sides facing).
- Stitch up both sides using slip stitch or whip stitch.
- Leave openings for:
- Spout
- Handle
Use stitch markers to guide spacing.
Crochet the Top Edge
- Attach yarn at the top opening.
- Work single crochet rounds, decreasing slightly to shape the lid.
- Stop just below the lid knob.
Optional Handle Strap
- Chain 25–30 stitches.
- Single crochet back along the chain.
- Attach both ends to the cozy near the handle opening.
Finishing
Test fit on the teapot.
Weave in all ends.
Lightly steam the block (do not flatten it).
Crochet Mug Cozy
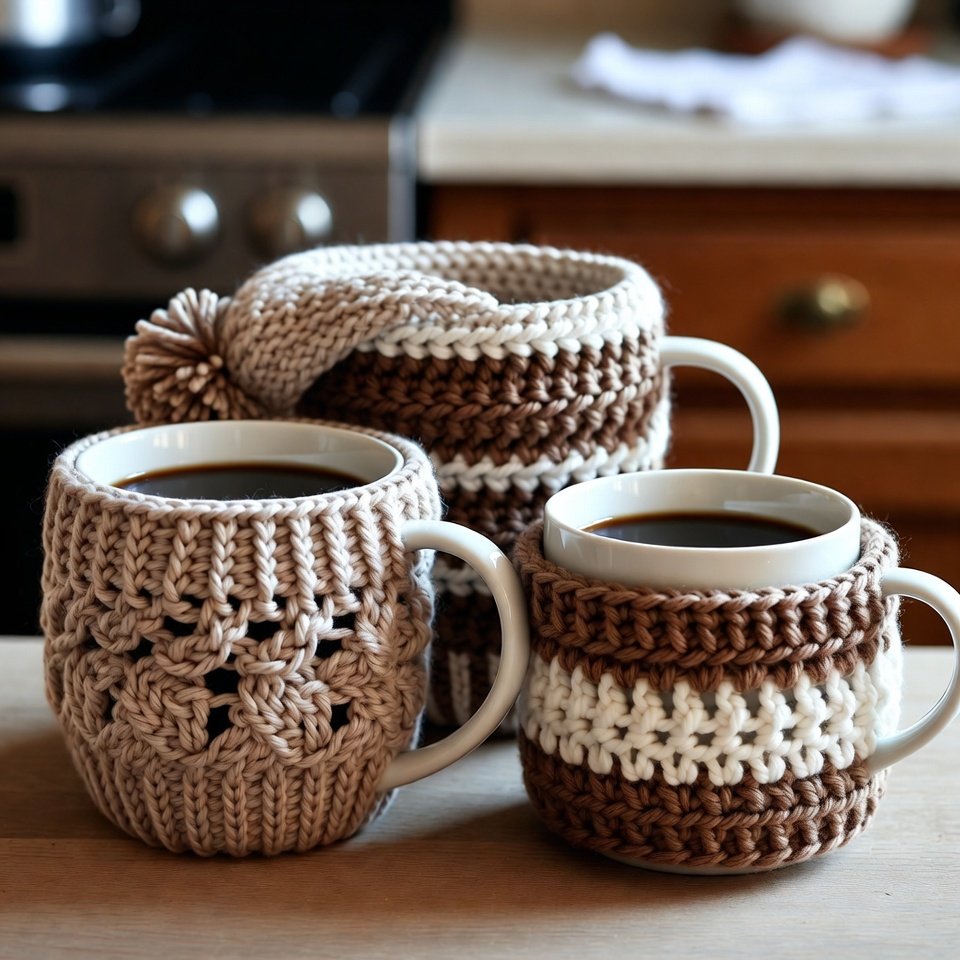
Crochet Mug Cozy Making Tutorial
Materials Needed
- 100% cotton yarn (medium weight / worsted)
- Color A: light beige
- Color B: brown
- Crochet hook: 4 mm or 4.5 mm
- Scissors
- Tapestry needle
- Button (optional)
- Pom-pom maker (optional)
Measure Your Mug
- Mug circumference (excluding handle)
- Mug height
Most standard mugs need 30–36 stitches wide and 10–12 rows high.
Foundation Chain
- Chain enough stitches to wrap around the mug snugly (do not stretch).
- Join with a slip stitch to form a ring or keep flat if using buttons.
Base Ribbed Section
- Round 1: Half-double crochet (HDC) in each stitch.
- Round 2–4: Work HDC in back loop only (BLO) for ribbed texture.
- This creates the stretchy bottom edge.
Textured Middle Section
Change to the second color.
Choose one texture:
- Puff stitch
- Bean stitch
- Front post double crochet
Work 3–4 rounds evenly for a thick, insulated center.
Top Border
Switch back to the first color.
- Single crochet (SC) or HDC for 2 rounds.
- Optional: Fold the top edge inward and stitch for a cuff look.
Handle Opening (Optional)
If working flat:
- Chain 2–3 at the handle position.
- Skip the same number of stitches.
- Continue the pattern normally.
Fasten & Finish
- Slip stitch to close.
- Fasten off.
- Weave in all ends neatly.
Crochet Bread Basket with Handle
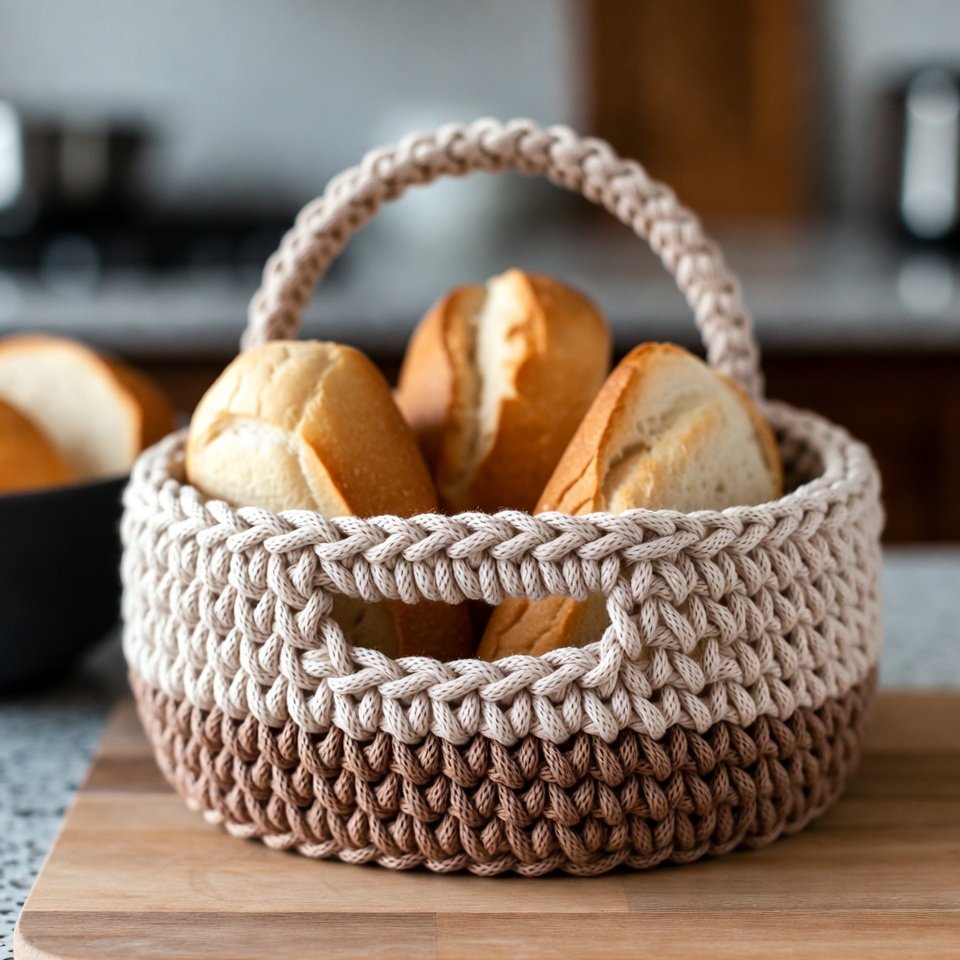
Crochet Bread Basket with Handle Making Tutorial
Materials Needed
- 100% cotton yarn (bulky or double-stranded worsted)
- Color A: beige
- Color B: brown
- Crochet hook: 5 mm–6 mm
- Scissors
- Tapestry needle
- Stitch marker
Crochet the Base (Round)
- Make a magic ring.
- Round 1: 8 single crochet (SC) into the ring.
- Round 2: Increase in each stitch (16 SC).
- Round 3: (1 SC, increase) around (24 SC).
- Round 4: (2 SC, increase) around (32 SC).
- Continue increasing until the base reaches 8–9 inches wide.
Start Basket Sides
- Do single crochet in back loop only (BLO) for one round (creates a sharp edge).
- Continue crocheting SC or half-double crochet (HDC) in both loops.
- Switch to Color B after 2–3 rounds.
Build Height
- Crochet evenly without increases.
- Alternate colors for the two-tone look.
- Continue until the basket height is 4–5 inches.
Create Handle Openings
- Mark two opposite sections (about 4 stitches wide).
- Chain 4–5 stitches.
- Skip the same number of stitches.
- Continue around normally.
This forms clean handle gaps.
Strengthen the Top Edge
- Crochet 2–3 rounds of tight SC stitches.
- Use slip stitch or reverse single crochet (crab stitch) for a firm rim.
Crochet the Handle
- Attach yarn to one opening.
- Chain 30–35 stitches.
- SC back along the chain.
- Attach securely to the opposite opening.
- Repeat 1 more row over the handle for thickness.
Finishing
- Fasten off.
- Weave in all ends.
- Lightly steam block to shape.
Crochet Fruit & Vegetable Holders
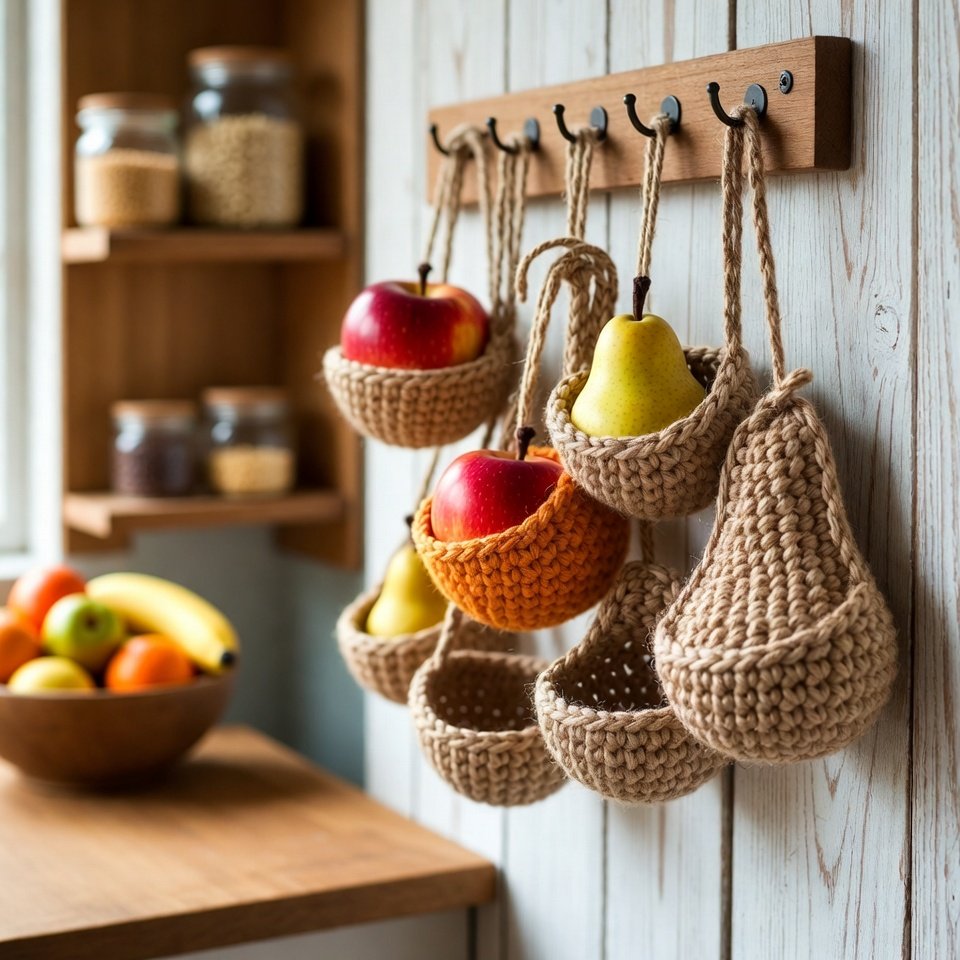
Crochet Fruit & Vegetable Holders Making tutorial
Materials Needed
- Cotton yarn or jute yarn (medium to bulky weight for strength)
- Crochet hook (4.5–6 mm depending on yarn)
- Scissors
- Stitch marker (optional)
- Wooden ring or strong yarn loop for hanging
Create the Base Circle
Start with a magic ring.
Work 6 single crochets (SC) into the ring.
Pull tight and join with a slip stitch.
Increase evenly in the next rounds (2 SC in each stitch) until the base circle is about 8–10 cm wide.
This round base will hold the fruit securely.
Build the Basket Walls
Stop increasing and crochet 1 SC in each stitch around.
Continue working in rounds to build the height of the holder.
For a stretchy look, you can switch to half double crochet (HDC) or double crochet (DC).
Work until the basket is deep enough to hold apples, oranges, or pears.
Create Hanging Loops
Chain 10–15 stitches from the edge of the basket.
Slip stitch back into the same round to form a strong loop.
Repeat this evenly around the basket (3–5 loops).
These loops will connect to the hanging cord.
Make the Hanging Cord
Chain 40–60 stitches (adjust length as needed).
Show 3–5 cords together and knot them at the top.
Attach the cords to the basket loops securely.
Finish by attaching to a wooden ring, hook, or wall peg.
Crochet Jar Covers
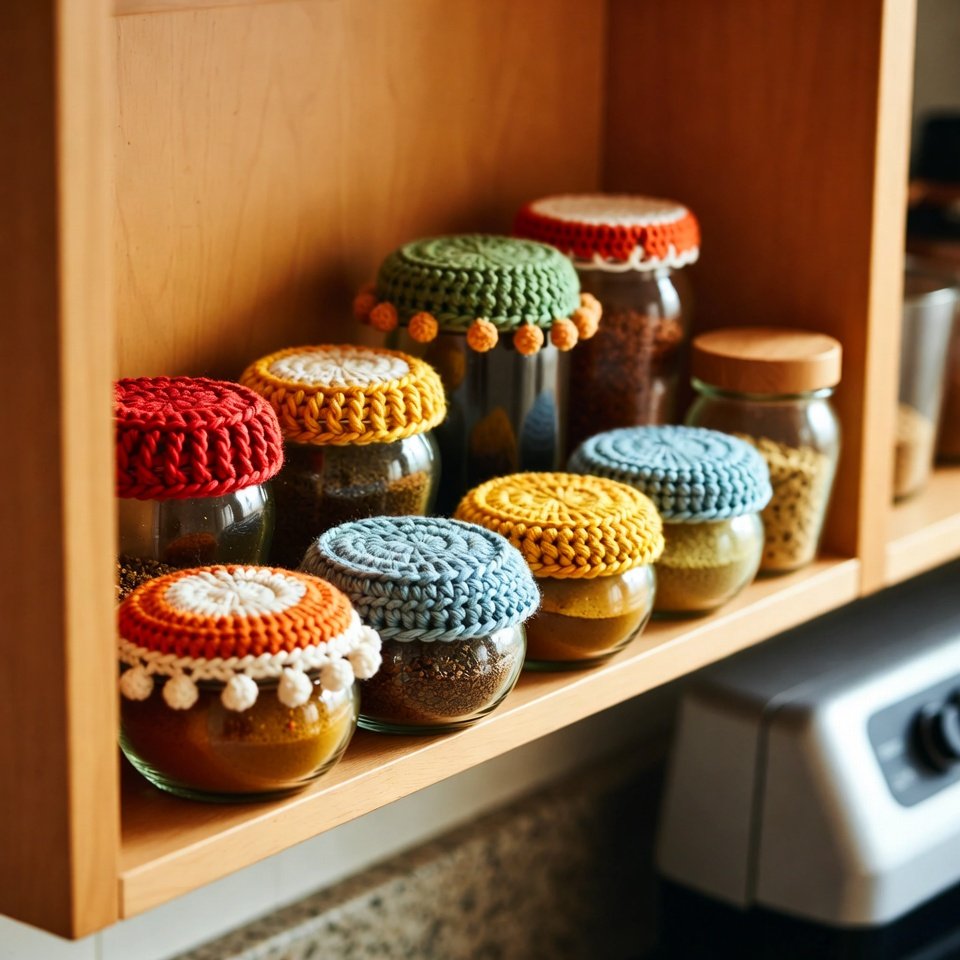
Crochet Jar Covers Making Tutorial
Materials Needed
- Cotton yarn (DK or worsted-weight cotton is best for kitchen use)
- Crochet hook (3.5 mm – 4.5 mm, depending on yarn)
- Scissors
- Yarn needle
- Glass jars (for size reference)
- Optional: contrasting yarn for edging or bobbles
Measure the Jar Lid
- Place your jar upside down.
- Measure the diameter of the lid.
- Your crochet circle should be 1–2 cm larger than the lid so it can stretch and grip the jar.
Crochet the Flat Circle (Top Part)
- Make a magic ring.
- Round 1: Work 10–12 double crochets into the ring.
- Round 2: Increase evenly (2 stitches in each stitch).
- Continue increasing in each round until the circle matches the lid size.
- Keep the circle flat (no curling).
Create the Side Edge
- Stop increasing.
- Crochet 1 round of single crochet in the back loops only.
- This creates a neat fold and allows the cover to bend downward around the lid.
Add the Hanging/Grip Edge
Choose one style:
- Simple edge: 1–2 rounds of single crochet.
- Decorative edge: bobble stitch, picot stitch, or shell stitch.
- Elastic fit: alternate single crochet and chain stitches for stretch.
Stop when the cover hugs the jar securely.
Finish & Secure
- Fasten off yarn.
- Weave in all loose ends.
- Stretch the cover gently over the jar lid.
Styling Ideas
- Use different colors for each spice.
- Add bobble edging like the image.
- Create seasonal sets (earth tones, pastels, and boho colors).
- Perfect for zero-waste kitchens and handmade décor.
These handmade accessories highlight how versatile and practical crochet kitchen items can be, making them perfect for eco-friendly homes, thoughtful gifting, and stylish everyday use.